Rust, 启动!!!
rust用户和案例
- 操作系统
Rust的优点
- 性能
- 安全
- 并发
- 只有一个缺点:难学
Hello Rust
Rust是编译型语言
rustc 编译
- exe
- .pdb
- 注意,rust一个缩进不是tab,是4个空格
cargo
- 使用cargo新建一个项目
cargo new hello_cargo
Cargo.toml是配置文件- TOML(Tom’s Obvious,Minimal Language)
- [package] 配置包
- [dependencies] 配置依赖
- 在rust中代码的包 叫做crate (货箱)
cargo buildcargo runcargo checkcargo build -release编译时会进行优化,让代码运行更快cargo版本管理
- cargo的toml文件用来管理依赖的版本
- 我们如果直接改变toml文件下的依赖的版本
- 实际的依赖不会变
- 依赖的版本被锁在了.lock文件下,而且优先级高于.toml
- 如果确定要更改版本,需要执行
cargo update第一个cargo程序
- cargo 默认导入
prelude
Rust基本教程
变量与可变性
let声明变量- 默认下
变量是不可变的 - 在变量前面加上
mut,变量就是可变的了常量
- 不可以使用
mut - 使用
const关键字 - 必须标注类型
- 函数名要全大写
- 只能绑定到常量表达式
Shadowing
- 可以使用相同变量名来声明新的变量
mut可变但类型不可变- shadowing主要解决的就是类型转换问题,我们不需要去思考如何命名
let in = “ “; let in = in.len();
1
2
3
4
5
6
7
8
9
10
11
12
13
14
15
16
17
18
19
20
21
22
23
24
25
fn main() {
    let x = 5;
    let y = -5;

    let y1 = &y;

    let x = x + 1; //原本的x会被立即drop
    let y = y -1 ; //原本的y还有人引用,不会被立即drop

    println!("The value of x is: {}", x);  //6
    println!("The value of y is: {}", y);  //-6
    println!("The value of y1 is: {}", y1);  //-5

    {
        let x = x * 2;
        let y = y * 2;
        println!("The value of x is: {}", x);  //12
        println!("The value of y is: {}", y);  //-12
    }

    println!("The value of x is: {}", x);  //6
    println!("The value of y is: {}", y);  //-6
    println!("The value of y1 is: {}", y1);  //-5

}
数据类型-标量
Integer
| Length 长度 | Signed 有符号 | Unsigned 无符号 |
|---|---|---|
| 8-bit | i8 | u8 |
| 16-bit | i16 | u16 |
| 32-bit | i32 | u32 |
| 64-bit | i64 | u64 |
| 128-bit | i128 | u128 |
| arch | isize | usize |
Number Literals
| Number literals 数字字面值 | 示例 |
|---|---|
| Decimal 十进制 | 98_222 |
| Hex 十六进制 | 0xff |
| Octal 八进制 | 0o77 |
| Binary 二进制 | 0b1111_0000 |
| Byte (u8 only) 字节 | b'A' |
- 十进制数可以使用
_来分隔开,方便view
Floating Point
- f32 : 4字节
- f64 : 默认,8字节
- 都有符号
Boolean
- 使用bool表示
Character
- 4字节
- 表示一个Unicode标量
复杂量
Tuple 元组
- 固定长度
- 含有不同类型数据
- 可用自动拆箱
Array 数组
- 固定长度
- 相同数据类型
函数和流程控制
由于这些属于编程通用,便不再过多阐述
1
2
3
4
5
6
7
8
9
10
11
12
13
14
fn main() {
    let y ={
        let x = 1;
        x + 5
    };
    println!("{}", y);
    let y = another_function(1);
    println!("{}", y);

}

fn another_function(x:i32) -> i32 {
   x + 5
}
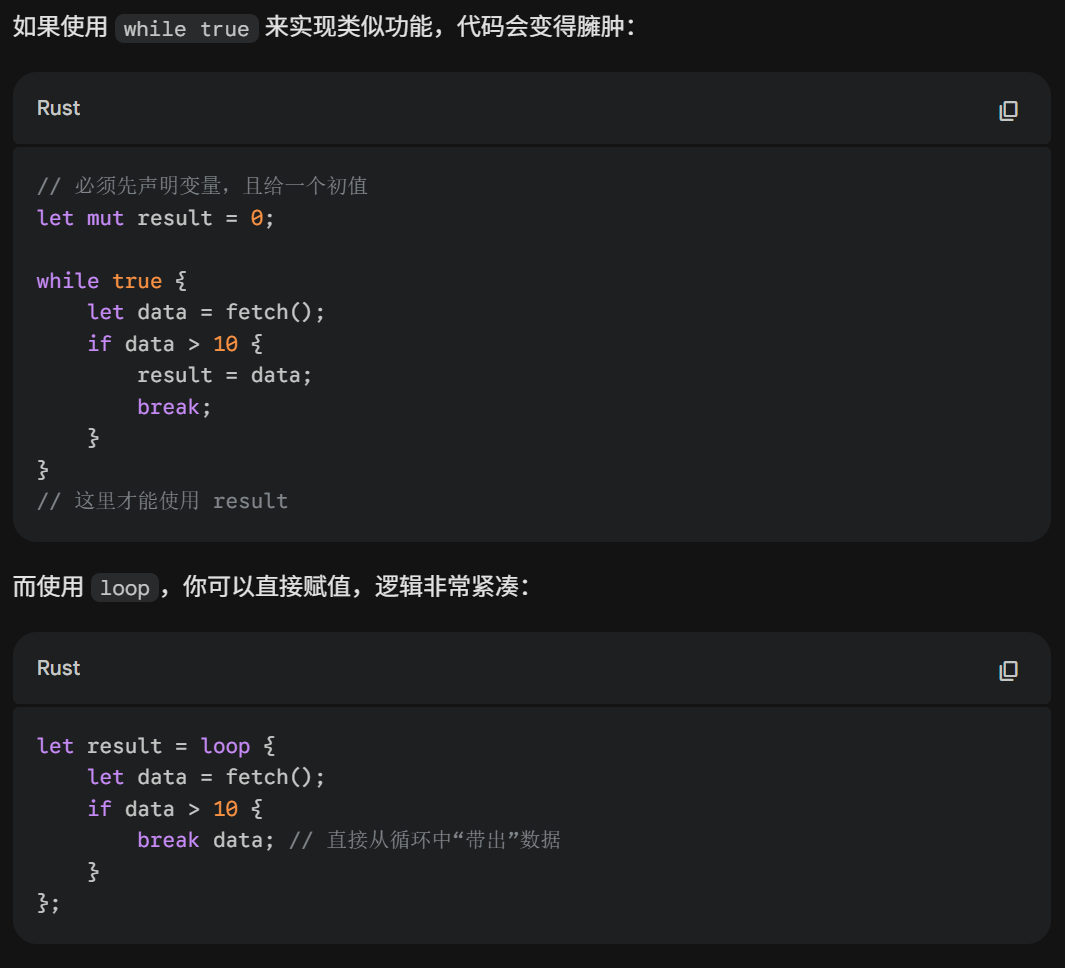
大多数语言同时存在while和for,有的语言认为while和for完全重合,便舍去了一个,但是rust却新增了一个loop
- loop
- while
- for
签名
rust中有这个语法用来给循环命名,依次来阐述到底如何跳出多重循环
所有权
数据存储
- stack
- 必须拥有已知的大小
- heap
- 访问较慢
所有权
- 每个值都有一个变量,这个变量是值的所有者
- 每个值同时只能有一个所有者
- 所有者超出作用域scope,将被删除
- 相对于其他语言
- 要么是GC
- 要么是手动释放,有double free的风险
- 相对于其他语言
变量与数据交互
- 移动:这是一种新的机制,不是深拷贝,也不是浅拷贝
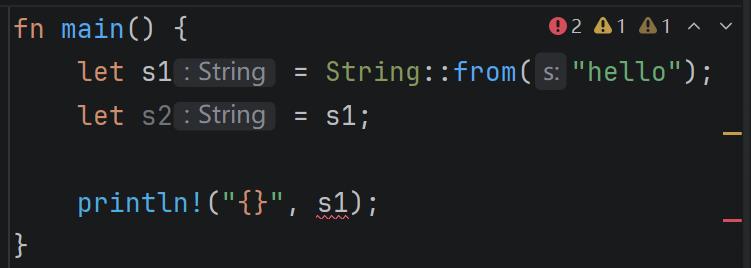
- 克隆;针对堆上的数据
- 复制:针对栈上的数据
- Copy trait可以用于实现stack上的类型
- 几乎所有基本数据
- 放在堆上的数据一定是
- 类型实现类Copy trait 旧变量在赋值后仍然可以使用
- Copy trait 不能 在有 Drop trait时使用
- Copy trait可以用于实现stack上的类型
所有权与函数
- 把值传递给函数和把值赋给变量是相同的
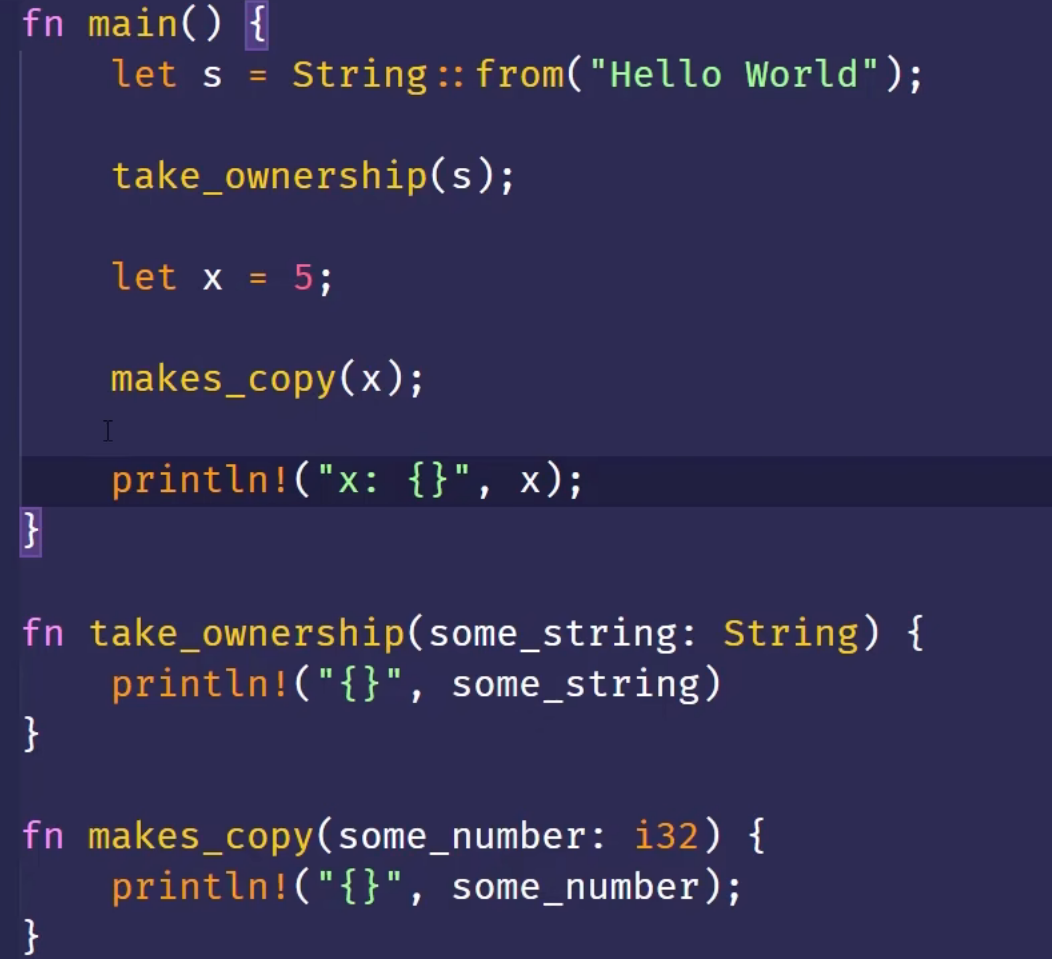
- 返回值与作用域
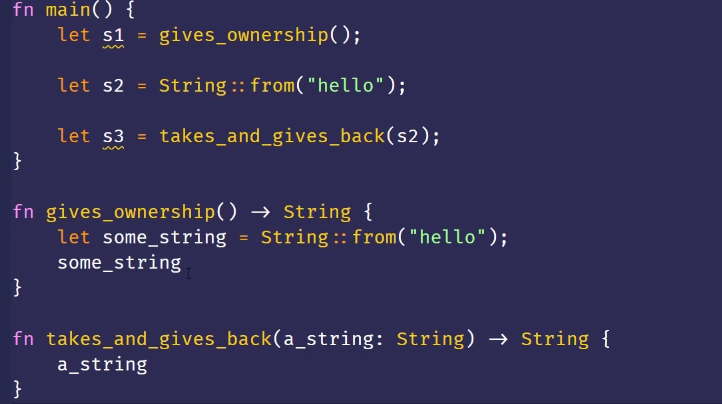
- 所有权的手动借用
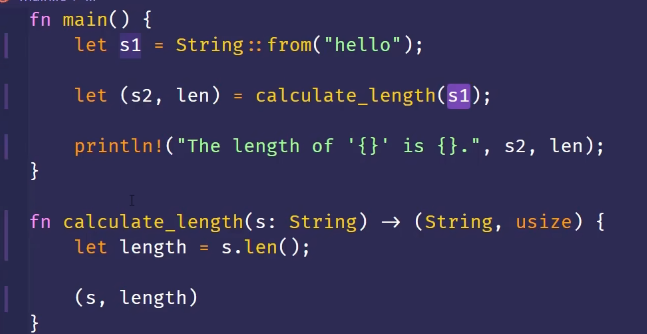
引用和借用
- 引用: 引用某些值但不获得所有权
- 引用时没有”所有权”的指针
- 引用的作用域
- 悬空引用:rust编译器保证了不会出现悬垂引用
- 把引用作为参数值就叫做借用
可变引用
- 在特定作用域内,对某一块数据,只能由一个可变引用,这么做是为了防止数据竞争
- 数据竞争(编译时报错)
- 多指针访问同一个数据
- 至少有一个指针在写
- 没有数据同步机制
- 不可以同时有可变引用和不可变引用
切片
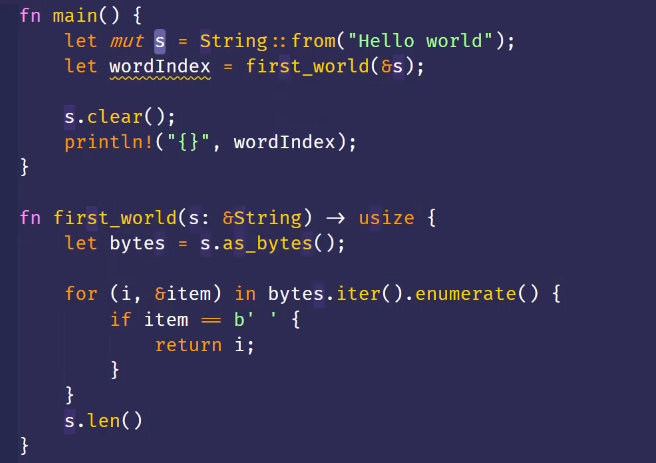
下面这个函数拿到
worldIndex之后,一旦s被清理了,worldIndex就失去了意义,所以rust提供了切片
Rust和很多函数不同,rust左闭右开
let s2 = &s1[..];- 所以必须发生在有效的UTF-字符边界
- 对多字节的字符串切片,会报错
- 字符串字面值是切片
- 定义函数时,可以使用字符串切片
&str,这样既可以传入字符串切片,也可以传入一个字符串的切片
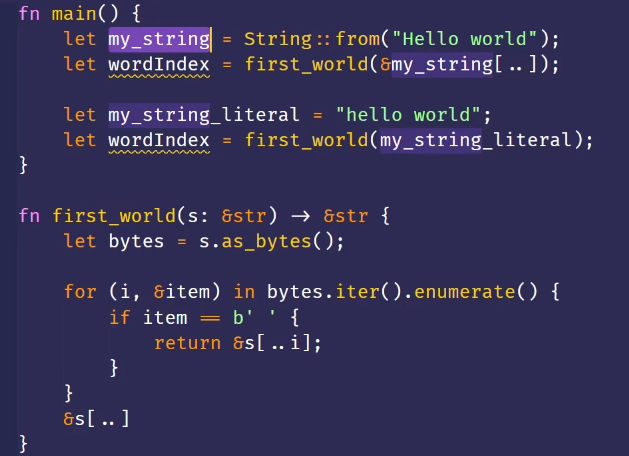
- 其他类型的切片
- 其实就是存储了起始位置和长度
Struct
struct 基础
- 必须全部赋值
- 点标记法取属性
- 一旦实例是
mut,所有属性都是mut - 手搓构造方法省略字段名
1
2
3
4
5
6
7
8
9
10
11
struct User{
    username: String,
    email: String,
}

fn build_user(email:String,username:String) -> User {
    User {
        username,
        email,
    }
}
struct more
- struct更新语法(可以创建一个基于已有数据的数据)
1
2
3
4
 let user2 = User {
        username:String::from("a"),
        ..usr1
    };
- Tuple struct
- 更像是一个tuple
- 方便我们进行给tuple分类,不同的tuple struct实际上是不同struct,感觉这里更偏向类一点 ``` rust fn main() { struct Color(i32, i32, i32); struct Point(i32, i32, i32);
let black = Color(0, 0, 0); let origin = Point(0, 0, 0);
fn cal_Point(p1: Point,p2: Point) -> Point{ Point(p1.0+p2.0, p1.1+p2.1, p1.2+p2.2) }
//let point = cal_Point(black,origin); 报错 //let point = cal_Point(origin,origin); 报错,所有权在第一个origin的时候就没了 let p1 = Point(0, -1, 0); let p2 = Point(1, 0, 2);
let p3 = cal_Point(p1,p2); println!(“{}”, p3.2); let black_red:i32 = black.0; } ```
- Unit-Like struct
- 需要在某个类型上实现某个trait,但又不想存储数据
1
2
3
4
5
6
7
8
9
10
11
12
13
14
15
16
struct GaussianPlume;  // 高斯羽流模式
struct Lagrangian;     // 拉格朗日模式

// 这种方式可以在编译时确保你使用了正确的物理模型,而不需要在运行时通过 if/else 判断字符串。
trait Formalizer {
    fn convert(&self, input: &str) -> String;
}

struct LatexFormatter; // 仅作为逻辑载体

impl Formalizer for LatexFormatter {
    fn convert(&self, input: &str) -> String {
        format!("\\begin{}\\end", input)
    }
}
- struct 的所有权
- 生命周期保证了只要struct是有效的,里面的引用也是有效的
- TODO这里比较重要
A demo
1
2
3
4
5
6
7
8
9
10
11
12
13
14
15
16
#[derive(Debug)]
struct Rectangle{
    width: u32,
    height: u32,
}
fn main() {
    let rect = Rectangle{width: 30, height: 50};

    println!("are: {}" ,area(&rect));
    println!("rect: {:?}", rect);
    println!("rect: {:#?}", rect);
}

fn area(rec: &Rectangle) -> u32 {
    rec.width * rec.height
}
- Struct 就像是一个“容器标签”:
- 普通 Struct:带名字的文件夹(知道里面每个文件叫什么)。
- Tuple Struct:不带名字但有固定顺序的文件夹(知道第一个、第二个文件是什么)。
- Unit Struct:一个空的、仅用于占位的标签(只告诉编译器“我在这里”)。
struct 的方法
- 方法与函数
- 类似:fn, param, return,name
- 不同:
- 方法是在struct的上下文定义的
- 方法的第一个参数是self,表示方法调用的struct实例
- 用法
- 在impl中实现
- 方法的第一个参数是self,可以获得所有权或者可变借用 ``` rust struct Rectangle{ width: u32, height: u32, } impl Rectangle { fn area(&self) -> u32 { self.width * self.height } fn can_hold(&self, other: &Rectangle) -> bool { self.width > other.width && self.height > other.height } } struct Point(u32, u32); fn main() { let point1 = Point(5, 5);
let rect = Rectangle{width: 30, height: 50}; println!(“The area of the rectangle is {}”, rect.area()); } ```
- 方法调用的运算符
- rust没有
->符号 - rust有自动解引用
- rust没有
- 关联函数
- 在impl中可以声明的函数
- 通常用来做实例化函数
- 第一个参数不需要是
&self - 相当于是静态方法,实例不能调用
1
2
3
4
5
6
7
8
9
10
11
impl Rectangle {
    fn square(size: u32) -> Rectangle {
        Rectangle{
            width:size,
            height:size
        }
    }
}
fn main() {
   let a = Rectangle::square(3);
}
- struct 允许有多个
impl块
枚举与模式匹配(Rust中强悍的数据类型)
枚举
- 枚举允许我们列举所有可能的值来定义一个类型
- 记住这一点十分强大
我这样来简单说一下,比如你要给一个类定义一个ip的标签, 在java中,我想大多数人都选择使用给一个IpAddr{ipflag: ipString}我们用一个标记属性,用枚举类来区分IpAddr是哪个 但是在rust中,我们甚至可以直接给枚举定义不同的类型,而不需要flag标记
- 存在于命名空间中
- 数据可以附加在枚举的变体中
- 甚至可以有
impl方法
1
2
3
4
5
6
7
8
9
10
11
12
13
14
15
16
17
18
19
20
21
22
23
24
25
26
27
28
enum IpAddrKind{
    V4(u8, u8, u8, u8),
    V6(String)
}
enum Message{
    Quit,
    Move{x: i32, y: i32},
    Write(String),
    ChangeColor(i32, i32, i32)
}

impl Message{
    fn call(&self){

    }
}

fn main() {
    let four = IpAddrKind::V4;
    let six = IpAddrKind::V6;

    route(IpAddrKind::V4(127, 0, 0, 1));

}

fn route(ip: IpAddrKind){

}
Option
- 存在标准库中
- 包含在预导入模块
- Rust没有Null,但有Null概念
- Option
类似null的概念 - 包括
- Option
- Some(T)
- None: 必须显示声明,编译器无法推断
- Option
1
2
3
4
5
fn main() {
    let some_number = Some(5);
    let some_string = Some("a string");
    let absent_number: Option<i32> = None;
}
这种语言设计的好处就是,对于一个T类型,我搞了一个Option
,你如果想用,你就自己把Option 转为T,这样就很好的保证了,我如果直接处理两个T,就一定不会有其他不同的错误,但是对于其他语言都需要考虑空指针的情况。 说到这里就不得不吐槽了,我明明前一个逻辑保证了我传入的值不为空,但是你看到我这里的代码总是想让我加一个非空判断,我都说了这里不用加,写注释你又看不到,非得我加个断言你才信
match
- 允许一个值与一系列模式进行匹配,并执行匹配的模式对应的代码
- 模式可以是字面值,变量名,通配符
- (我觉得现代语言不该有switch这种东西)
- 但是java里面有switch赋值表达式,emm也算是升级switch了吧,java的switch和match有点接近了
- 控制流运算符,我们要用match取代switch
1
2
3
4
5
6
7
8
9
10
11
fn main() {
    let b = 4;
    let a = match b {
        1 => {
            println!("Hello, world!");
            1
        }
        o => 2  //我们甚至能把这个值拿到

    };
}
- 绑定值
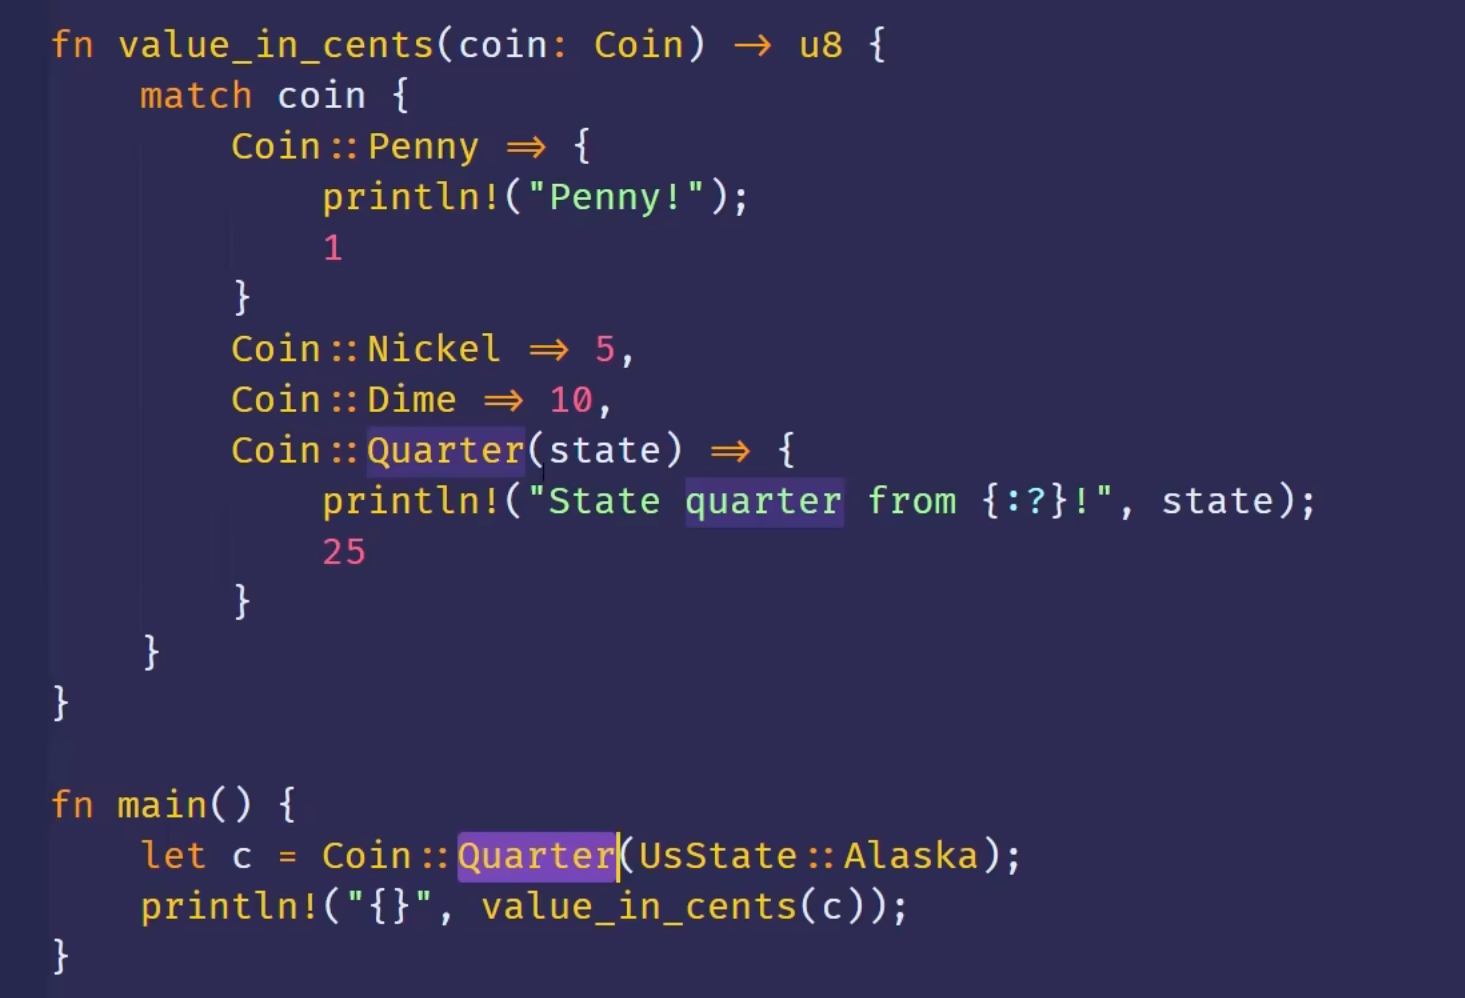
- 匹配Option
1
2
3
4
5
6
7
8
9
10
11
12
fn main() {
    let five = Some(5);
    let six = plus_one(five);
    let none = plus_one(None);
}

fn plus_one(x: Option<i32>) -> Option<i32> {
    match x {
        Some(i) => Some(i + 1),
        None => None
    }
}
- 用match必须处理所有情况,如果你觉得没必要处理,就用
_显式标明出来
1
2
3
4
5
6
7
fn main() {
    let v = 0u8;  //rust的后缀定义类型写法
    match v{
        1 => println!("one"),
        _ => println!("other"),
    }
}
if let 简单控制流
- 只关注一种匹配:优化上面的那块代码
- 这样和直接使用
if其实差距很大- 分工不同,if就负责判断bool,if let是模式匹配,这意味着你可以通过值绑定,直接拿到值,而不是手动解构,而且手动解构在一些情况下还是禁止的
1
2
3
if let 1 = v {
  println!("one");
}
- 分工不同,if就负责判断bool,if let是模式匹配,这意味着你可以通过值绑定,直接拿到值,而不是手动解构,而且手动解构在一些情况下还是禁止的
Package,Crate,Module
- Package:
- Crate:
- Module:use
- Path:
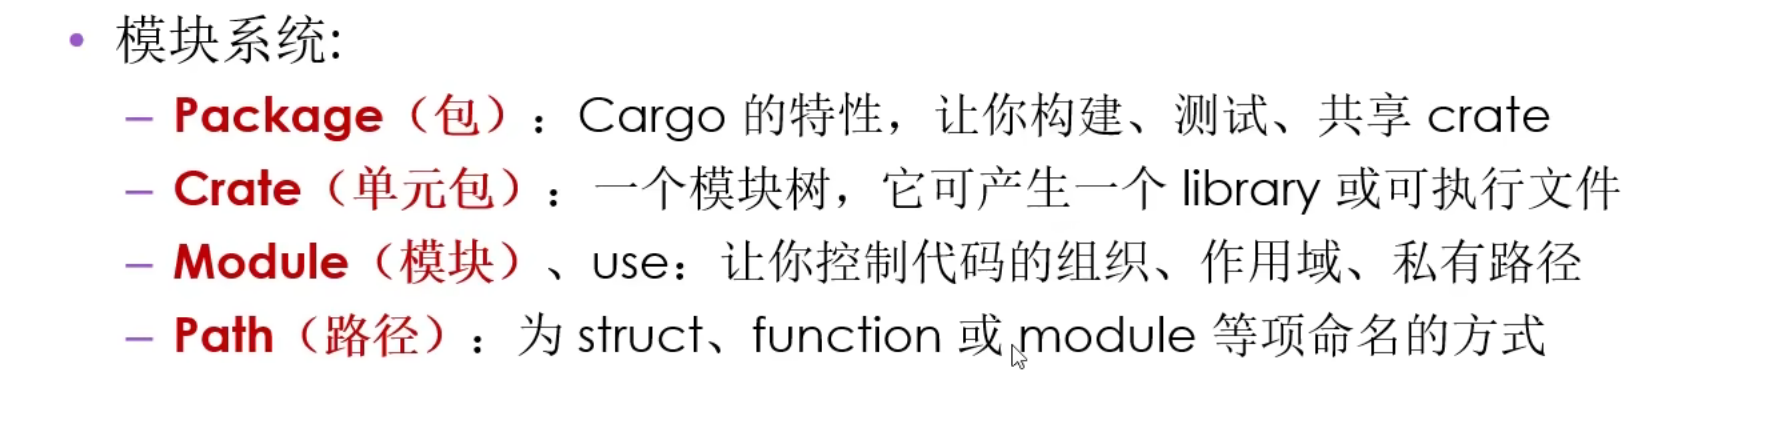
Package Crate
- Crate
- binary
- library
- Crate Root
- 是源代码文件
- Rust编译器从这里开始,组成你都Crate的根Moudle
- 一个Package
- 一个Cargo.toml
- 0-1个lib crate
- 任意个bin crate
- 至少一个crate
- src/main.rs
- binary crate 的 crate root
- crate 与 package相同名字
- src/lib.rs
- package包含一个lib crate
- lib crate 的 crate root
- crate 与 package相同名字
- 上面的俩文件会交给rustc
module
- 在crate中进行分组
- 可控制私有性
- mod关键字
- 可嵌套
- 可包含其它项的定义
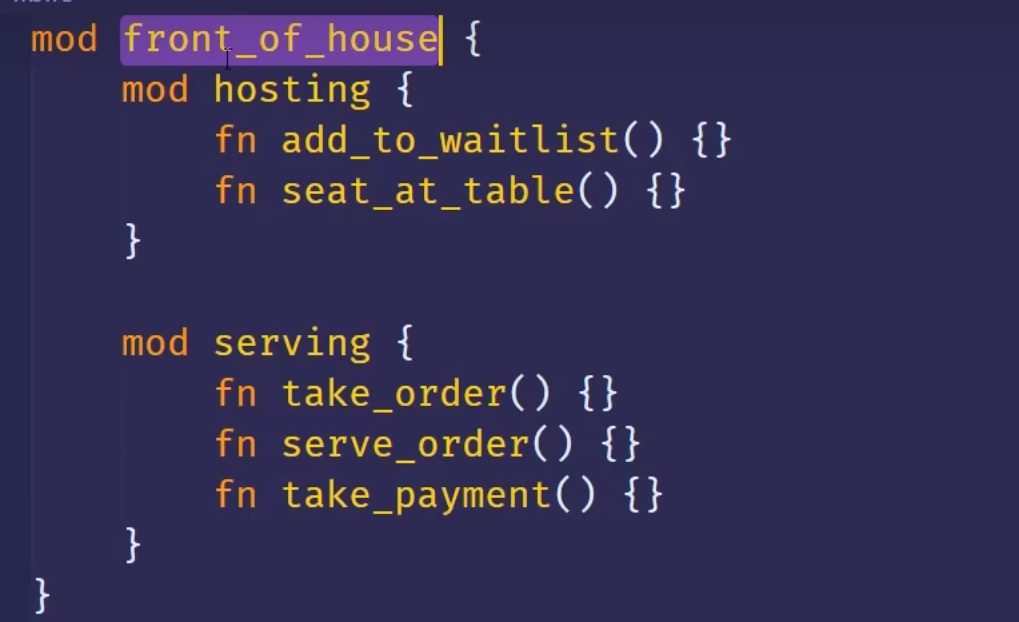
Path
- 绝对路径: 从crate root 开始,使用crate名或 字面值
-
相对路径: 从当前模块开始,使用self super
- privacy boundary: rust默认私有
- 父无法使用子私有
- 子可使用父所有
-
兄弟可调用
-
super 表示上一级:在相对路径中适用
- 就算你给struct 设置pub,struct的属性还是默认私有,也要pub
- pub menu
use
- 像是using namespace
- 对于函数推荐引用到上一级:将函数的父级模块引入到作用域
- 对于struct的话,推荐引用到本身
- 对于同名条目,就需要引用到父级了
- 还有
as关键字,
1
2
3
4
5
6
7
8
9
10
11
12
13
14
mod front_of_house{
    pub mod hosting{
        pub fn eat_at_restaurant(){}
    }
}

use front_of_house::hosting; //你要是直接引用到函数,
//你就和那种c++纯小子一模一样了

pub fn eat_at_restaurant(){
    hosting::eat_at_restaurant();
    hosting::eat_at_restaurant();
    hosting::eat_at_restaurant();
}
- 上面代码中,尽管我们使用use,但是对于外部文件(use了本文件)的文件来说,use引入进来默认为私有,是看不到内部的
- 我们需要
pub use - 这个就很爽了,你想用我的包,我的包引用的包你全都默认看不见,这是好事啊,因为你本来就不关注我想不想用这些
使用package
- Cargo.toml
- use到作用域
- std甚至也是外部包,不过被内置在toml里面了
1
2
use std::io::{self,Write};
use std::collections::* ; //谨慎使用
模块化
- 太人性了,强制你把模块放到
模块路径名文件夹/文件名
常用集合
- 放在heap上
- 与array tuple不同
Vector
- 标准库提供
- 存储多个值
- 同类型
- 在内存中连续存放
- 离开作用域之后就没了
- 什么时候用索引,什么时候用.get()
- 遍历用 for
1
2
3
4
5
6
7
8
9
10
11
12
13
14
15
16
17
18
19
20
21
22
23
24
25
26
27
28
29
30
31
32
33
34
35
36
37
38
39
40
41
//Vector learn

pub fn run() {
    println!("Hello, try01!");
    let v1:Vec<i32> = Vec::new();
    println!("{:?}", v1);
    let v2 = vec![1, 2, 3];
    println!("{:?}", v2);

    let mut v = vec![1, 2, 3];
    v.push(5);  //无敌的上下文类型推断
    //这编译器无敌了
    let third: &i32 = &v[2];
    println!("The third element is {}", third);

    let third: Option<&i32> = v.get(2);
    let third = match v.get(2){
        Some(third) => third,
        None => &5
    };
    //上面的match可用下面的方法回调替代
    let third = v.get(2).unwrap_or_else(|| &5);

    //注意,下面一个错误的示例:引用交叉
    let first = &v[0];
    v.push(6);
    println!("The first element is {}", first);

    for i in &v {
        println!("{}", i);
    }
    for i in &mut v {
        *i += 50;
    }
    for i in  v {
        i + 50;
    }

    //后续没有v的使用权了

}
Vector enum
众所周知,Vector存储同一种类型的数据类型,而enum可以有不同类型的附加数据,所以这俩就擦出来了神奇的火花
1
2
3
4
5
6
7
8
9
10
11
12
13
enum SpreadsheetCell {
    Int(i32),
    Float(f64),
    Text(String),
}

pub fn run(){
    let row = vec![
        SpreadsheetCell::Int(3),
        SpreadsheetCell::Text(String::from("blue")),
        SpreadsheetCell::Float(10.12),
    ];
}
String
- rust用utf-8,这带来了很多困扰
- String 和 &str
1
2
3
4
5
6
7
8
9
10
11
12
13
14
15
16
17
18
19
20
21
22
23
24
25
26
27
28

pub fn run(){
    let mut s = String::new();
    let s = "hello world".to_string();
    let s2 = "hello world";
    //from 函数
    let mut s = String::from("hello world");
    //push添加
    s.push_str(", world");
    s.push('!');
    //+ 连接
    let s1  = String::from("hello");
    let s2 = String::from("world");
    let s3 = s1 + &s2;

    println!("{}", s3);
    println!("{}", s1);  //报错
    println!("{}", s2);
    //这里可以这样解释,对于"+"
    //相当于执行了 s1.add(self, &str)的方法
    //自己的所有权转移了,到了更小的生命周期
    //所以访问不到了
    //而s2的所有权可以保留

    //format! 添加
    let s = format!("{}-{}-{}", s1, s2, s3);

}
String 是 utf-8
- 不能按照索引访问
- Stirng 是对
Vec<u8>的包装 - 字符串看待方式
- 字节
- 标量值
- 字形簇
1
2
3
4
5
6
7
8
9
10
11
12
13
14
pub fn run(){
    let len = String::from("我是人").len();
    println!("{}", len);  //len = 9

    let w = String::from("神说要有光,然后有了rust");
    for b in w.bytes() {
        println!("{}", b);
    }
    for b in w.chars() {
        println!("{}", b);
    }

    //获取字形簇:没有这个方法
}
HashMap<K,V>
- 不在Prelude中,需要自己导入
- 没有内置的宏(也就是
!) - heap上存数据
- 是同构的
- collect构建HashMap
- HashMap的所有权
- 对于实现了Copy trait 的类型,值会复制到HashMap
- 对于拥有所有权的,所有权会移动
更新HashMap
- key存在
- 覆盖
- 丢弃
- 合并
- key不存在
- 新建
entry方法返回一个Entru枚举
Rust错误处理
- 可恢复错误
- Result<T,E>
- 不可恢复错误
panic!宏- 打印错误信息
- 展开或终止调用栈
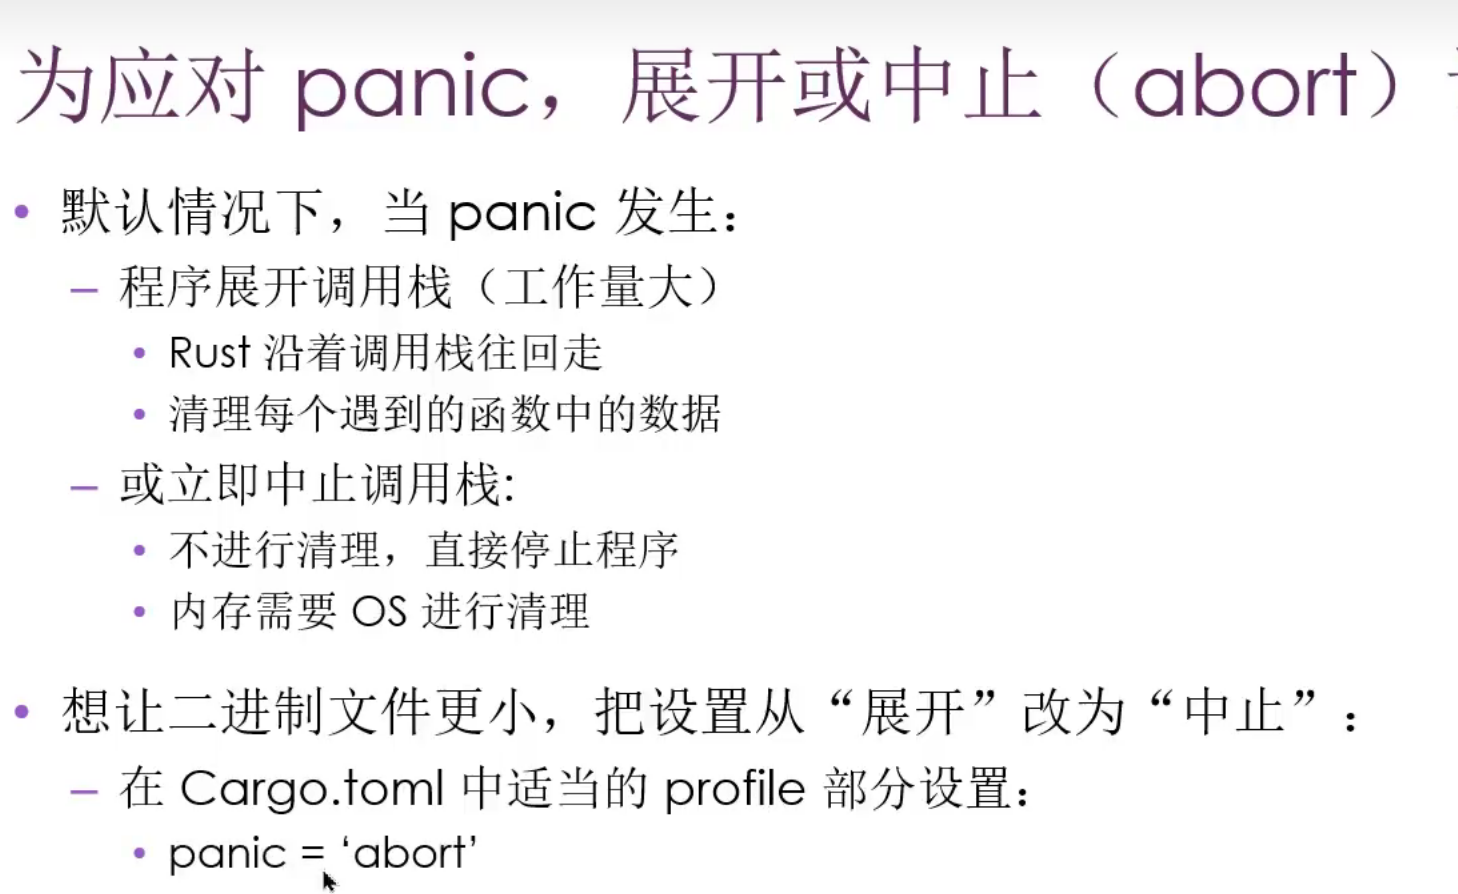
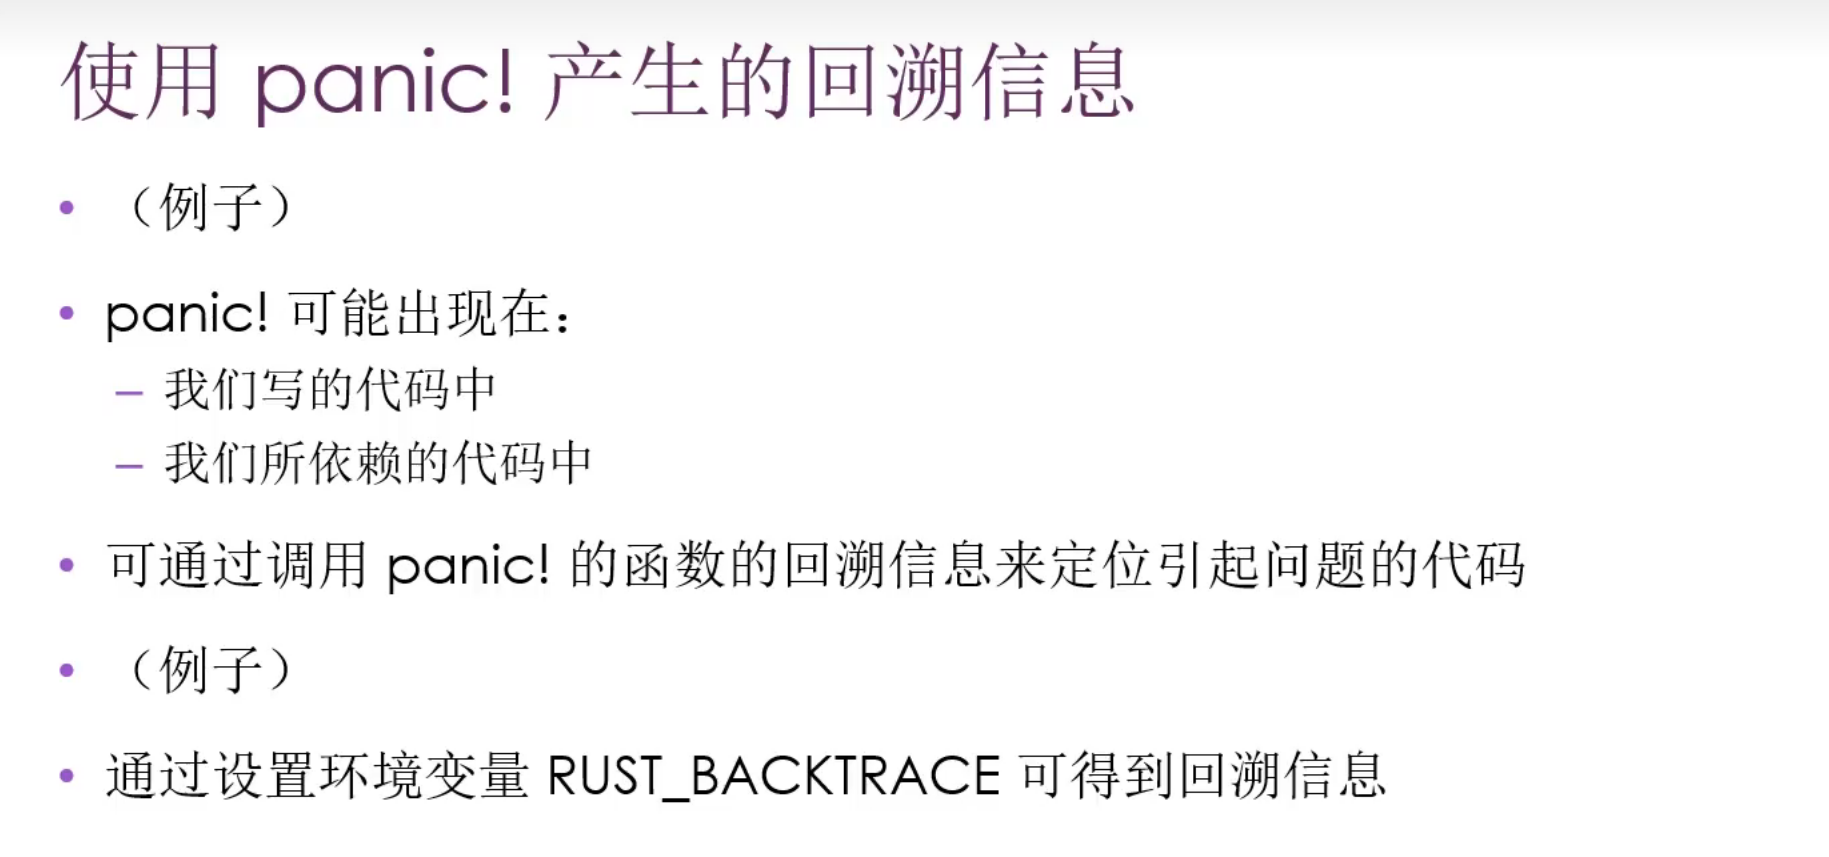
Result枚举
- enum Result<T,E>{ Ok(T), Err(E), }
1
2
3
4
5
6
7
8
9
10
11
use std::fs::File;

pub fn run(){
    let f = File::open("Cargo.toml") ;
    let f = match  f {
        Ok(f) => f,
        Err(e) => {
            panic!("{}", e);
        }
    };
}
- unwarp()操作
- 如果Result结果是Ok,返回其中的值
- 如果结果是Err,调用panic!
- expect
- 自定义panic打印信息
1
2
3
4
5
use std::fs::File;
pub fn run(){
    let f = File::open("argo.toml").unwrap();
    let f = File::open("Cargo.toml").expect("Cargo.toml");
}
- 传播错误
1
2
3
4
5
6
7
8
9
10
11
12
13
14
15
16
17
18
19
fn read_username_from_file2() -> Result<String,io::Error>{
    let mut f = File::open("hello.txt")?;
    let mut s = String::new();
   f.read_to_string(&mut s) ?;
    Ok(s)
}

fn read_username_from_file() -> Result<String,io::Error>{
    let f = File::open("hello.txt");
    let mut f = match f {
        Ok(file) => file,
        Err(error) => return Err(error),
    };
    let mut s = String::new();
    match f.read_to_string(&mut s) {
        Ok(_) => Ok(s),
        Err(error) => return Err(error),
    }
}
这个用?的简写,实质上就是自动match了,要么Ok,把值拿到,要么直接return Err(e)。还有一点,就是最后一行的Ok(s)一定要加
form 与 ?
- Trait std::convert::From 上的from函数:用于错误之间的转换
- ?接受的错误,会被from隐式处理
- ?只用于返回值是Result的函数
- ? 与 main函数 , main函数返回值竟然可能是Result<T,E>
1
2
3
4
5
6
use std::fs::File;
use std::error::Error;
fn main() -> Result<(), Box<dyn Error>> {
    let file = File::open("./test.txt")?;
    Ok(())
}
什么时候panic
- 没有恢复的可能!!!
- some examples
- 代码最终可能处于损坏状态
- 损坏状态(Bad State):某些假设,保证,约定或者不可变性被打破 ``` rust
```
泛型,Trait,生命周期
泛型的使用
- 泛型基本用法
- rust允许方法中出现
impl没有声明的泛型 - rust泛型在编译的时候进行
单态化- 也就是你有多少种泛型,我就在编译期间进行多少种代码复制
- 运行时速度不受影响,编译时间更长
Trait
- 抽象的定义共享行为
- 其实就像是接口,但有很多不同
- 把方法签名放在一起,来定义实现某种目的 所必需的一组行为
Trait的约束
- 这个类型或者这个trait是在本地crate定义的
- 禁止你把第三方库中的struct拿第三方trait
-
孤儿原则:
- 默认实现
- 我们可以选择保留,重载,实现trait的方法
1
2
3
4
5
6
7
8
9
10
11
12
13
14
15
16
17
18
19
20
21
22
23
24
25
26
27
28
pub trait Summary {
    fn summarize_authot(&self) -> String;
    fn summarize(&self) -> String{
        format!("(Read more from {} ...)", self.summarize_authot())
    }
}

pub struct NewsArticle {
    pub headline: String,
    pub location: String,
    pub author: String,
    pub content: String,
}

impl Summary for NewsArticle {
    fn summarize_authot(&self) -> String {
        format!("{}, by {} ({})", self.headline, self.author, self.location)
    }
}
pub fn run(){
    let article =  NewsArticle{
        headline: String::from("dfs"),
        content:String::from("dfsa"),
        author:String::from("dfa"),
        location:String::from("dfa"),
    };
    println!("{}", article.summarize());
}
Trari作为参数
- impl trait语法: 适用于简单情况
- trait bound 语法:可用于复杂情况
1
2
3
4
5
6
7
8
9
10
11
12
13
fn example(item : impl Summary+Display){
    println!("{}", item.summarize());
}
fn example2<T:Summary+Display>(item1 : T, item2 : T){
    println!("{}", item1.summarize());
}
fn example3<T,U>(item1 : T, item2 : U)
where
    T : Summary + Display,
    U : Summary + Display,
{
    println!("{}", item1.summarize());
}
- 返回类型实现Trait
- impl trait之后,函数禁止有不同类型的返回值,如果有就报错
- 有很多不理解,你为什么不支持我返回多种类型
- 其实,这是rust基于安全性和性能所做的取舍,编译器必须知道你要返回的值的大小,要预留多少栈空间
- 但是,这种也有相应的解决办法:使用
enum - 一切禁止返回不同类型的都可以使用enum来解决
1
2
3
fn example4<T:Summary+Display>(item1 : T, item2 : T)-> impl Summary + Display{

}
trait bound
- 在
impl块上使用trait bound,可以有条件的实现特定类型Trait的实现方法 - 覆盖实现
1
2
3
4
5
impl<T: Display> Summary for T {
    fn summarize_author(&self) -> String {
        format!(" Hi, {}!", self.to_string())
    }
}
生命周期
- 避免悬垂引用
- 借用检查器
1
2
3
4
5
6
7
fn get_str(a:&str, b:&str)-> &str {  //报错expected named lifetime parameter
    a
}

fn get_str<'a>(a:& 'a str, b:& 'a str)-> & 'a str {
    a  //雷霆语法: 声明周期的标注
}
生命周期的标注
- 生命周期的标注不会改变引用的生命周期的长度
- 当制定了泛型生命周期参数,函数可以接收带有任何生命周期的引用
fn生命周期标注
- 生命周期的标注:
- 函数的声明周期标注
1
2
3
4
&i32
& 'a i32
& 'a mut i32
fn get_str<'a>(a:& 'a str, b:& 'a str)-> & 'a str;
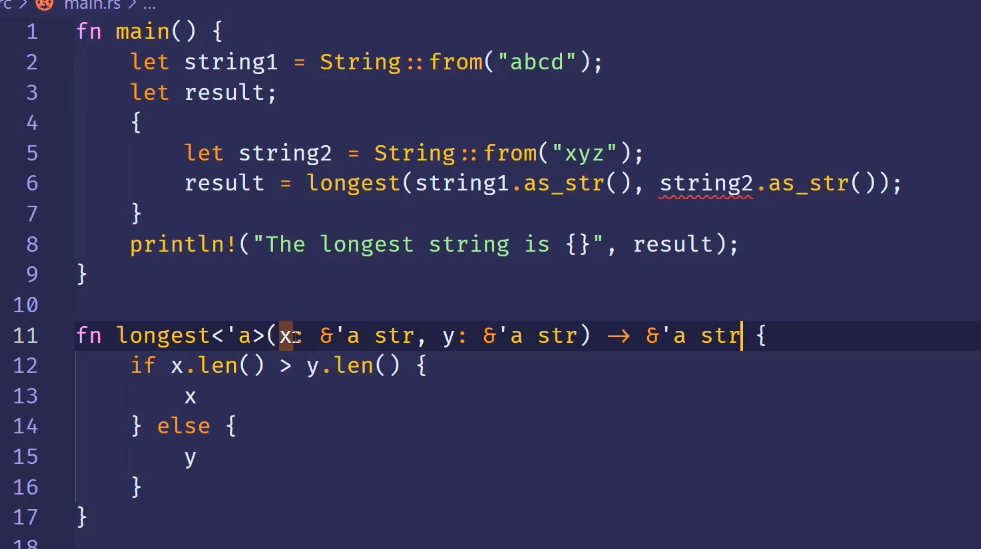 这个可以清楚的理解报错原因
- 函数返回引用时,返回类型的生命周期参数需要与其中一个参数的生命周期匹配
- 如果不这么做,那么返回的值都是只在函数内部生命周期,出函数就变成了悬垂引用
1
2
3
fn example<'a>(a:& 'a str, b:& 'a str)-> & 'a str {
    let result = String::from("hzy");
    result.as_str()  //报错了
Struct生命周期标注
- 如果内部有引用,必须添加生命周期标注
1
2
3
struct MyStruct<'a> {
    part: & 'a str,
}
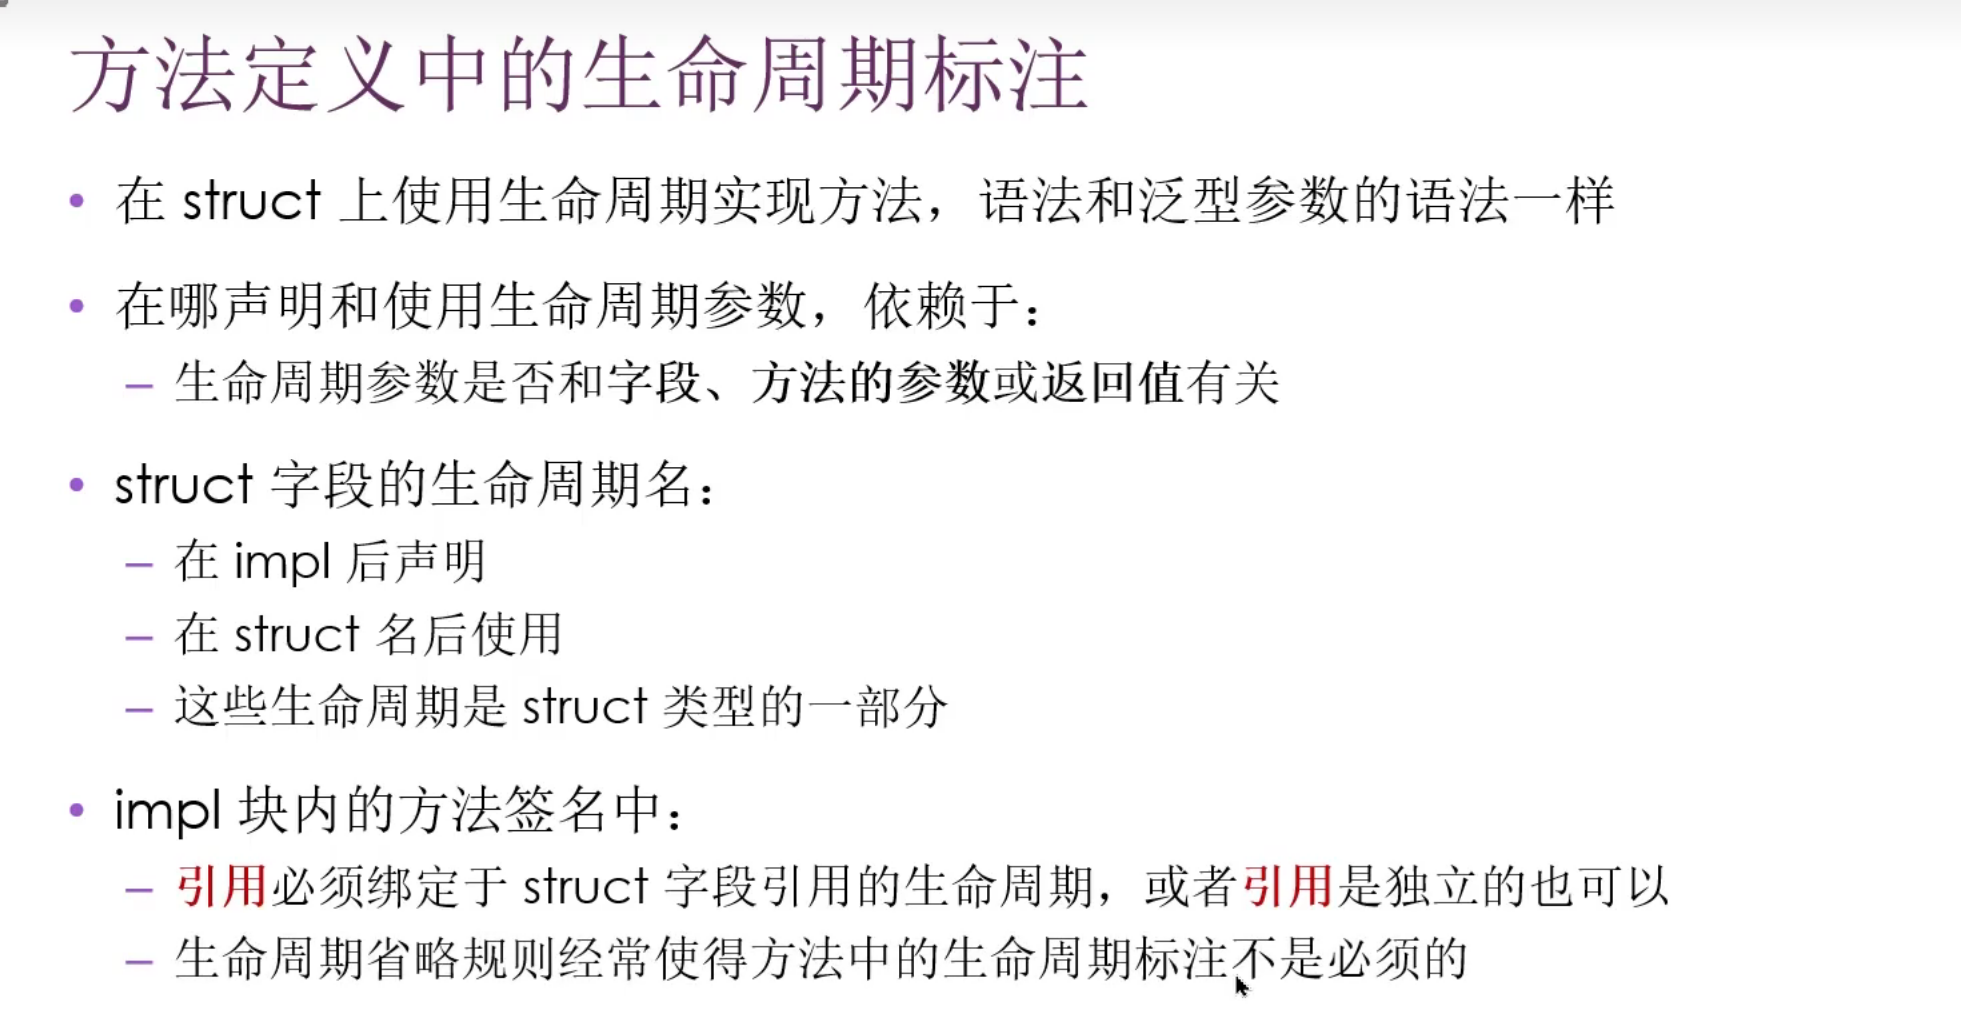
生命周期的省略
- 某些情况写入了rust编译器
- 三大规则
- 每个引用类型的参数都有自己的生命周期
- 如果只有1个输入,那么输入的生命周期会赋给所有的输出生命周期参数
- 多个输入生命周期参数,其中一个是
&self和&mut self,那么self的生命周期赋值给输出
1
2
3
4
5
6
7
8
9
10
11
12
struct MyStruct<'a> {
    part: & 'a str,
}

impl<'a> MyStruct<'a> {
    fn level(&self) -> i32 {
        3
    }
    fn example(&self,b:& str) -> &str {
        self.part
    }
}
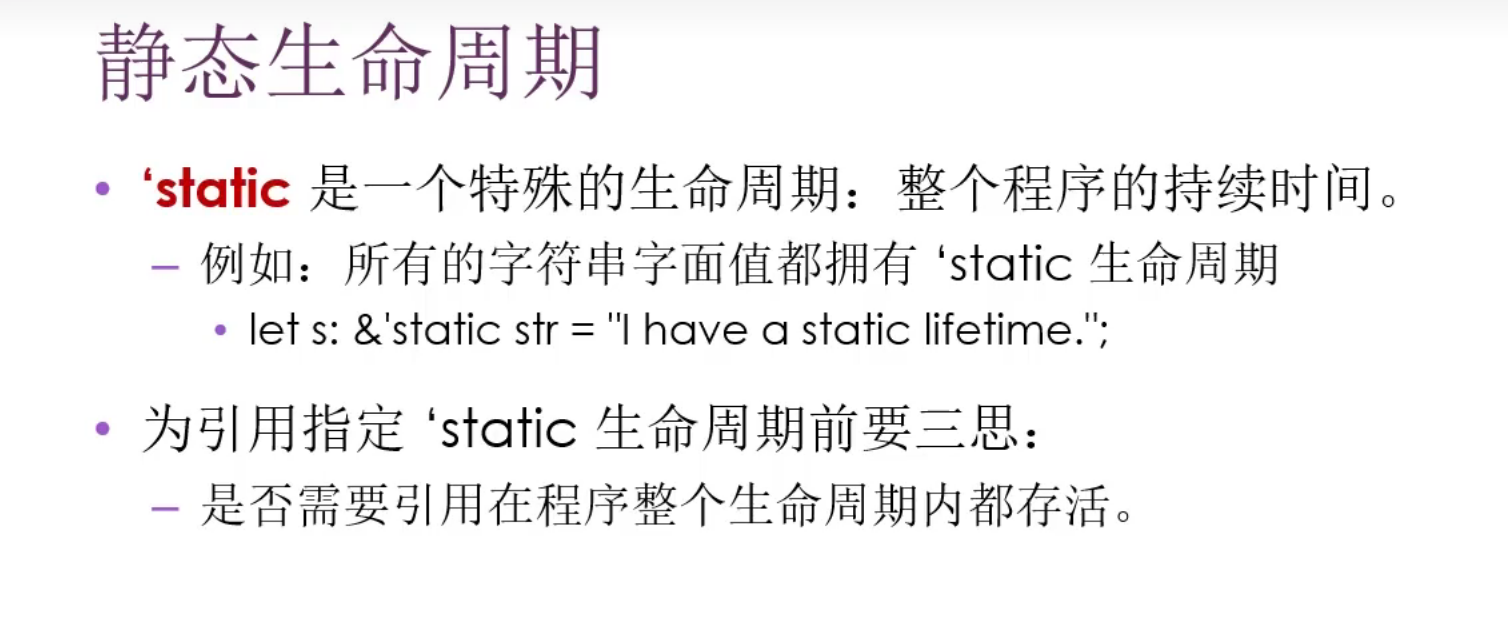
静态生命周期
1
2
3
4
5
6
fn example<'a, T>(x: & 'a str,y: & 'a str,u: T)  -> & 'a str
where T:std::fmt::Display
{
     println!("{}",u);
    x
}
编写和运行测试
测试(3A)
- Attribute
- Act
- Assert
测试函数
#[test]cargo test- 测试失败
- 有panic就失败
- 底层为每个test新建线程,线程g了就失败
断言
- assert() //传入一个true,否则就报错
assert_eq!assert_ne!- 来自标准库
- 判断两个参数
- 使用的是
==和!=运算符 - 断言失败会打印参数值
- 使用的是
debug - 需要实现
ParitialEq和Debug Traits
- 使用的是
添加自定义错误信息
- 自定义信息是可选的额外参数
- 参数会被传递给
format,所以可用{}
验证错误处理的情况
#[should_panic]标记- 没panic就失败
- 可以添加
expect参数- 这个用来匹配
panic的额外参数 - 就是来期待我们想要的恐慌
- 这个用来匹配
用Result进行测试
- 不能标注
should_panic
控制测试如何进行
- 默认行为
- 并行
- 不显示通过的输出
- 命令行参数
- cargo test 之后
- 针对可执行文件 –之后
1
2
cargo test --help
cargo test -- --help
--test-threads=1线程数1- 显式函数输出
--show-ouput- 通过:
println!不打印 - 失败: 打印
- 通过:
按名称测试
- 单个测试
- 多测试:可以使用模块名 ,或部分名称
忽略测试
#[ignore]- cargo test – –ignored
单元测试
- 需要
#[cfg(test)] - 可以测试private
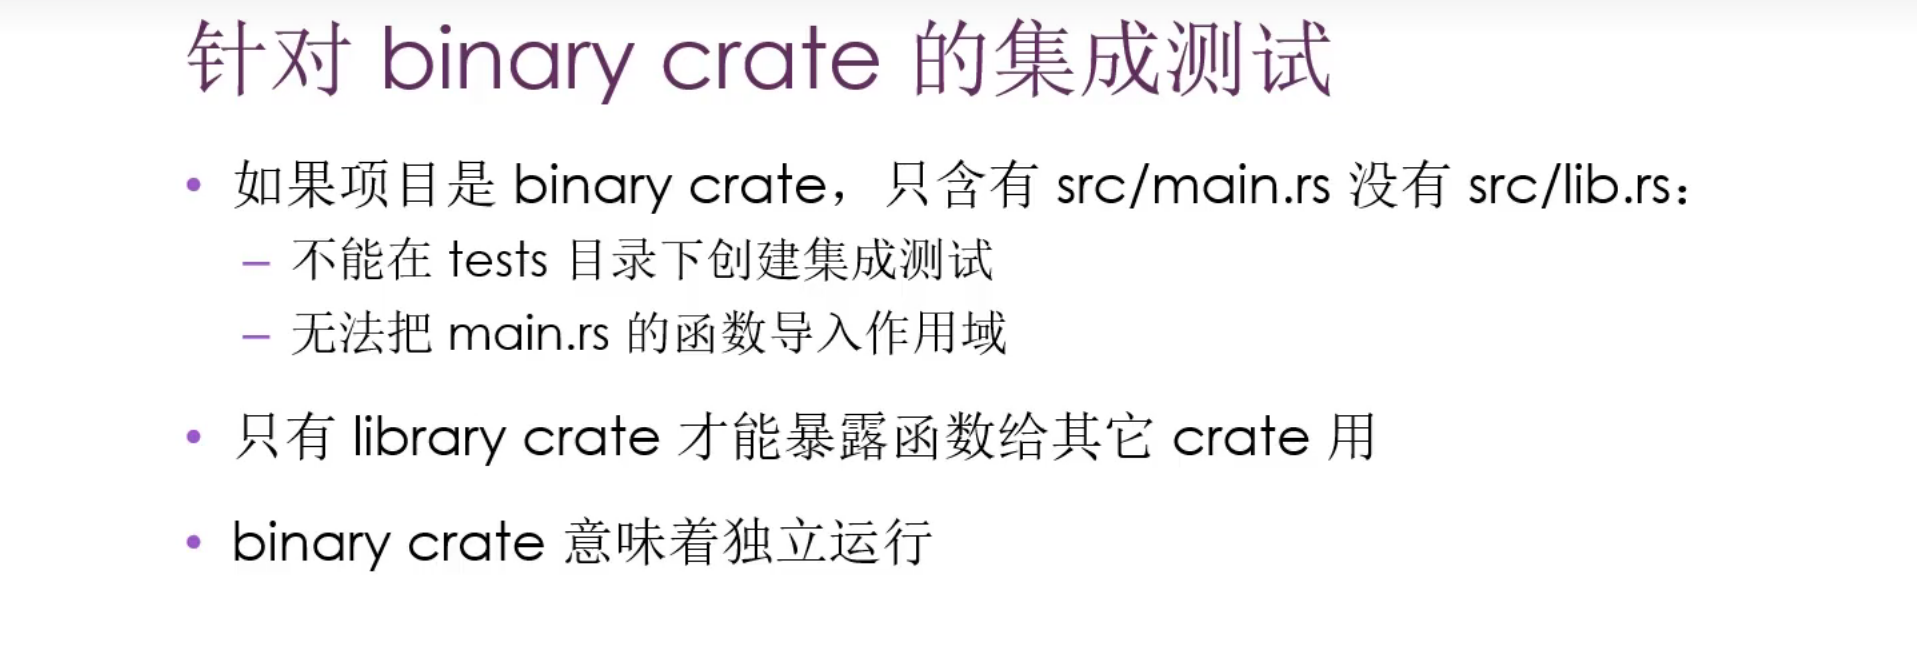
集成测试
- 需要test目录
- 每个文件是一个
crate - 需要将被测试库导入
- 甚至:use 项目名称
- 目录下文件互不影响
- 每个文件是一个
- 不需要
#[cfg(test)] - 只能访问
pub - 需要帮助函数
- 建立
common子目录 - 就不会成为一个集成测试
- 建立
- cargo test –test 文件名字
- 覆盖率
实例
迭代器和闭包
闭包
- 可以捕获其所在环境的匿名函数
- 是匿名函数
- 保存为变量,作为参数
- 可在一个地方创建闭包,然后在另一个上下文中调用闭包来完成运算
- 可从其定义的作用域捕获值
闭包的类型推断
- 闭包不要求标注参数和返回值类型
- 闭包通常很短小
- 闭包不允许多种类型!
1
2
3
4
5
6
7
8
9
10
11
12
13
14
15
16
17
18
19
fn my_sleep(num:u64) -> u64{
    println!("I want to go to sleep");
    thread::sleep(Duration::from_secs(num));
    num
}

pub fn run(){
    //我们有多个地方需要使用睡眠一秒,所以我们就这样重复定义了一下
    let sleep_one_secs = my_sleep(1);
    //但是,有个bug,我们在定义这句话的时候就会执行一次代码

    let sleep_one_secs = |num| {  //要么自己标明类型,要么上下文推断
        println!("I want to go to sleep");
        thread::sleep(Duration::from_secs(2));
        num
    };

    let s = sleep_one_secs(1);
}
如何让struct持有闭包
Fn Trait
- Fn
- FnMut
- FnOnce
示例代码:闭包实现懒汉式加载
1
2
3
4
5
6
7
8
9
10
11
12
13
14
15
16
17
18
19
20
21
22
23
24
25
26
27
28
29
30
31
32
33
34
35
36
37
38
39
40
41
42
43
44
45
struct Cacher<T>
where T:Fn(i32) -> i32
{
    cal: T,
    value: Option<i32>
}

impl<T> Cacher<T>
where T:Fn(i32) -> i32{
    fn new(cal: T) -> Cacher<T> {
        Cacher {
            cal,
            value: None,
        }
    }

    fn value(&mut self,arg:i32) -> i32{
        match self.value {
            Some(v) => v,
            None => {
                let v = (self.cal)(arg);//这里就是闭包的调用,我们
                self.value = Some(v);
                v
            }
        }
    }

    fn value(&mut self, arg: i32) -> i32 {
        // 1. 先检查有没有值,如果有,直接返回
        if let Some(v) = self.value {
            return v;
        }

        // 2. 走到这里说明是 None,此时 match/if let 的借用已经结束了
        let v = (self.cal)(arg);
        self.value = Some(v);
        v
    }

    fn value(&mut self, arg: i32) -> i32 {
        // 如果是 None,就执行闭包里的逻辑并存进去,最后返回里面的值
        *self.value.get_or_insert_with(|| (self.cal)(arg))
    }

}
这段代码需要好好理解一下
- 我们在创建struct的时候需要传入一个闭包的定义,也就是
T,是在new的时候传入的 - 我们在拿
value的时候,会有(self.cal)(arg),这个意思就是(self.cal)拿到了闭包,之后的括号传入值,就执行代码了
闭包可以捕获他们的环境
- 闭包可以访问定义它的作用域内的变量,而普通函数则不能
- 会产生内存开销
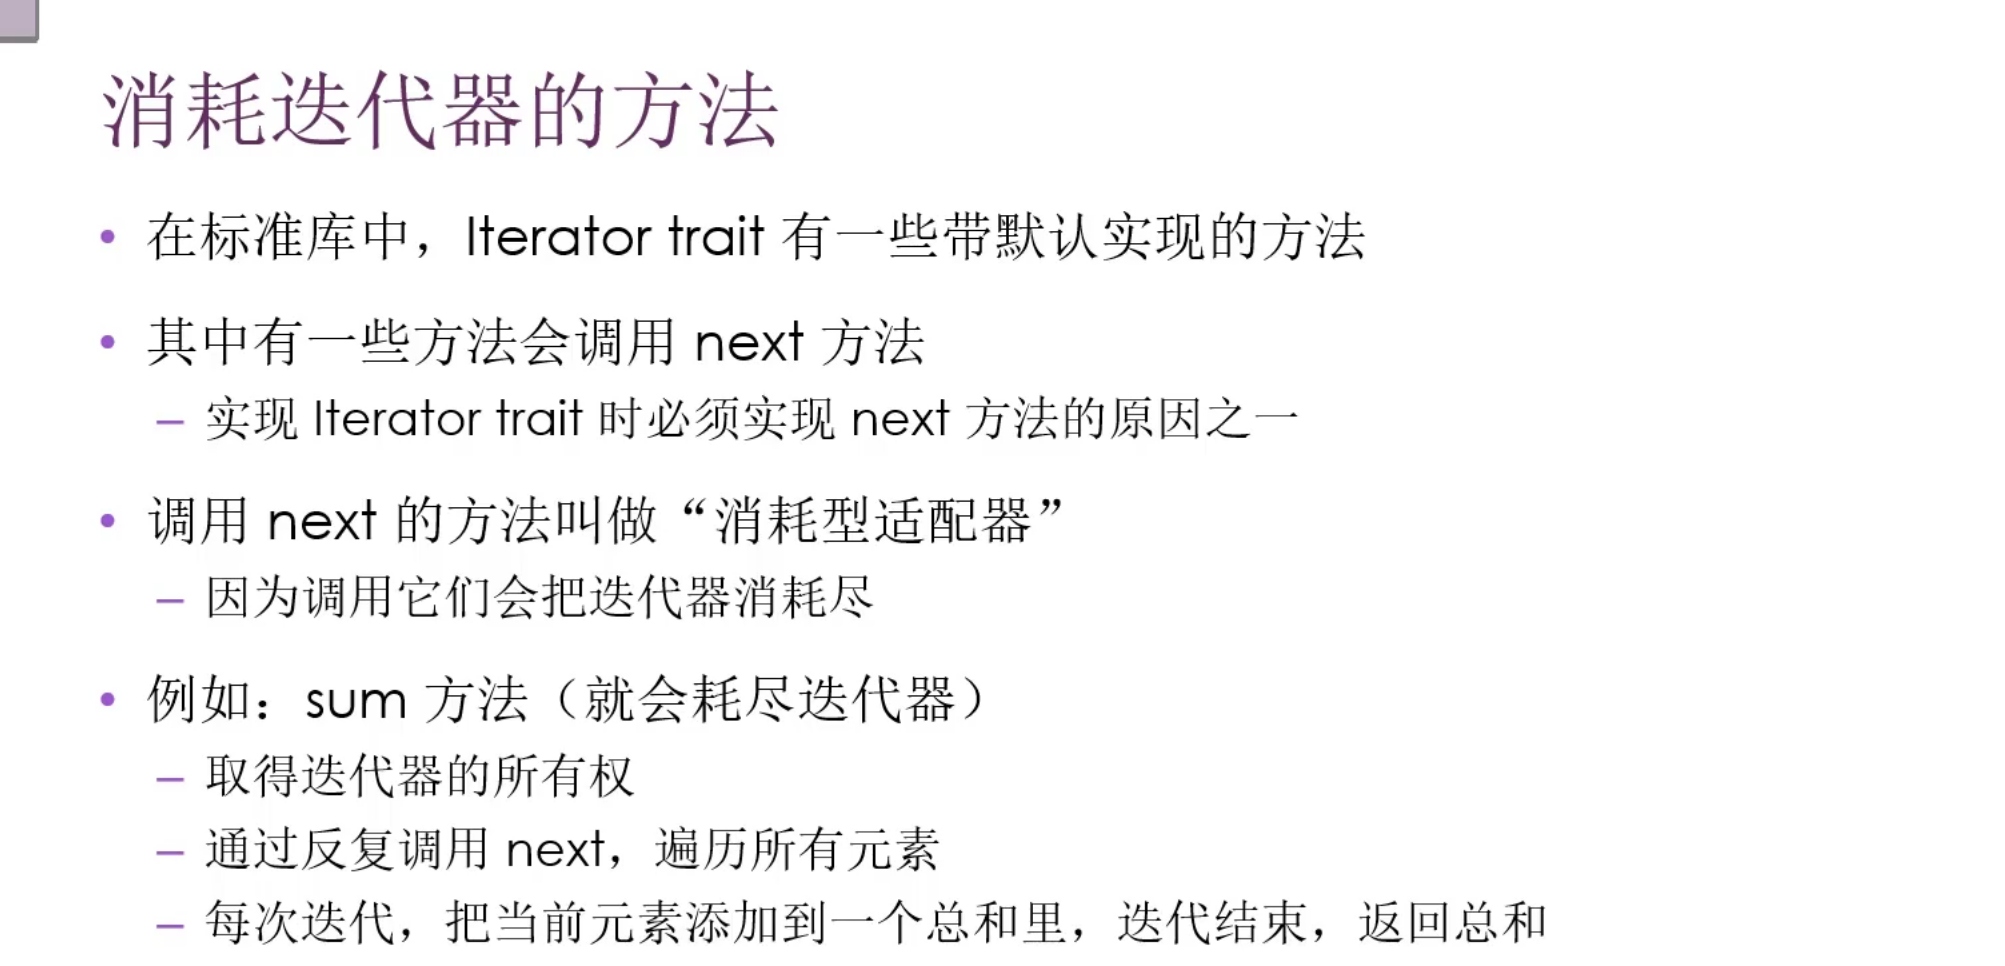
- FnOnce: 获取所用权,只能调用一次
- FnMut: 可变借用
- Fn: 不可变借用

- move关键字
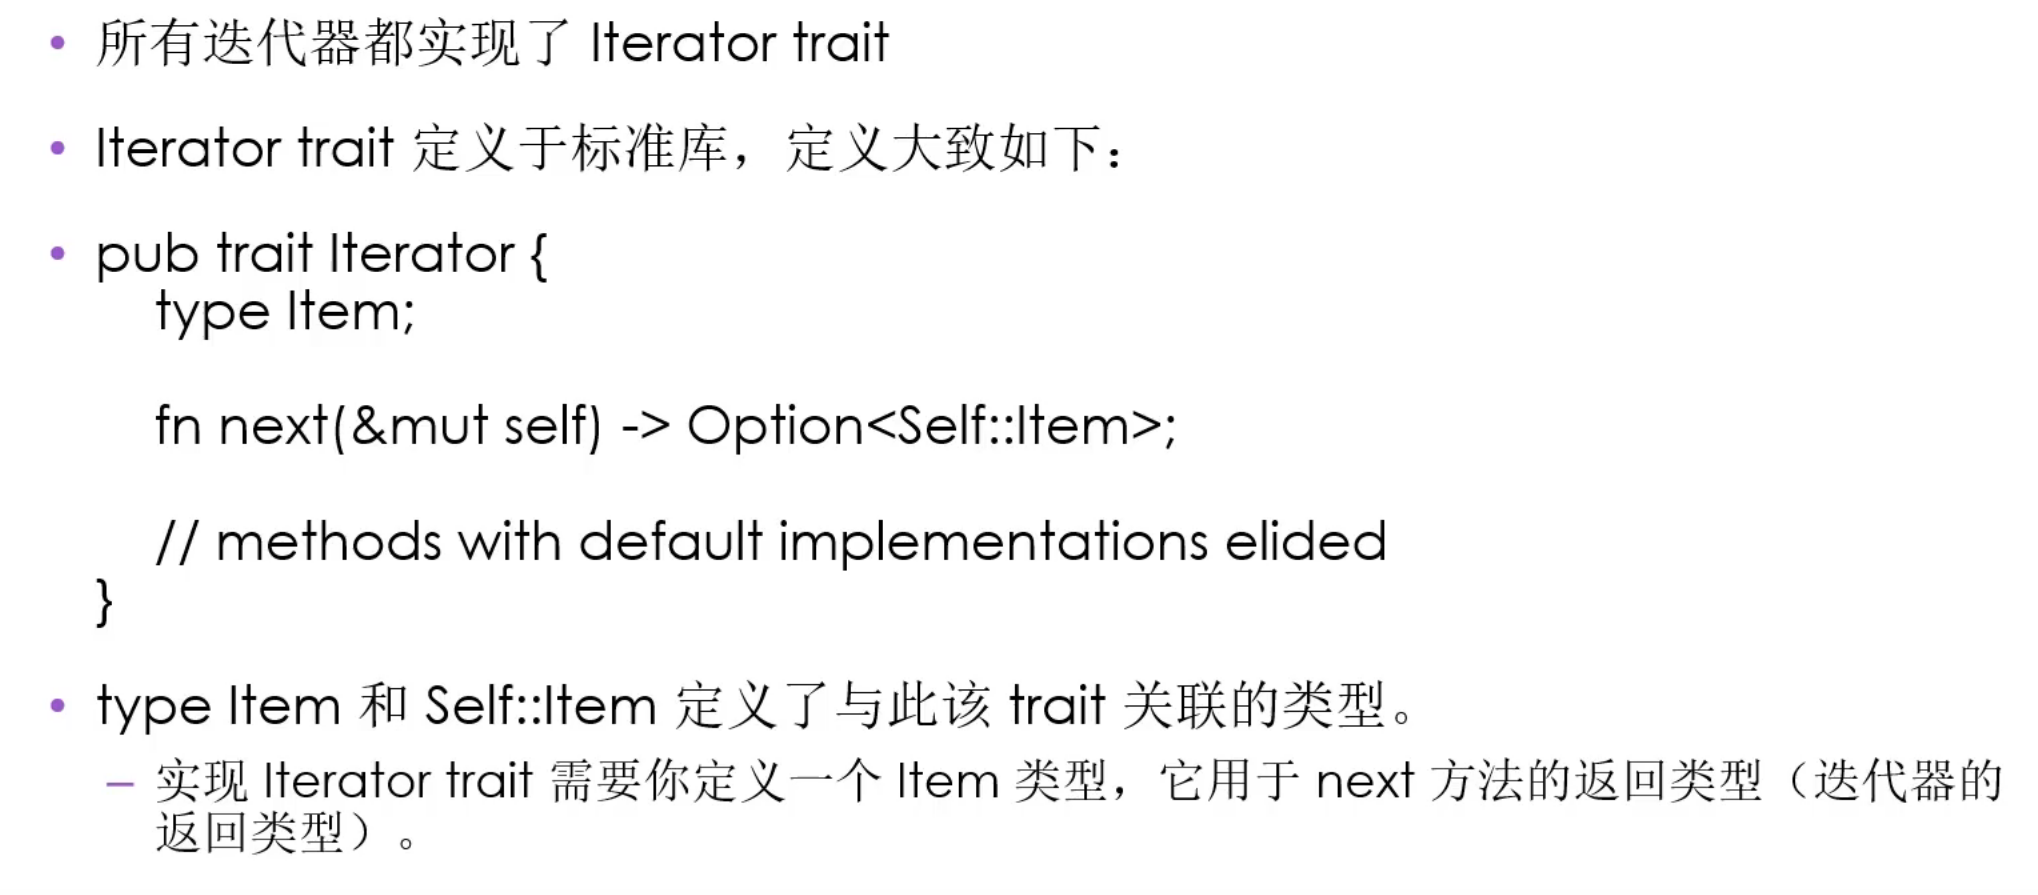
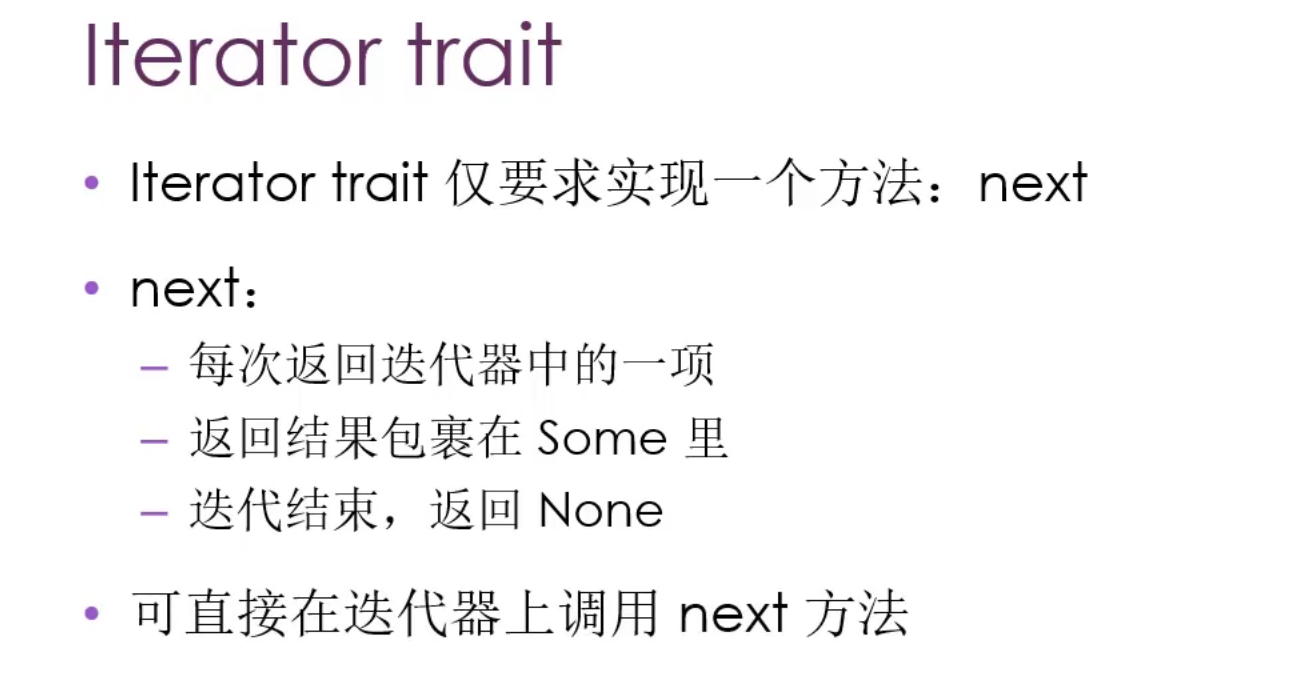
Iterator trait
- iter: 不可变引用上创建迭代器
- into_iter:创建的迭代器会获得所有权
- iter_mut:迭代可变的引用
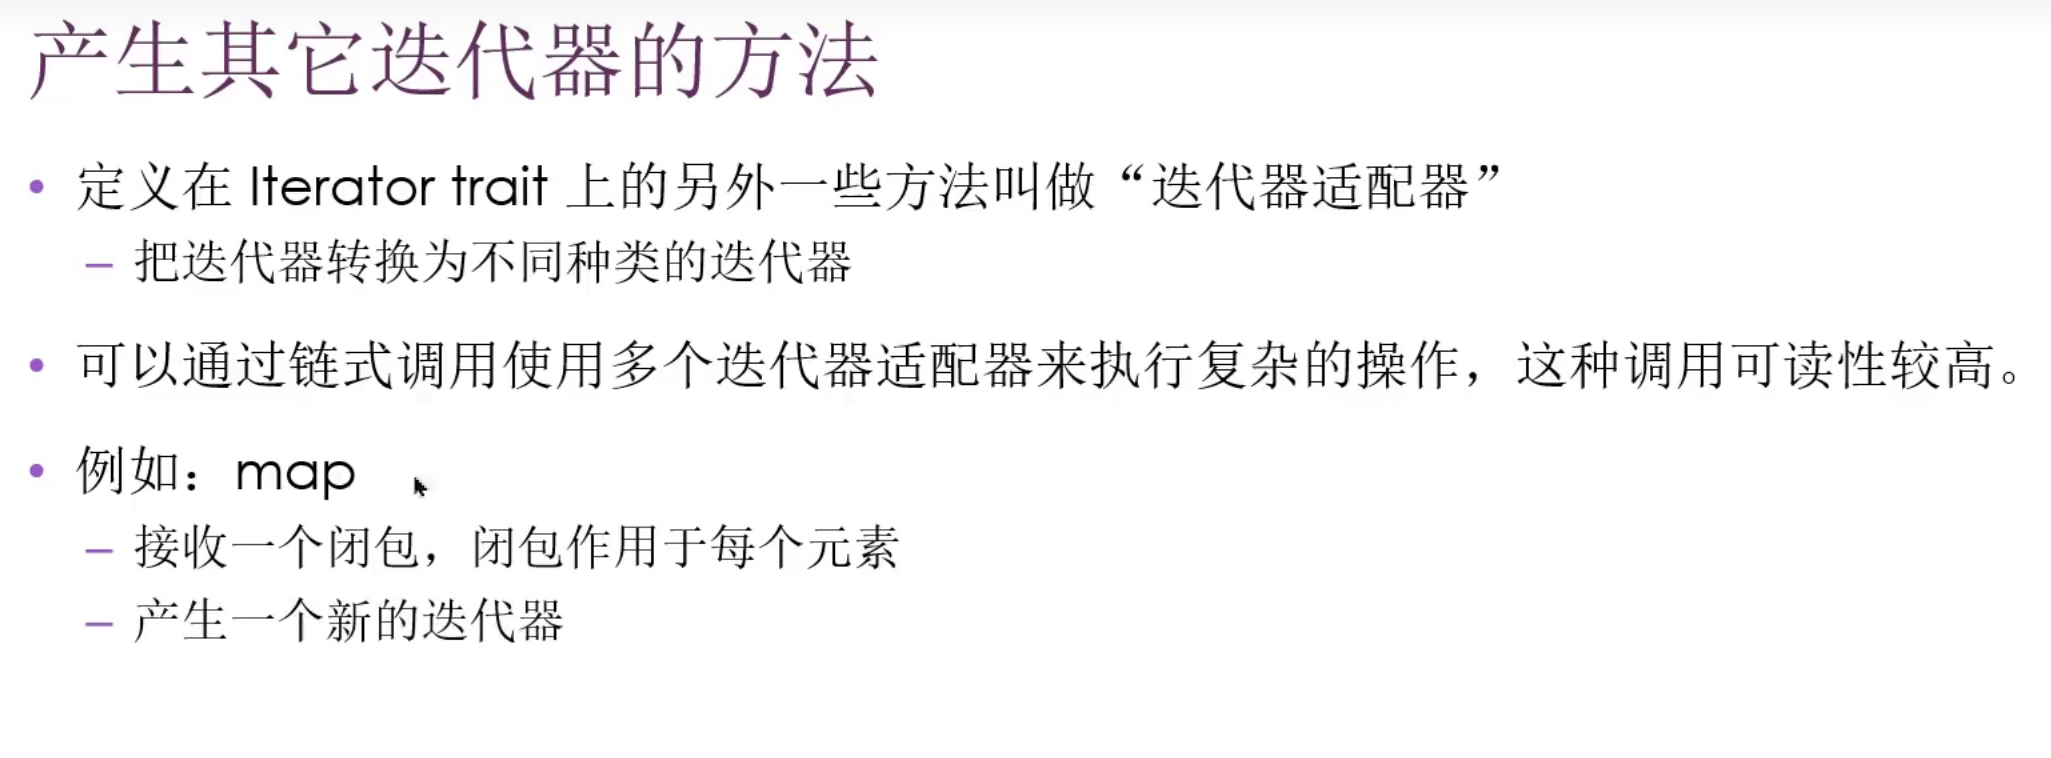
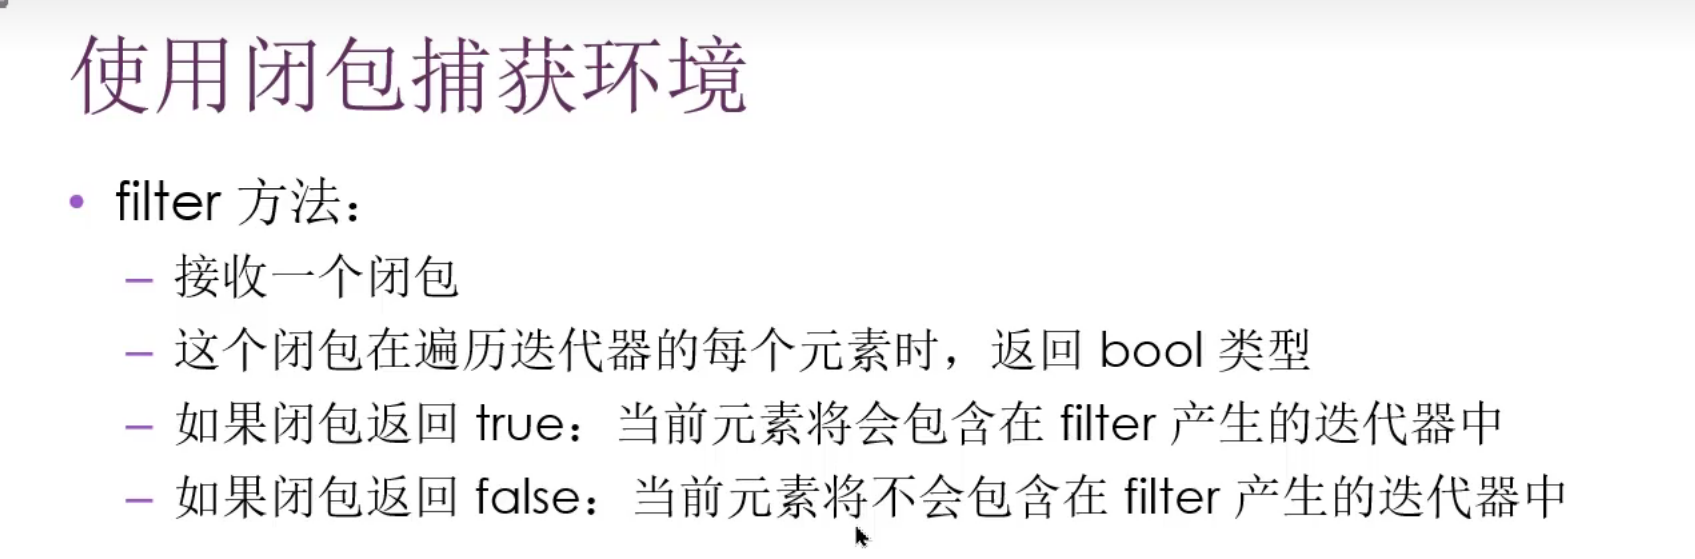
闭包捕获环境
自定义迭代器
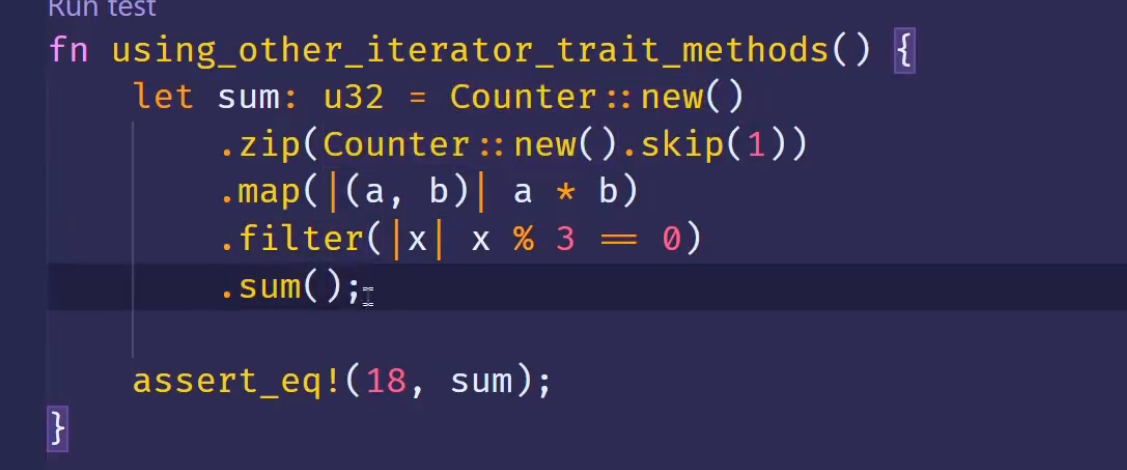
- 看了上面你就明白了,还是那批
喜欢在java中用stream的
循环 VS 迭代器
- 相信
rustc
Cargo , crates.io
release profile
- dev profile: cargo build
- release profile: cargo build –release
- 自定义profile
- 在Cargo.toml
- [profile.dev] 里面只需要覆盖
opt-level0-3的数字,值越大编译时间越长
- 在Cargo.toml
cargo doc
- 托管开源代码
cargo doc --open- 文档注释: 用于生成html
///
cargo doc- 常用章节
# ExamplesPanicsErrorsSafety
- 文档注释当作测试
- 可以把注释代码当作示例代码运行
//!描述外层条目
pub use
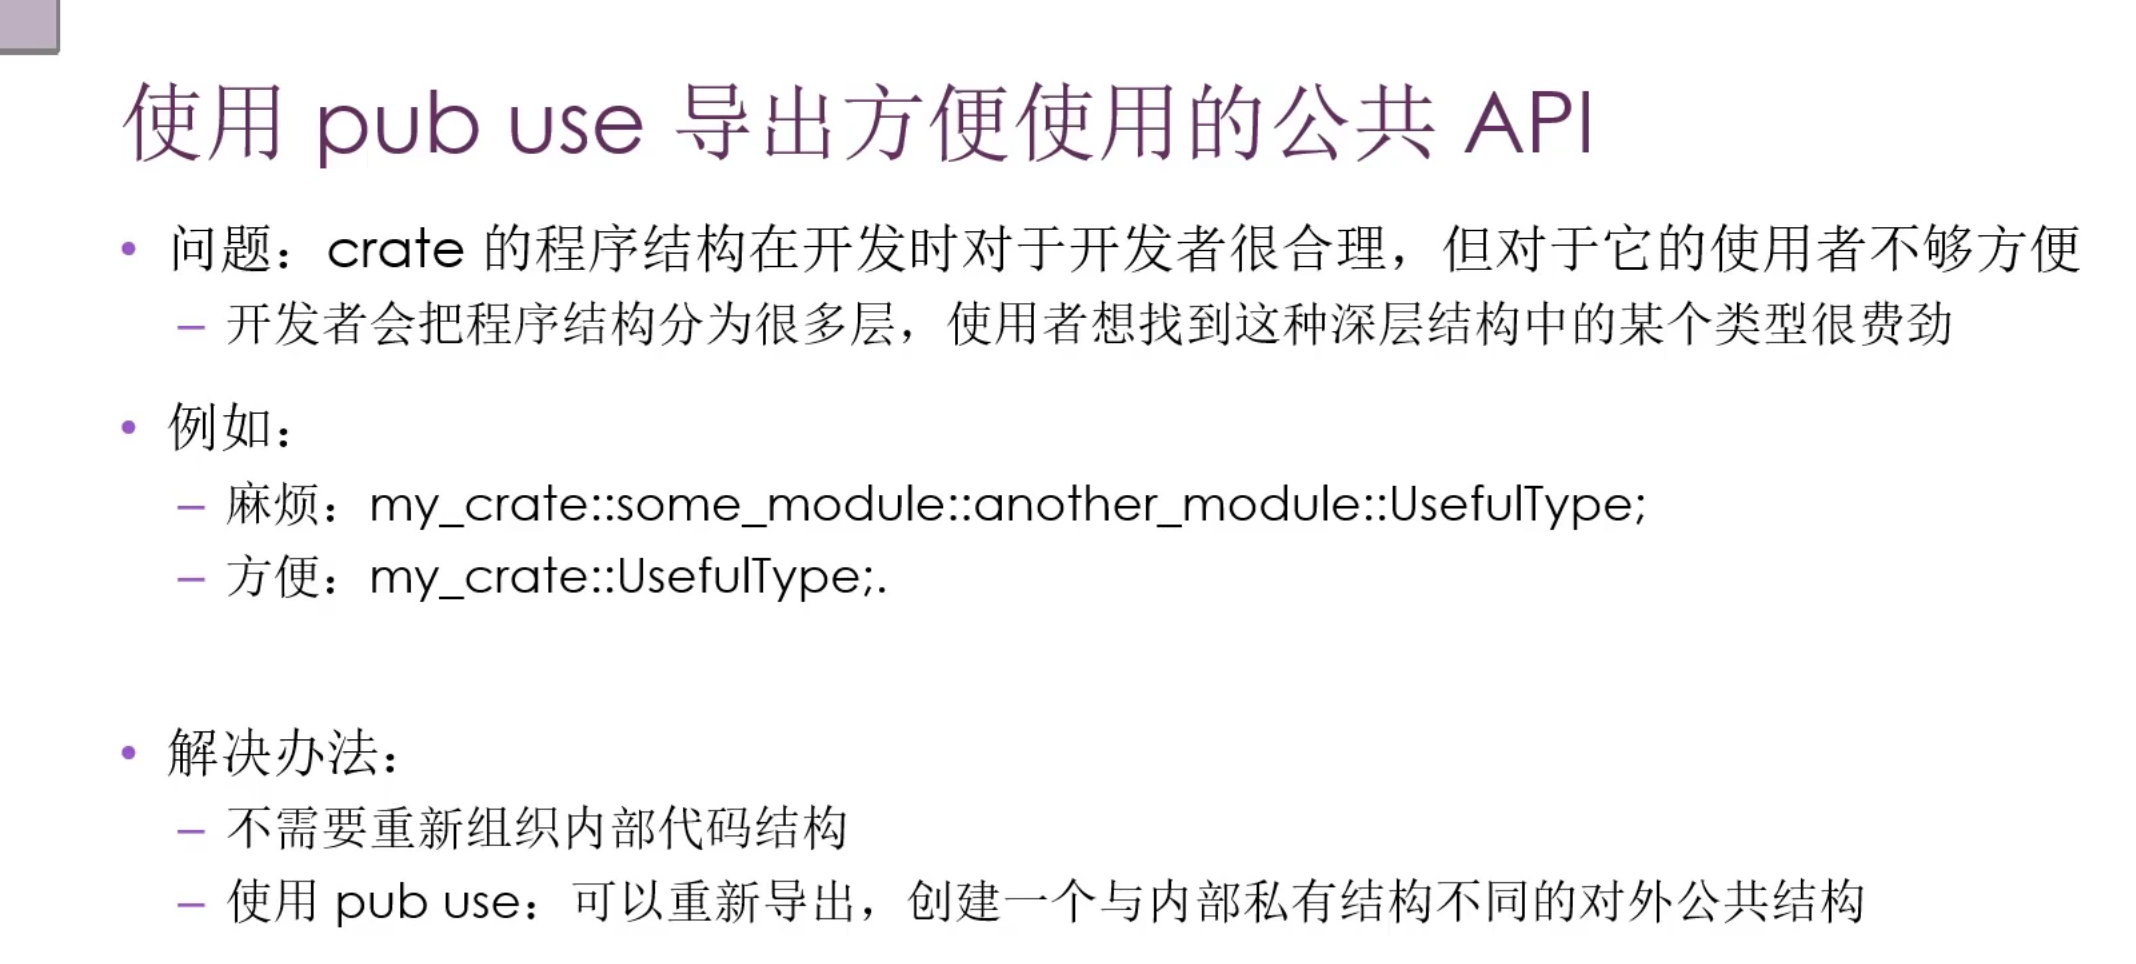
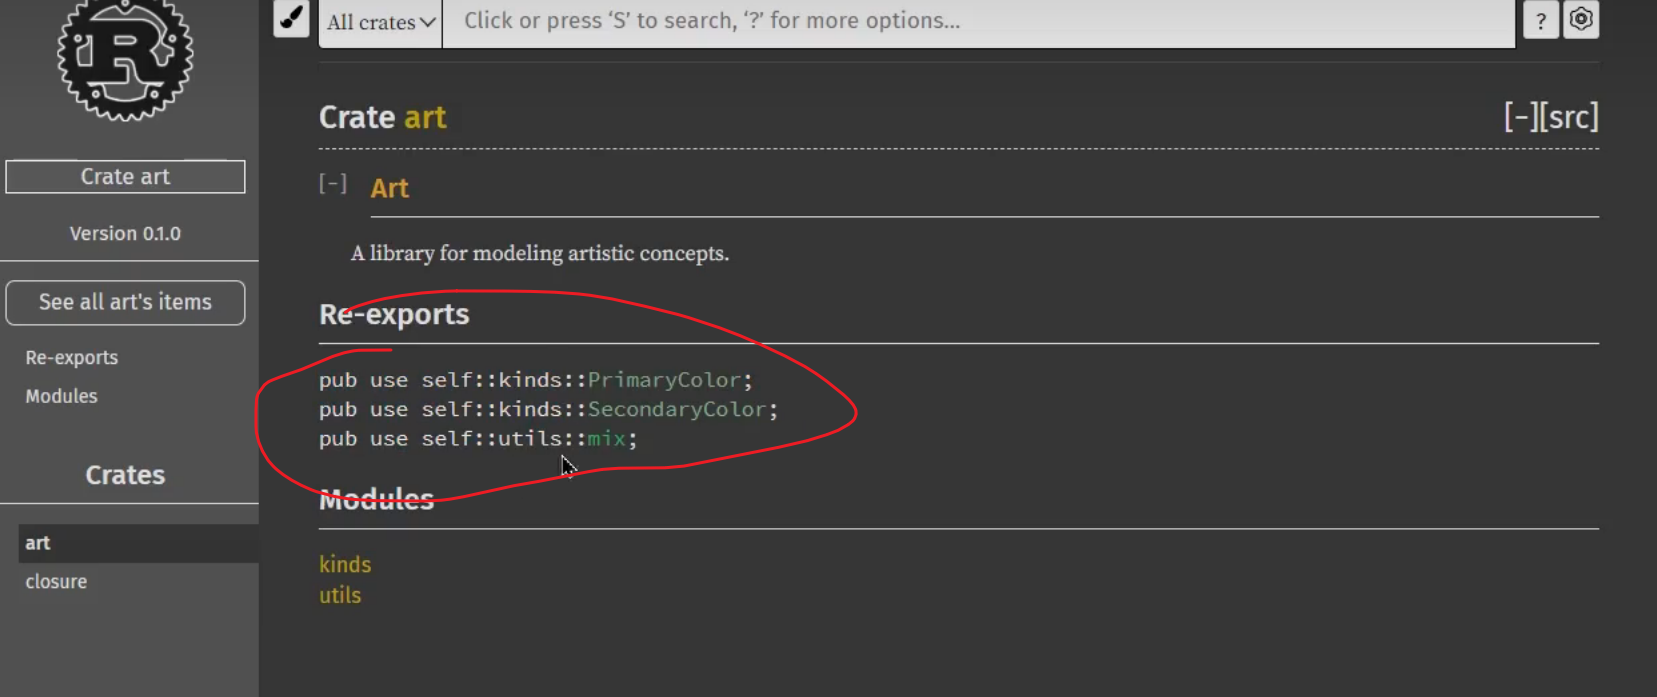
这样重新组织一下对外暴露的方法,我们导入的时候就可以很轻松的导入,而不是写一大长串路径
crates.io
- cargo login
[package]- crate:
- description:
- license
- version
- author
cargo publish [--allow-dirty]- crate一旦发布,就是永久性的:版本无法覆盖,无法删除
cargo yank -vers 1.0.1cargo yank -vers 1.0.1 --undo- 撤回版本只意味着新项目不能再依赖这个项目,但是被
Cargo.lock的旧项目仍然可以下载
Workspaces
- Cargo.toml
1
2
3
4
5
6
7
8
[workspace]

members = [
    "adder",
    "add-one",
    "add-tow",
]
- 必须手动显式指明子模块的依赖
- cargo run -p adder
- 工作空间只有一个
Cargo.lock,在最顶层 - 子不继承父亲的依赖
cargo publish以trait为单位,所以一个workspace需要多次publish
安装bin crate
cargo install
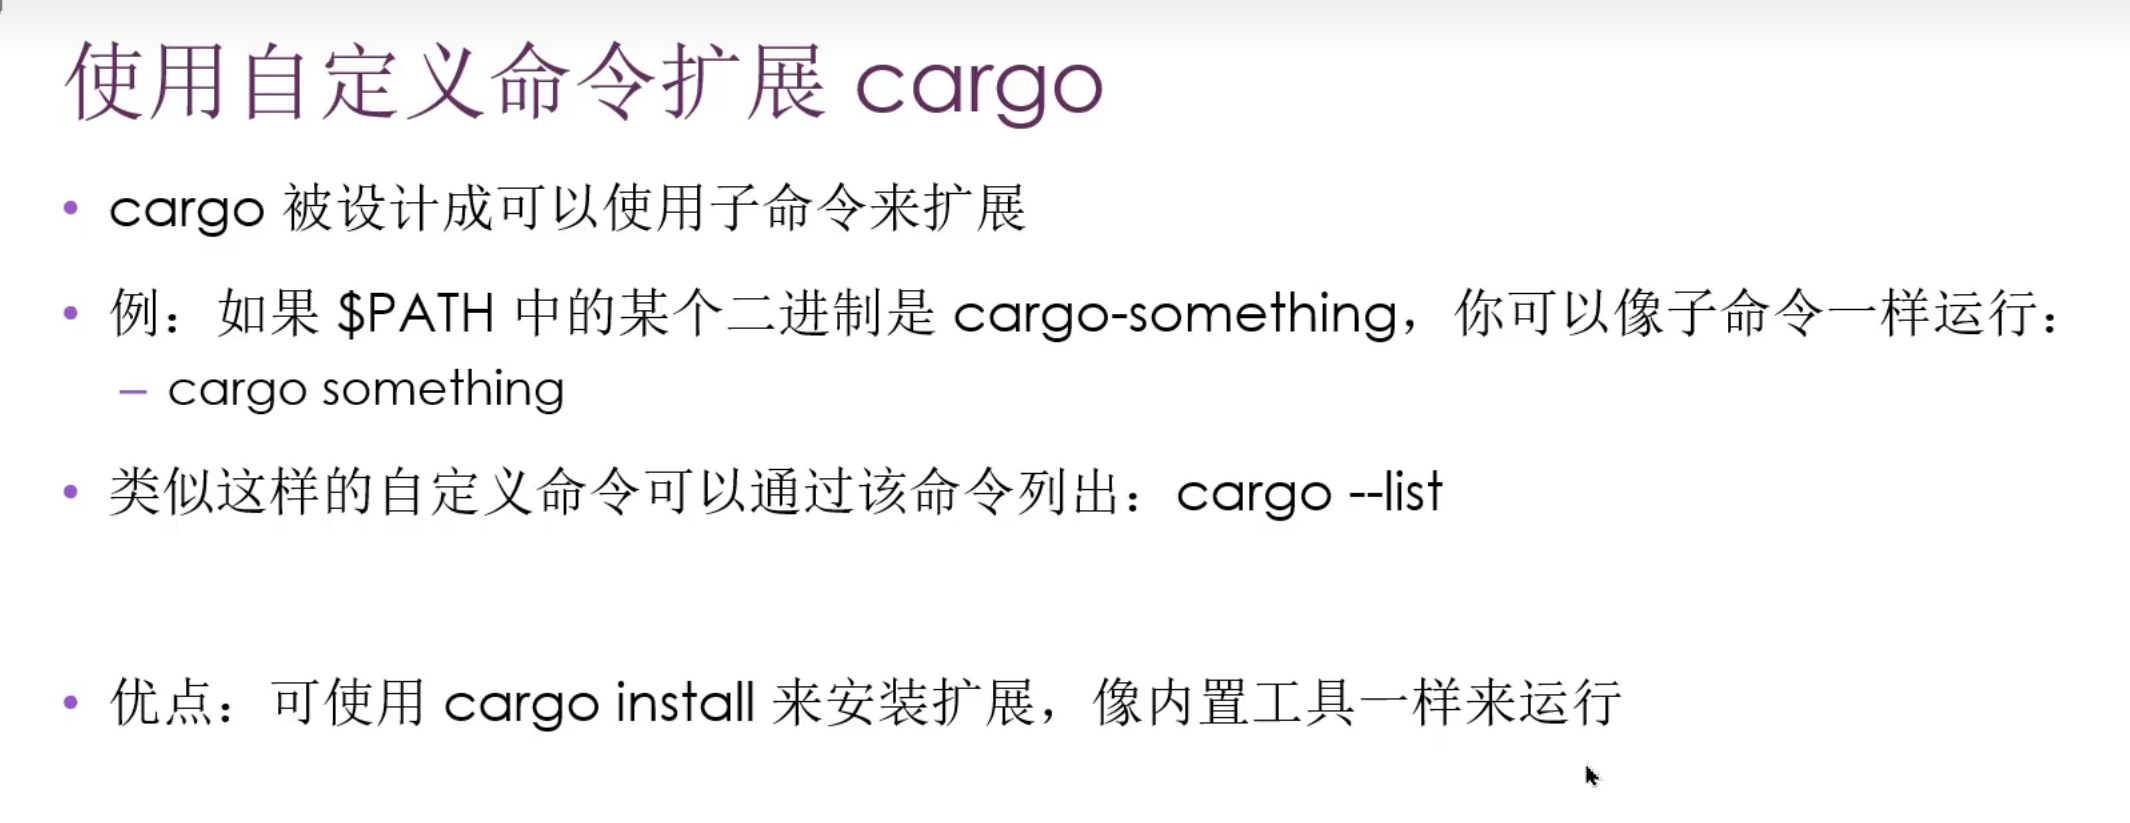
扩展Cargo
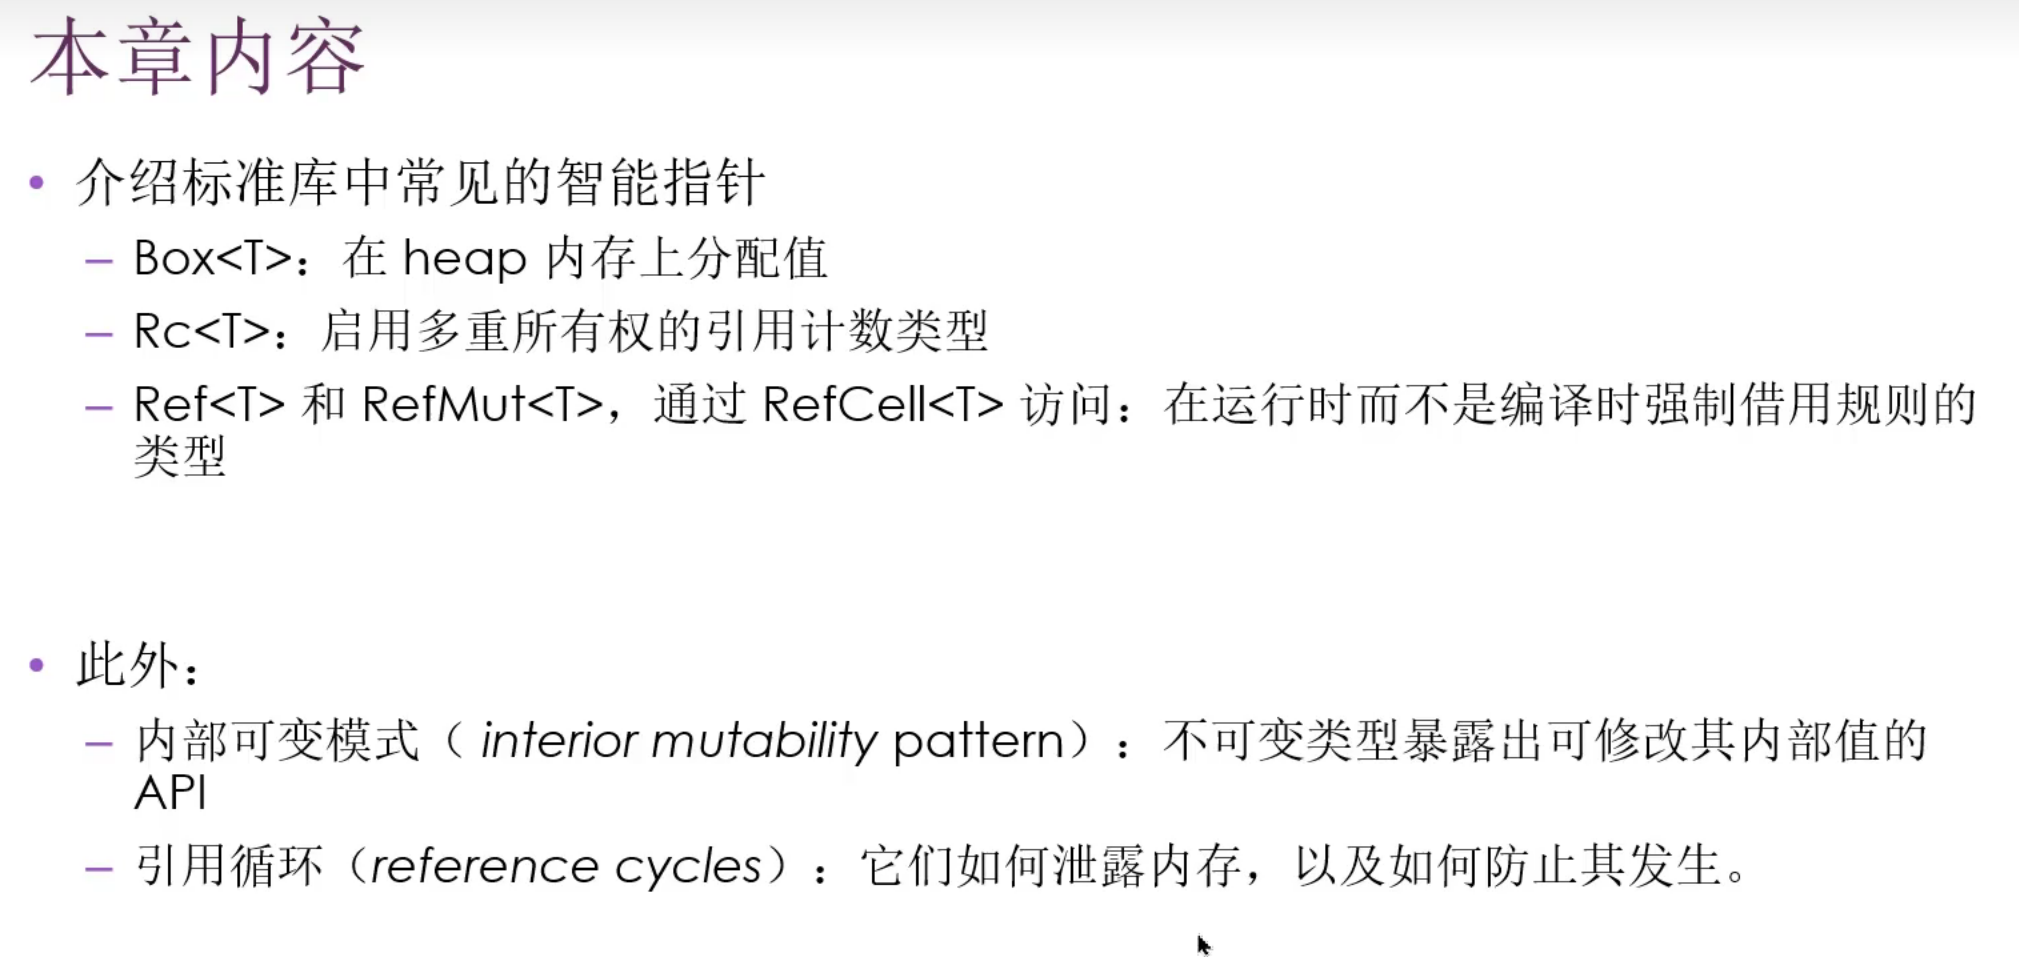
智能指针
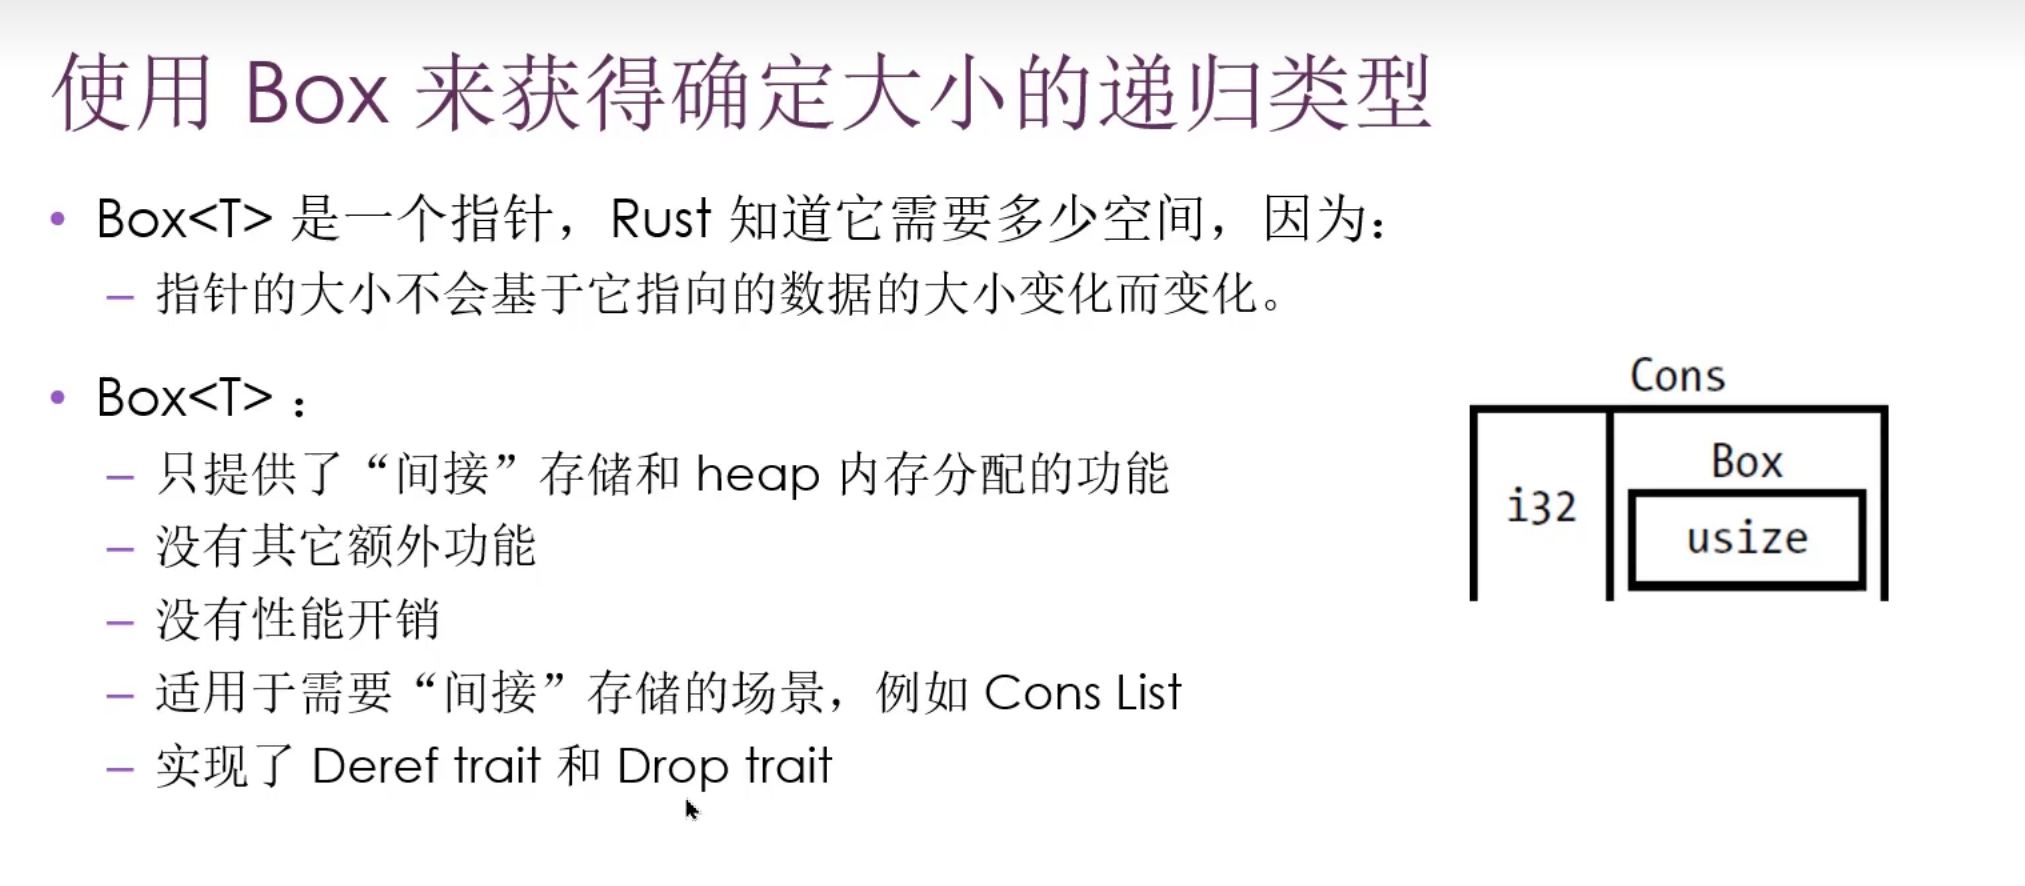
Box
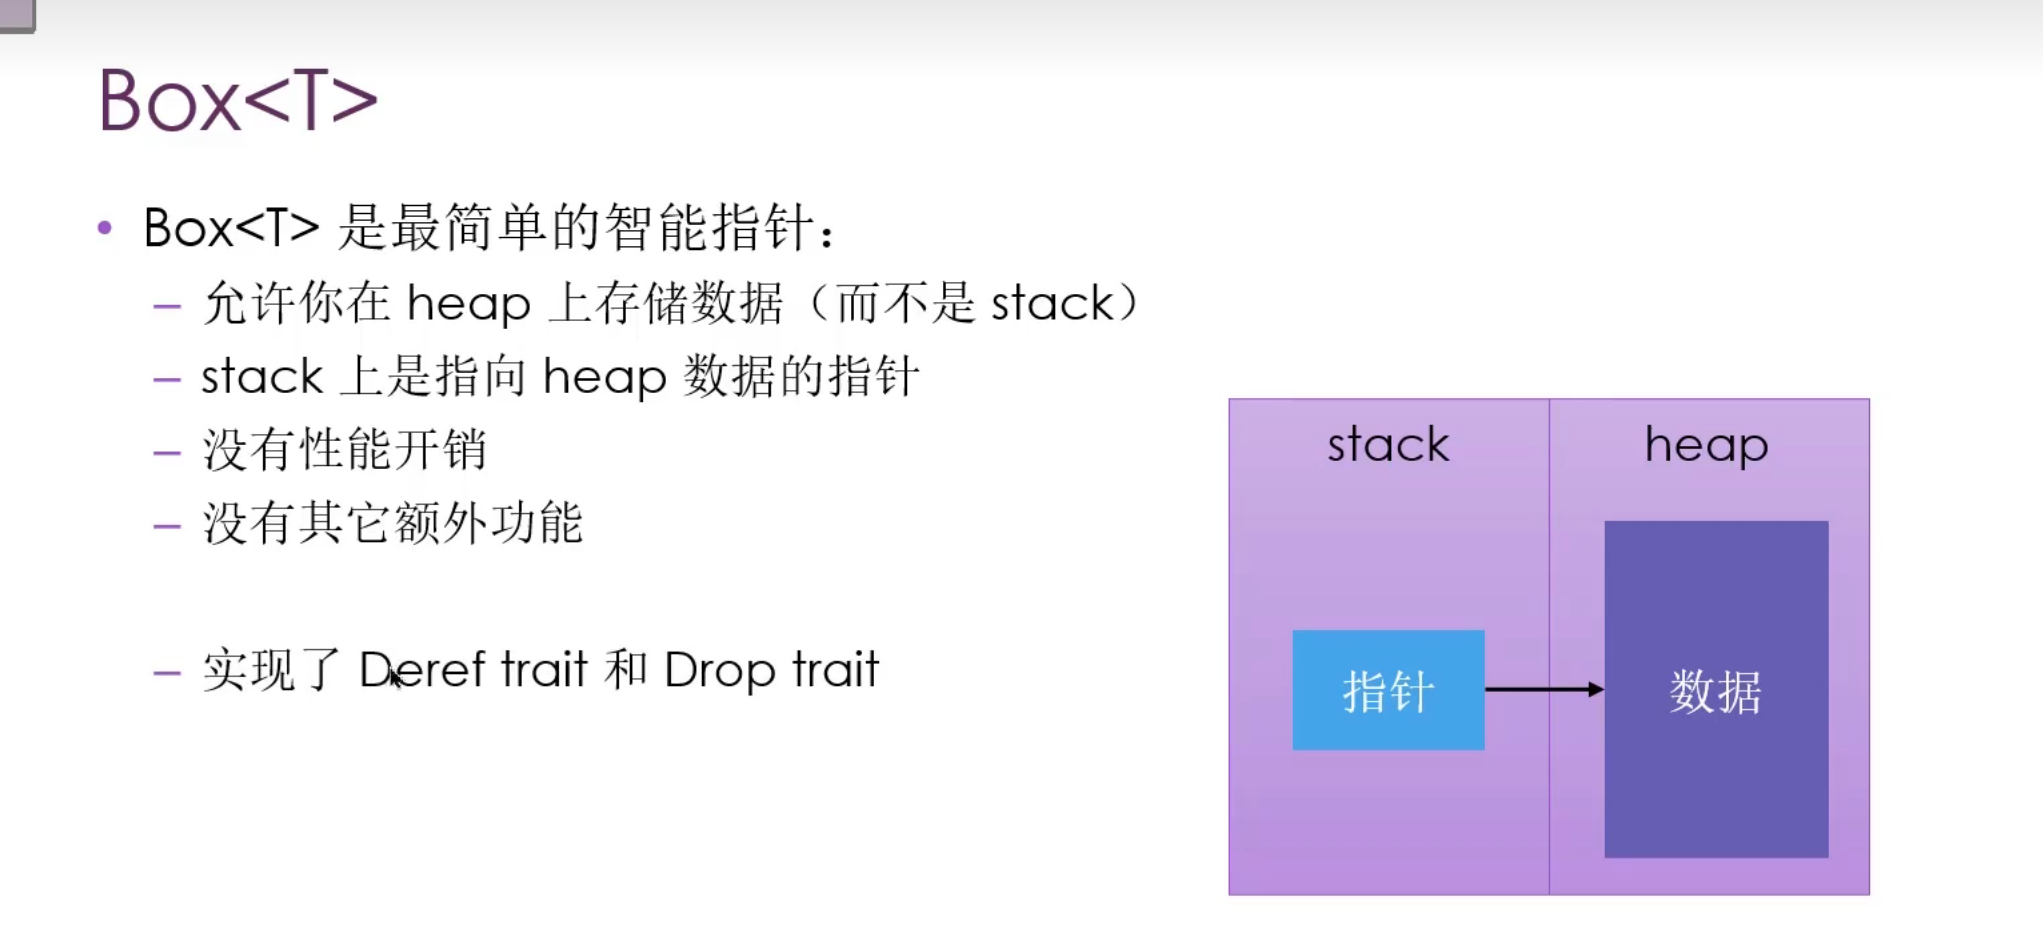
- 使用Box赋能递归类型
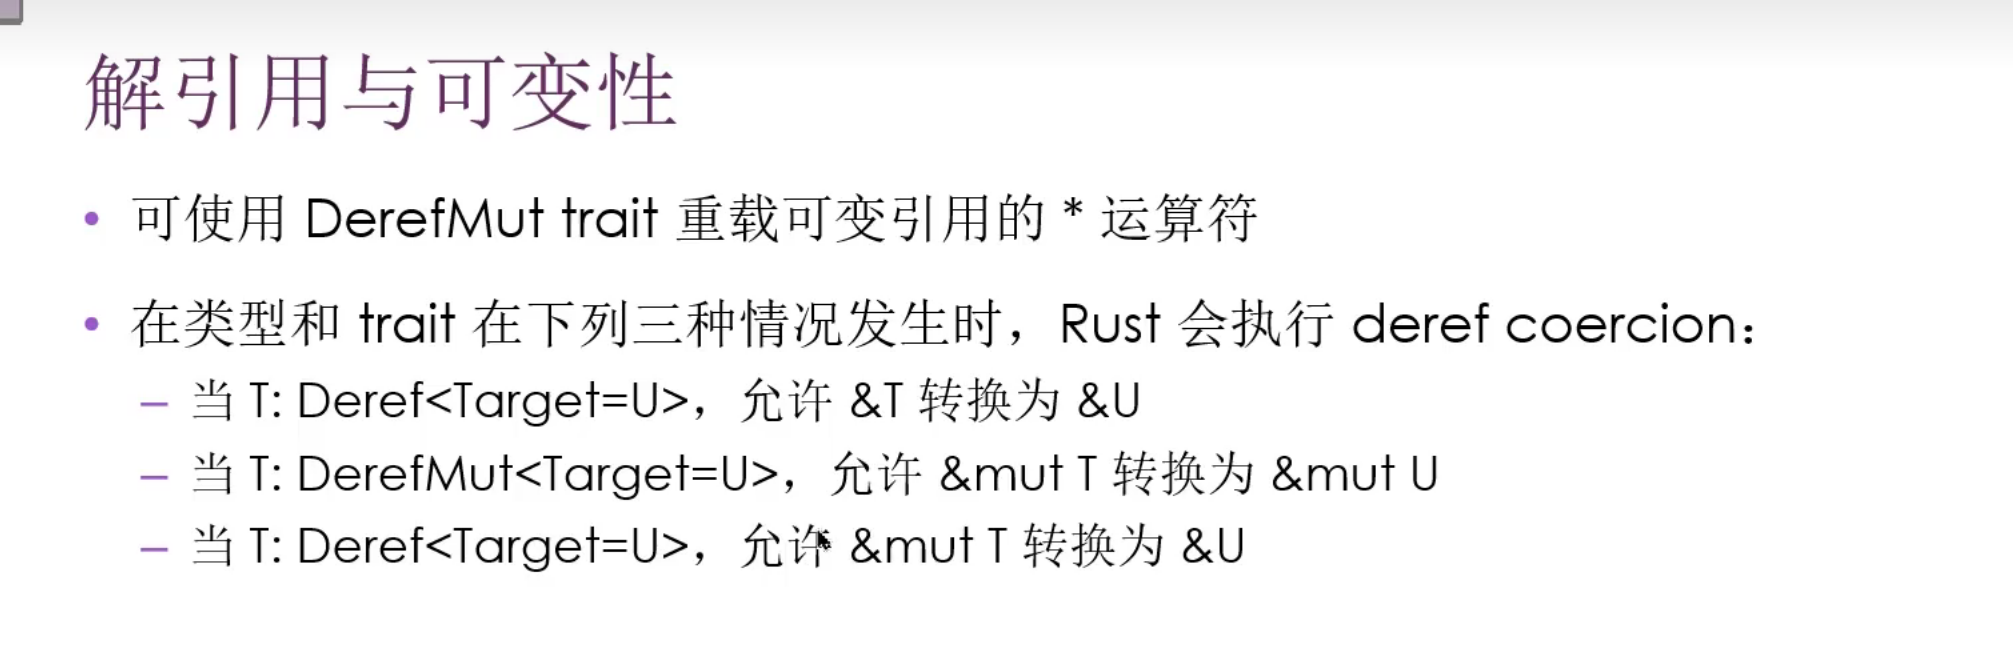
Deref Trait
- 可以自定义
*
Drop Trait
.png](/img/2026-1-15-Rust/.png)
- 不允许手动调用这个方法
Rc
- referrnce couting
- 一个值有多个所有者
- 使用场景
- 在heap上分配数据,这些数据被多个部分读取<只读>,但不确定谁是最后的使用者
- 不适用于多线程
- 不在预导入模块
- Rc::clone(&a)
-
Rc::strong_count(&a)
- 真的很难
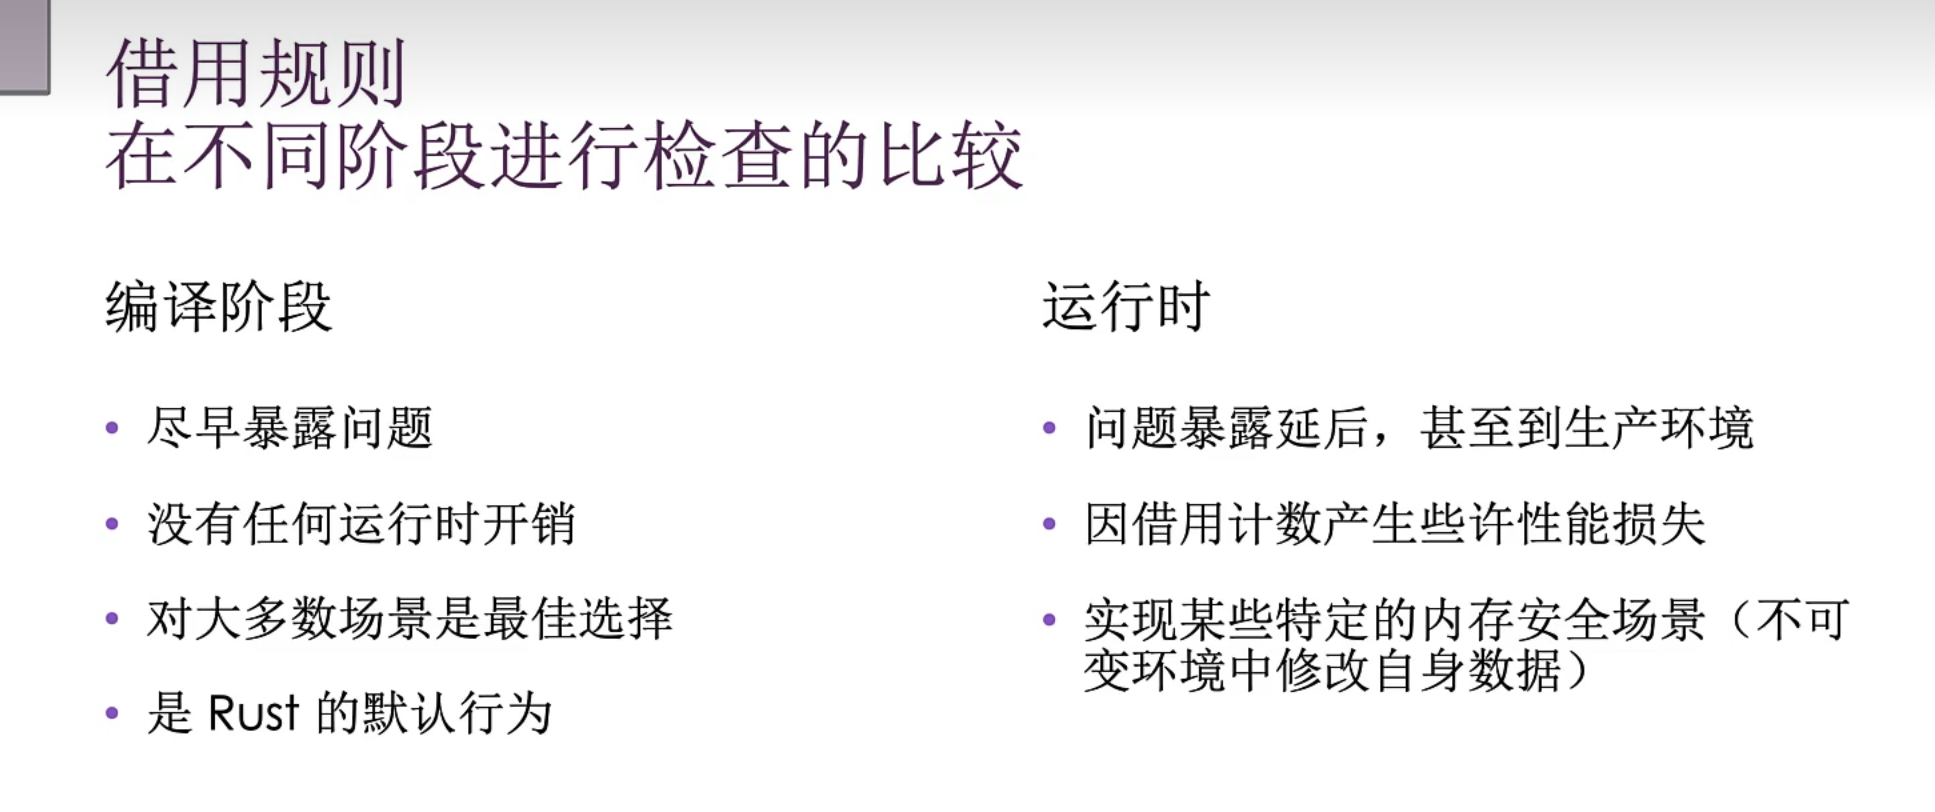
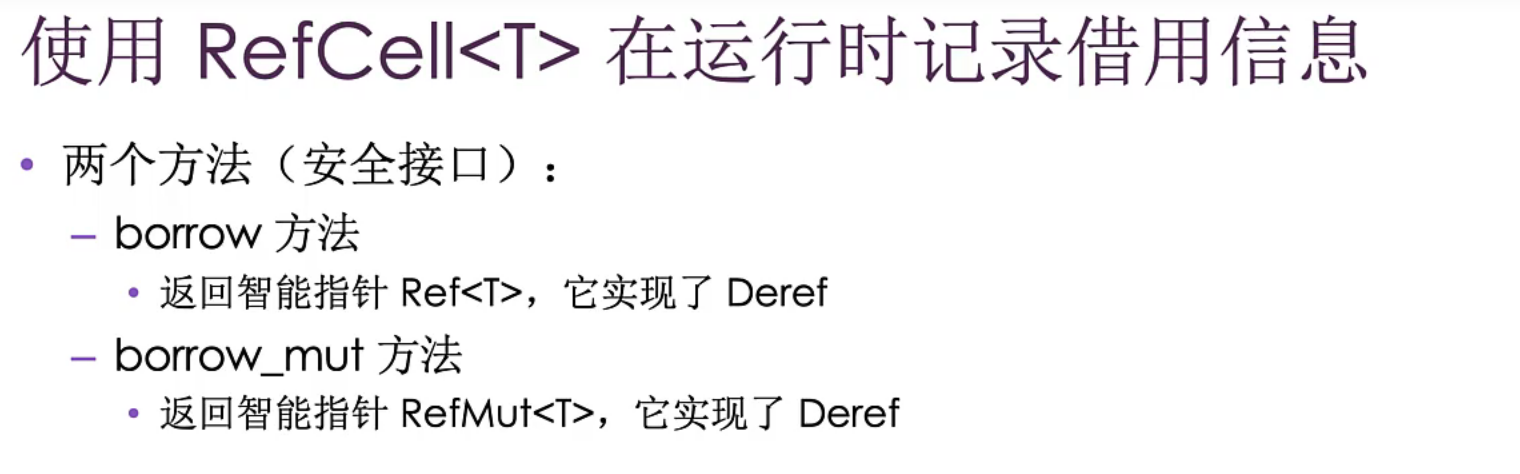
内部可变性
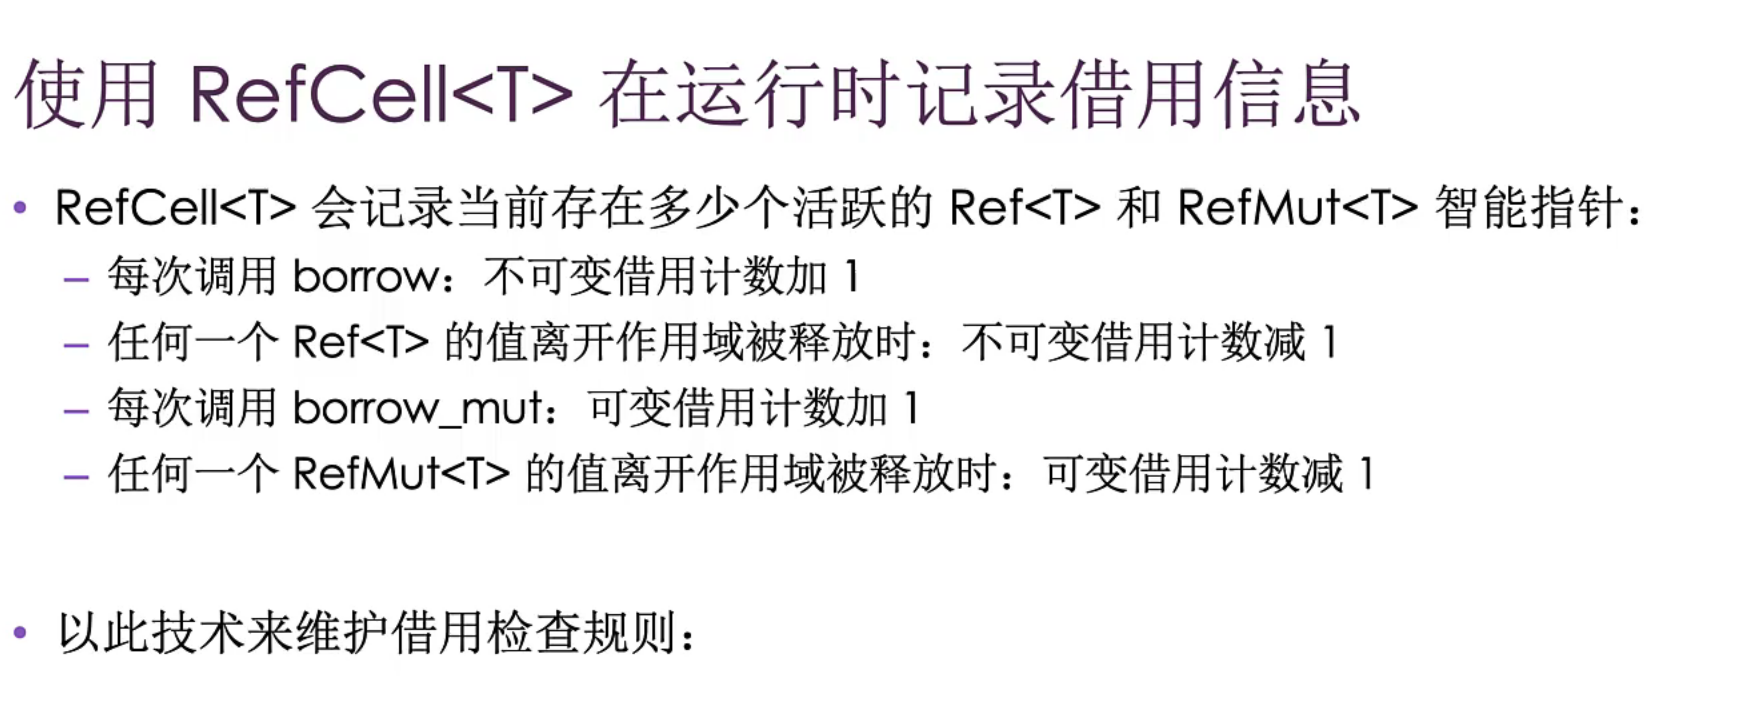
循环引用导致内存泄漏
1
2
3
4
5
6
7
8
9
10
11
12
13
14
15
16
17
18
19
20
21
22
23
24
25
use std::rc::Rc;

fn main() {
    // 1. 创建第一个强引用
    let strong_a = Rc::new(String::from("核心数据"));

    // 2. 创建第二个强引用(克隆)
    let strong_b = Rc::clone(&strong_a);

    println!("强引用数量: {}", Rc::strong_count(&strong_a)); // 输出: 2
}

use std::rc::Rc;

fn main() {
    let strong = Rc::new(5);

    // 3. 从强引用创建弱引用 (降级)
    let weak = Rc::downgrade(&strong);

    println!("强引用: {}, 弱引用: {}",
             Rc::strong_count(&strong),
             Rc::weak_count(&strong)); // 输出: 强引用: 1, 弱引用: 1
}
多线程
- Concurrent:并发
- Parallel:并行
线程
- Rust标准库仅提供1:1模型的线程
- 第三方库有M:N模型
1
2
3
4
5
6
7
8
9
10
11
12
13
14
15
16
use std::thread;
use std::time::Duration;

pub fn run(){
    let handler = thread::spawn(|| {
        for i in 1..10{
            println!("hi, I am {i}");
            thread::sleep(Duration::from_secs(1));
        }
    });
    for i in 1..5{
        println!("hi, I am {i}");
        thread::sleep(Duration::from_secs(1));
    }
    handler.join().unwrap()
}
move闭包
1
2
3
4
5
6
7
pub fn run(){
    let v = vec![1,2,3,1,2];
    let handler = thread::spawn(move || {
        println!("this is {:?}" ,v)
    });
    handler.join().unwrap()
}
消息传递Channel
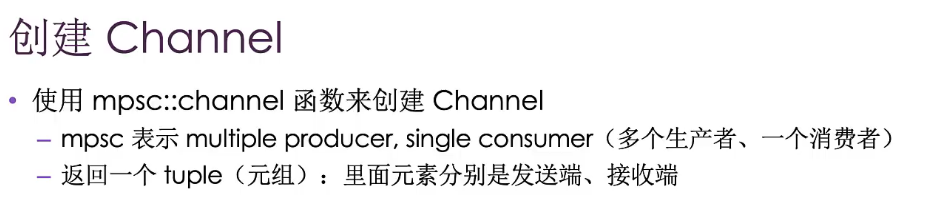
recv()会阻塞当前线程- 有值就返回Result<T,E>
- 发送端关闭,就会收到一个错误
try_recv()不会阻塞- 有数据旧Ok()
- 没有就返回错误
- 通常循环
try_recv
1
2
3
4
5
6
7
8
9
10
11
12
13
14
15
16
17
pub fn run(){
    let sleep = |x| {
        thread::sleep(Duration::from_secs(x));
    };

    let (tx,rx) = mpsc::channel();
    thread::spawn(move || {
       let val = String::from("hi");
        sleep(2);
        tx.send(val).unwrap();
        println!("I have sent my message")
    });
    println!("I am doing my Work");
    sleep(1);
    let received = rx.recv().unwrap();
    println!("Got : {received}")
}
- 可以发送多个值
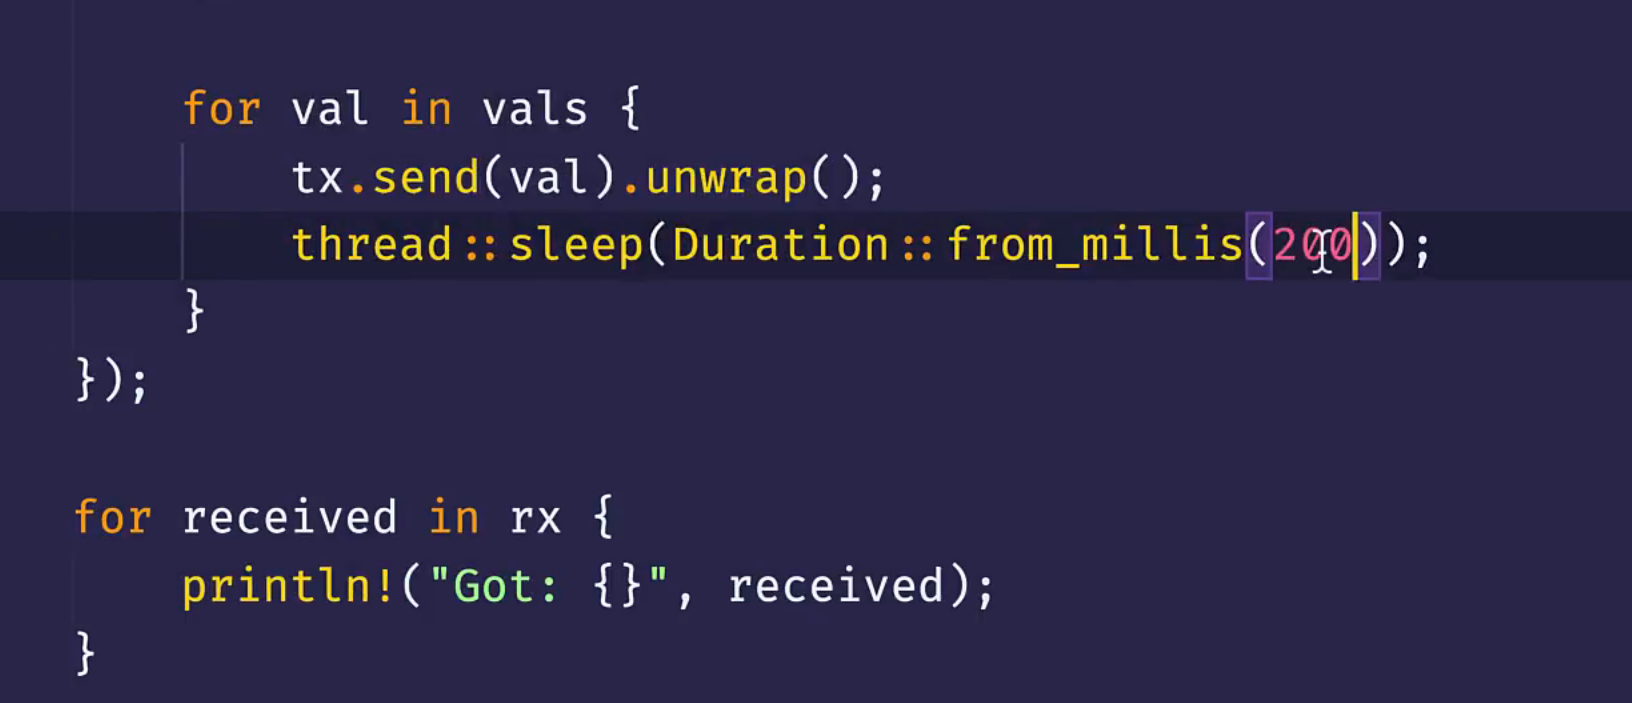
- 可以clone发送者
共享内存的并发
- Channel是单所有权
- 共享内存是多所有权
- Mutex:互斥锁
- 同一时刻只允许一个人访问
- 先得获得lock
- Mutex::new(data)
1
2
3
4
5
6
7
8
9
10
11
pub fn run(){
    let m = Mutex::new(5);
    {
        // 会阻塞当前线程,直到获得锁或者失败
        let mut num = m.lock().unwrap();

        println!("num = {num}");
        *num = 6;
    }//自动释放锁
    println!("num = {:?}",m);
}
- Arc: atomic Rc可以用于并发
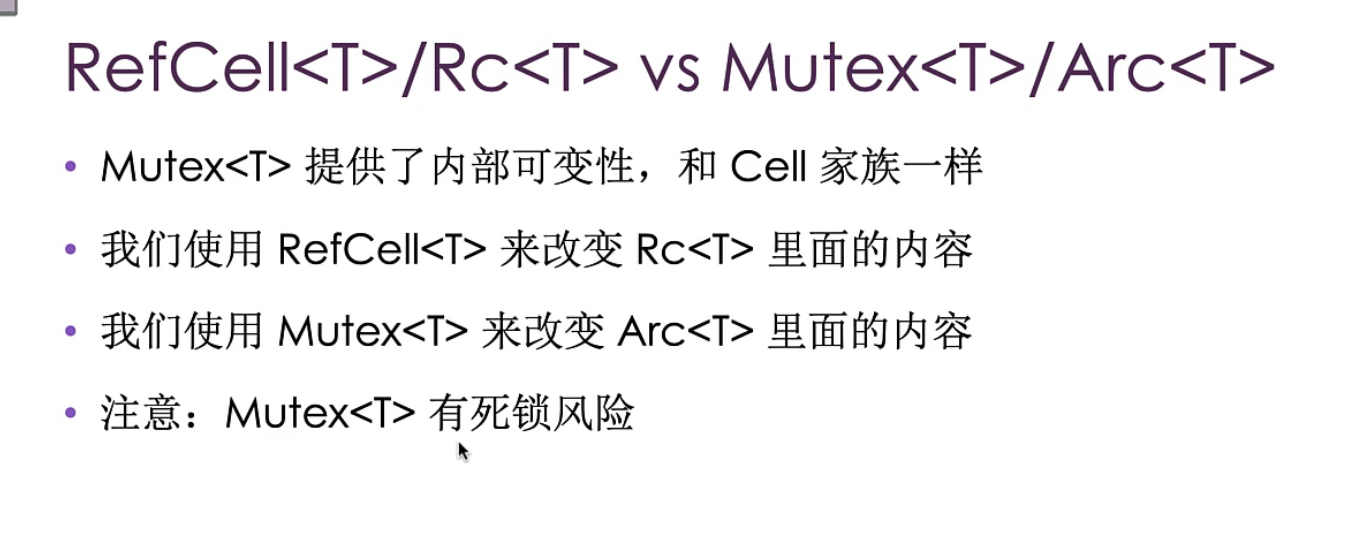
RefCell/Rc VS Mutex/Arc
Send 和 Sync
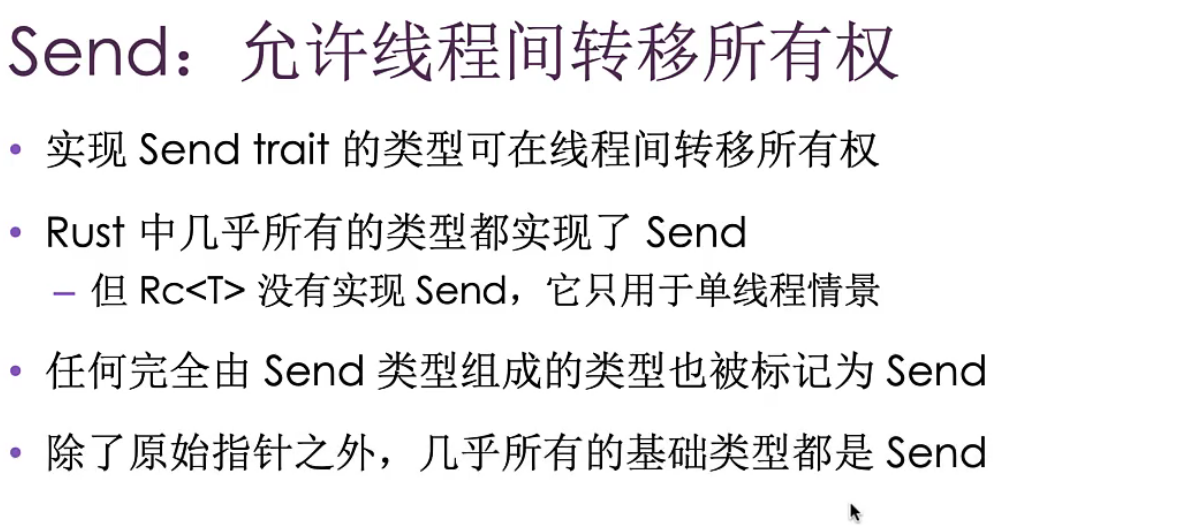
- std::marker::Send : 允许线程间转换所有权
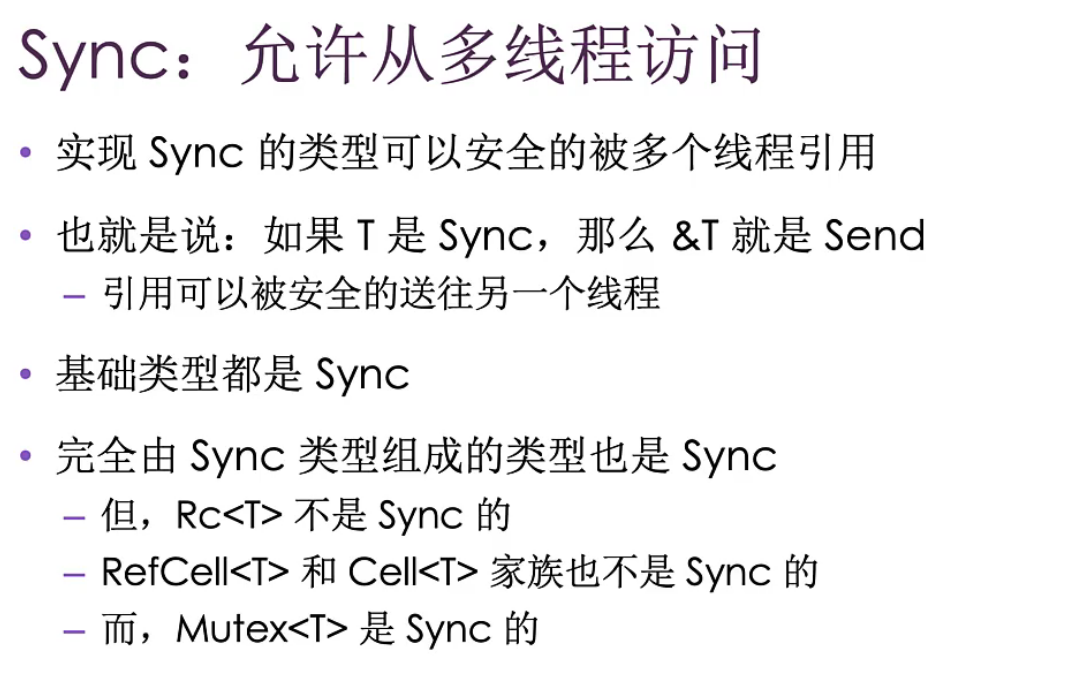
- Sync

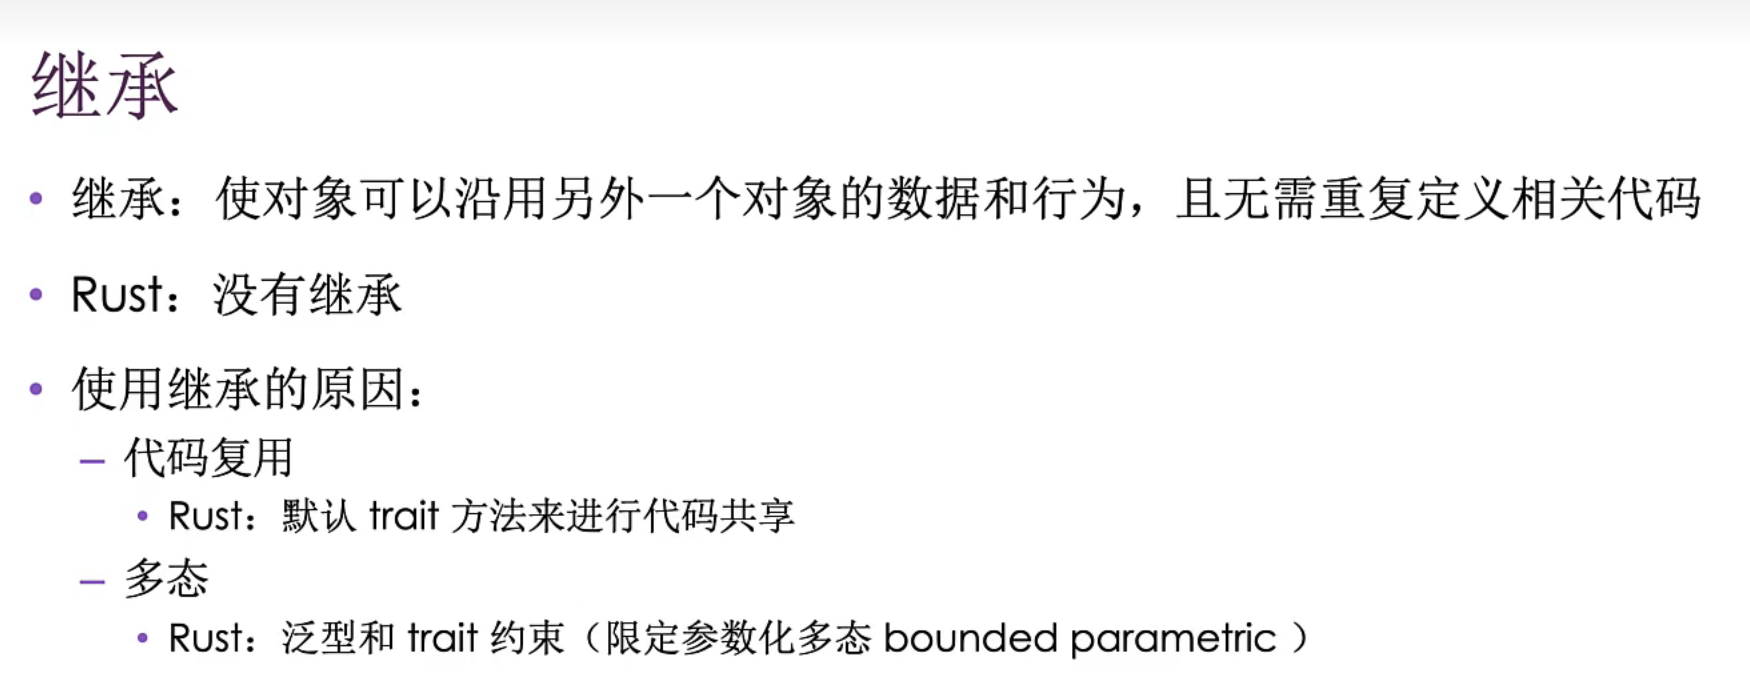
面向对象
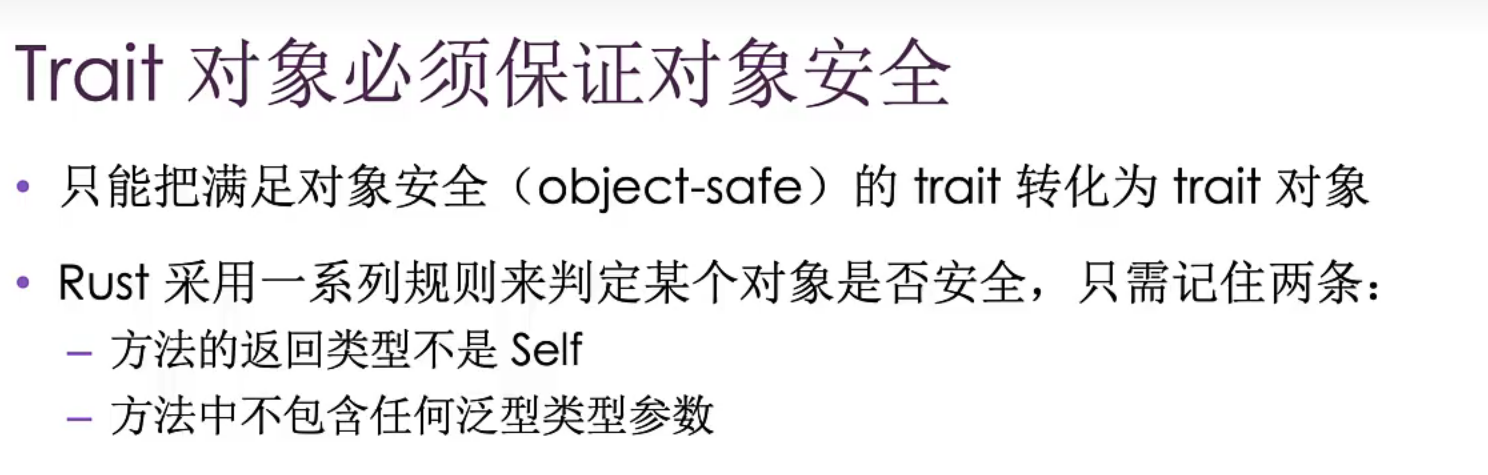
状态模式
模式
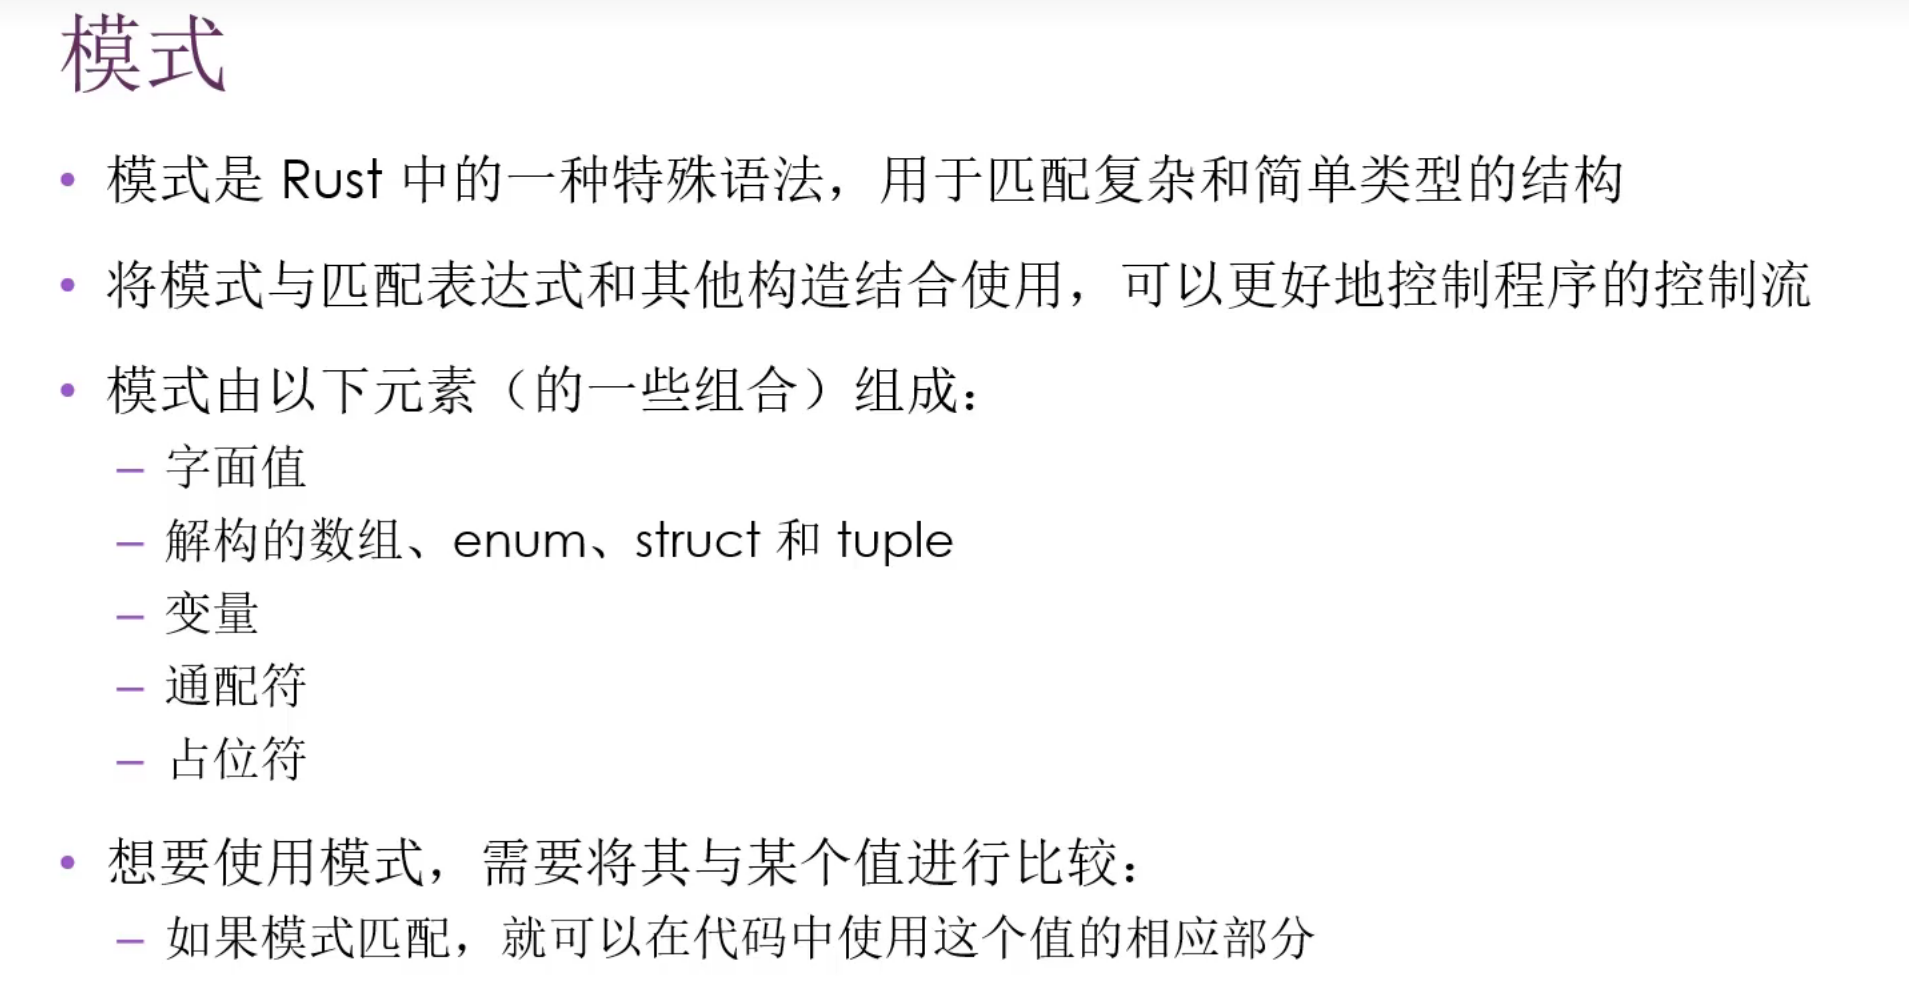
- match:
- if let
- for (index, value) in aaa
- let (a,b,c) = (1,2,3);
- fn foo(&(x,y))
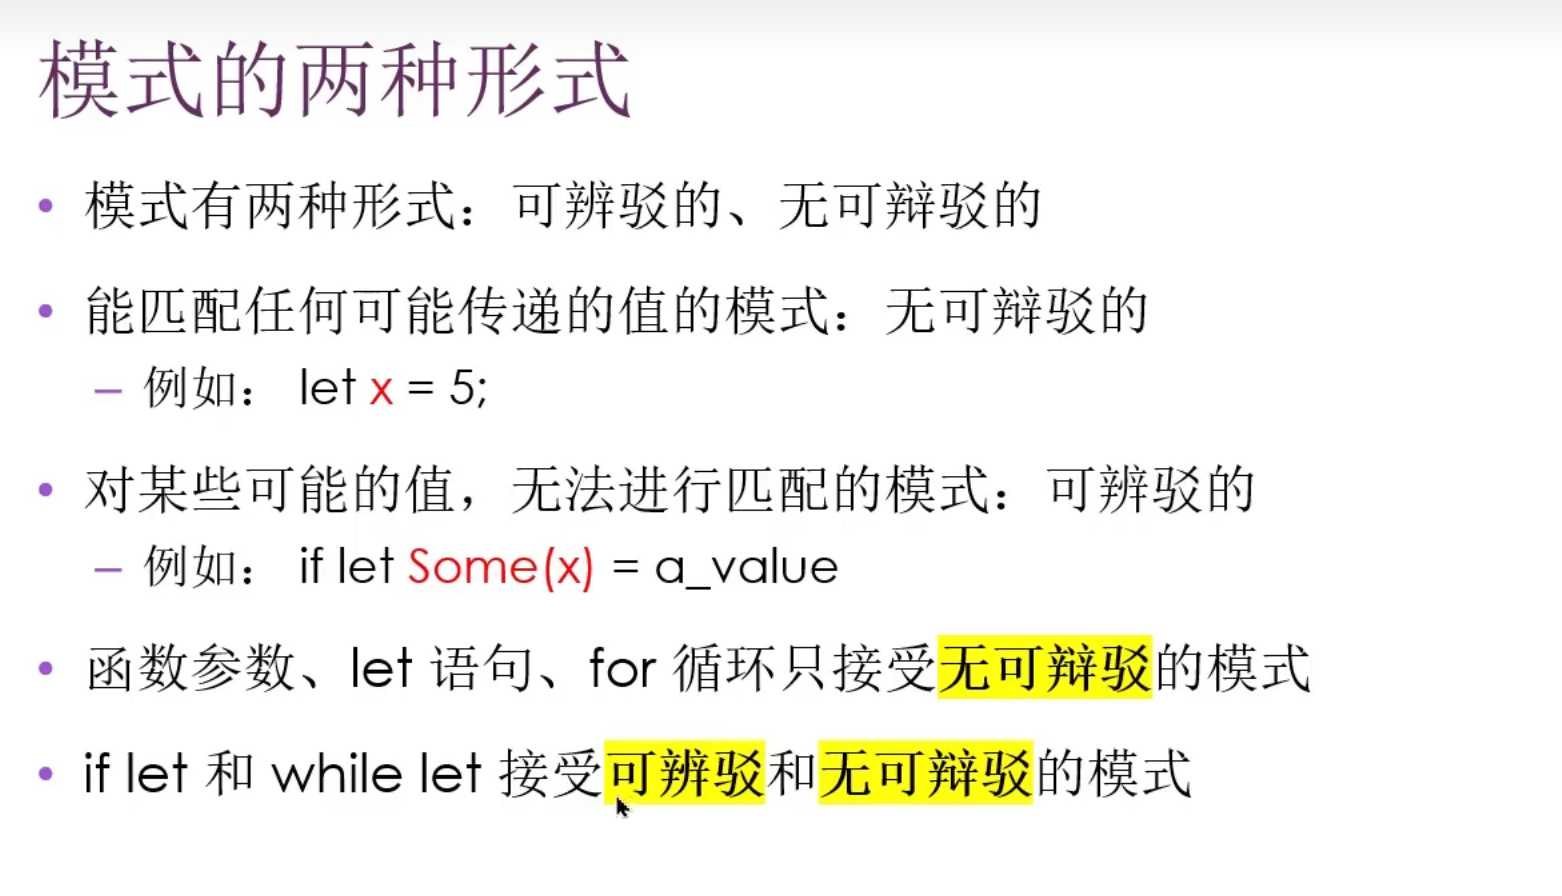
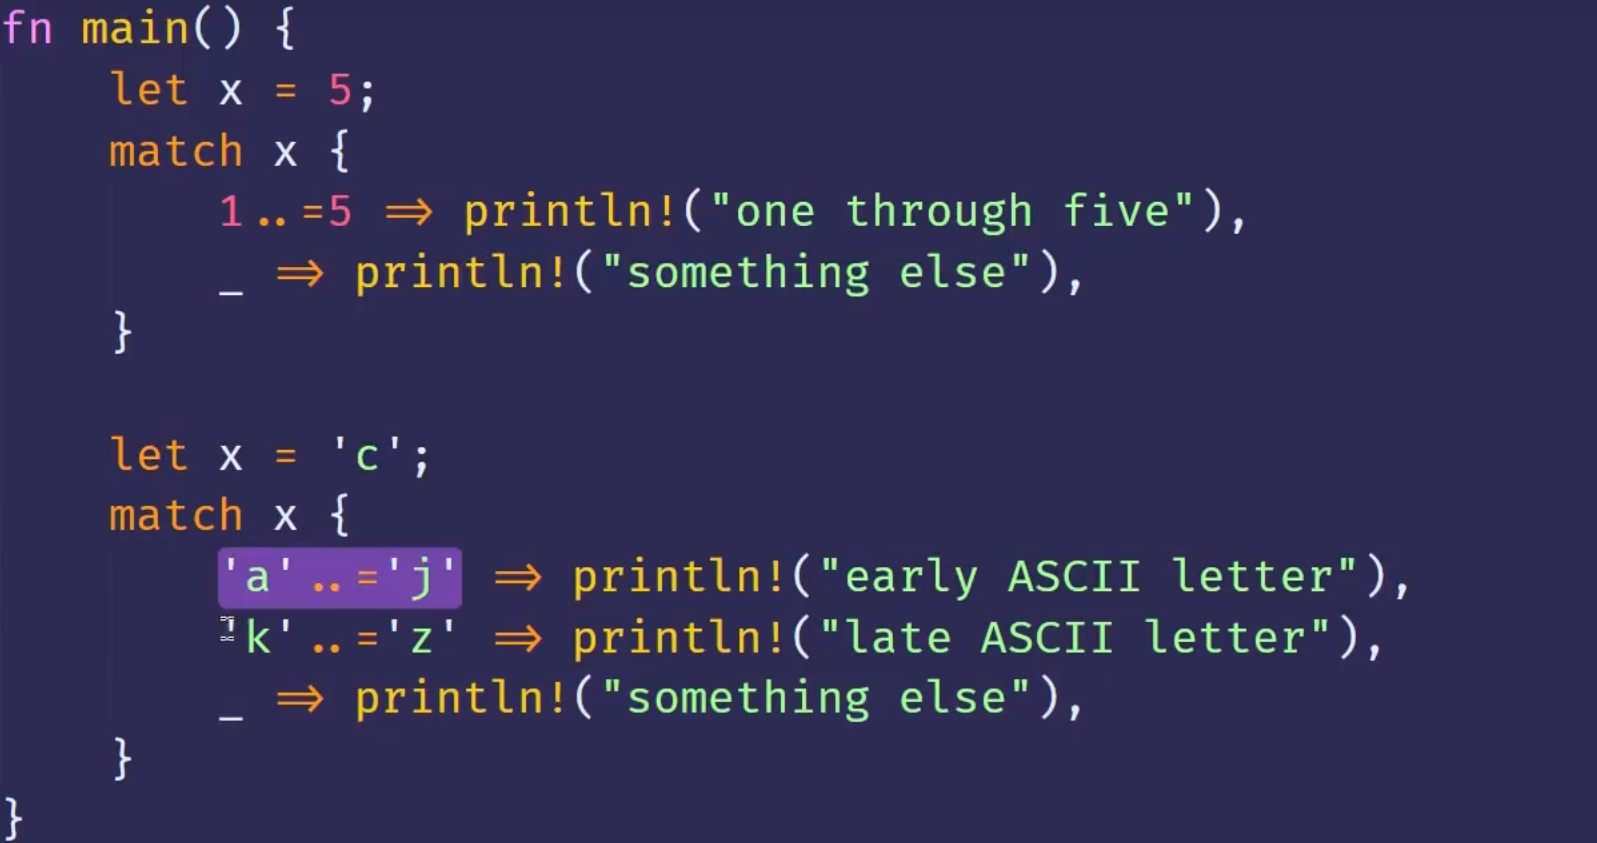
..=匹配范围
- struct解构,
..省略其他字段
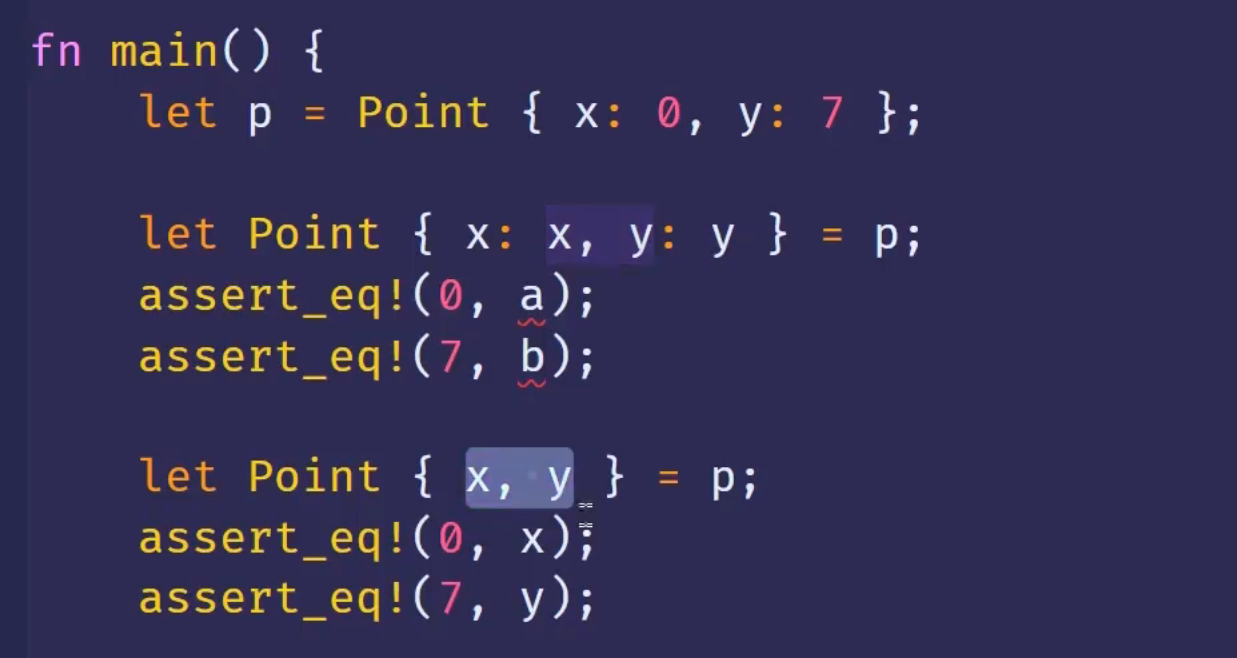
-
解构枚举,主要是枚举太6了,里面啥值都能存,所以要注意解构的方式
_忽略值,fn()_a这样命名变量,就不会发生警告没使用
1
2
3
4
5
let s = Some(String::form("fdjhkasfd"));

if let Some(_) = s {  //这样s的所有权不会被夺走

}
match守卫
1
2
3
4
5
6
7
let num = Some(4);
match num {
    Some(x) if x < 5 => println!("less than five:{}",x),
    Some(x) if x = y => println("{}",x),
    Some(1)|Some(2)|Some(3) => println!(),
    None => (),
}
@
@可以让我们在测试某个值是否模式匹配的同时保存这个值
1
2
3
4
5
6
7
8
9
10
11
12
struct MyStruct {
    id: u32,
}

let s = MyStruct { id: 5 };

// 使用 @ 符号将匹配到的值绑定到 new_id 变量上
if let MyStruct { id: new_id @ 3..=10 } = s {
    println!("匹配成功!新的变量名是: {},且它在 3 到 10 之间", new_id);
}

//孩子遇见这种雷霆语法的你还不笑吗
高级Rust
Unsafe Rust
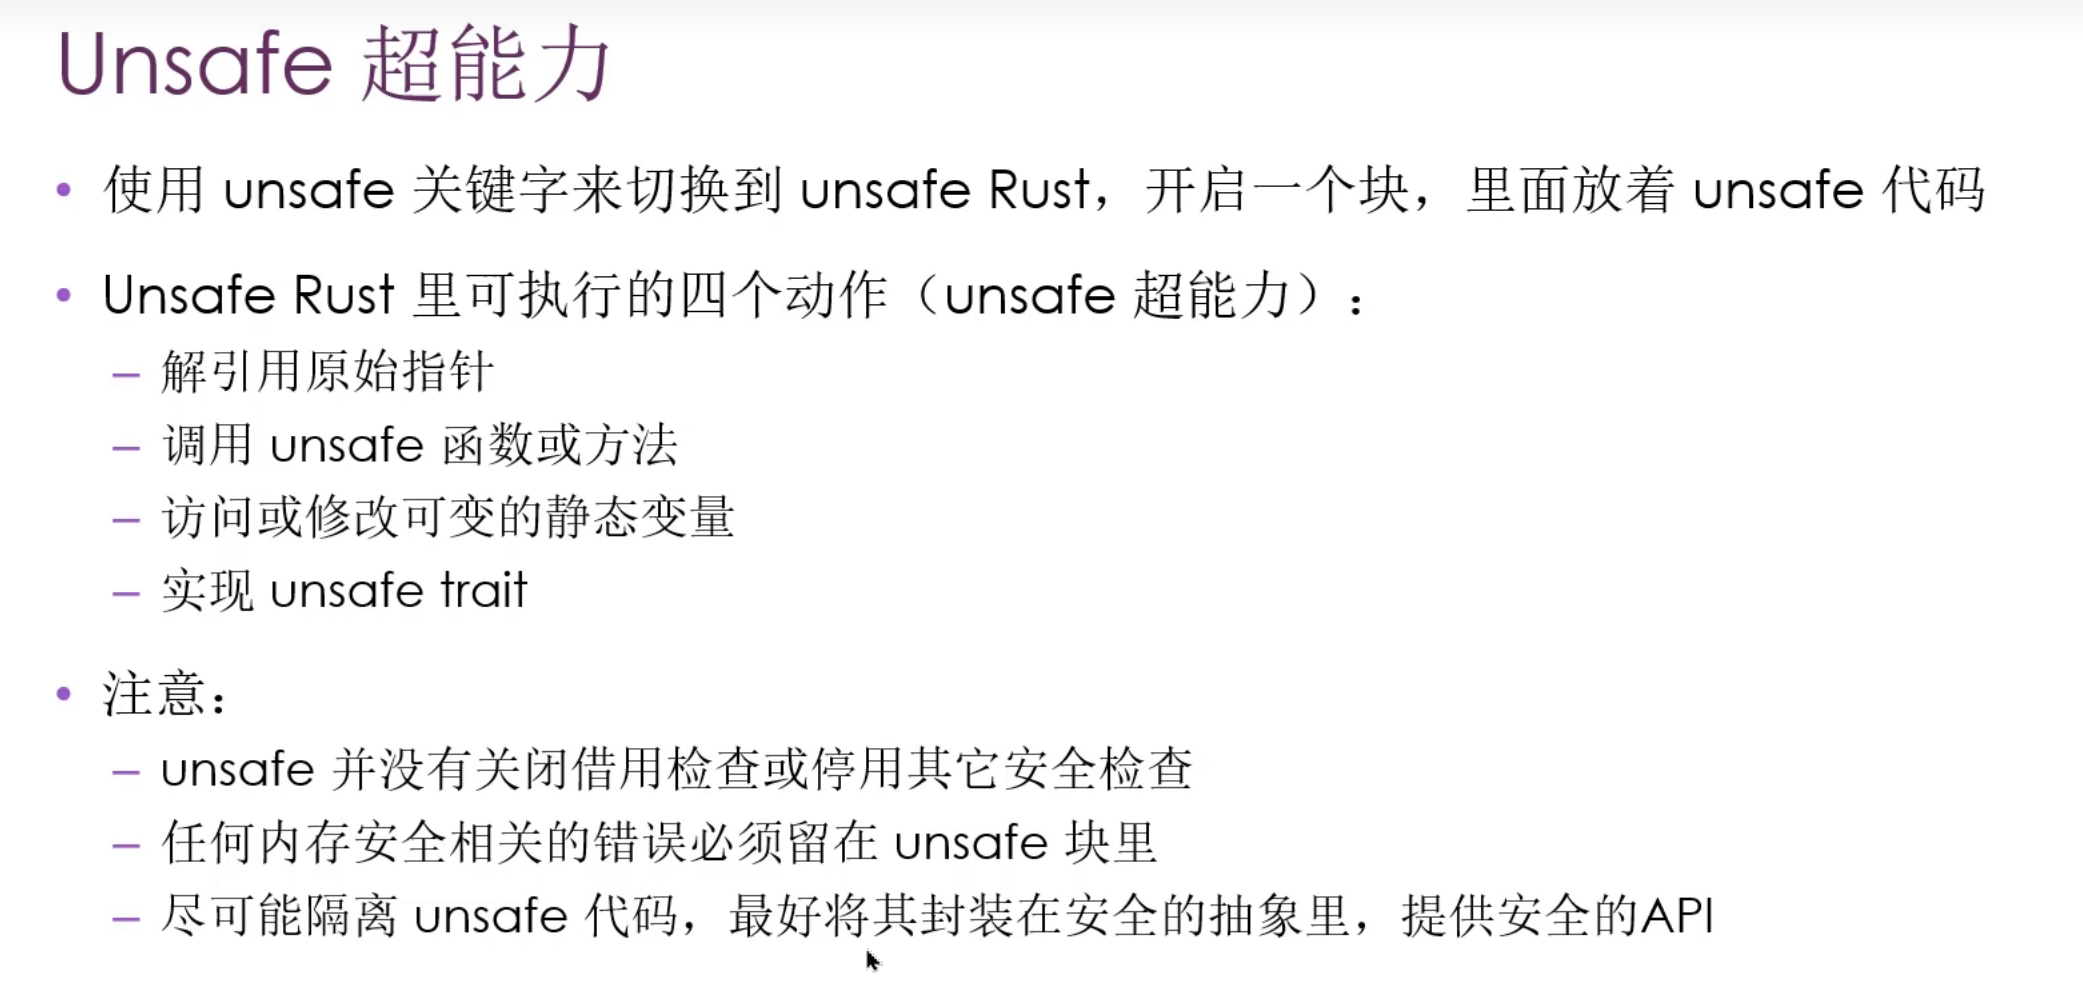
- 解引用原始指针
*mut T*const T
1
2
3
4
5
6
7
8
9
10
11
12
13
14
15
pub fn run(){
    let mut num =5;
    let r1 = &num as *const i32;
    let r2 = &mut num as *mut i32;

    let wide_ptr = 0x012564usize;
    let r = wide_ptr as *const i32;

    unsafe {
        println!("{}",*r1);
        println!("{}",*r2);
        println!("{}",*r);
    }

}
- unsafe函数的调用
1
2
3
4
5
6
unsafe fn dangerous(){}
pub fn run(){
  unsafe {
      dangerous()
  }
}
- 创建unsafe代码的安全抽象
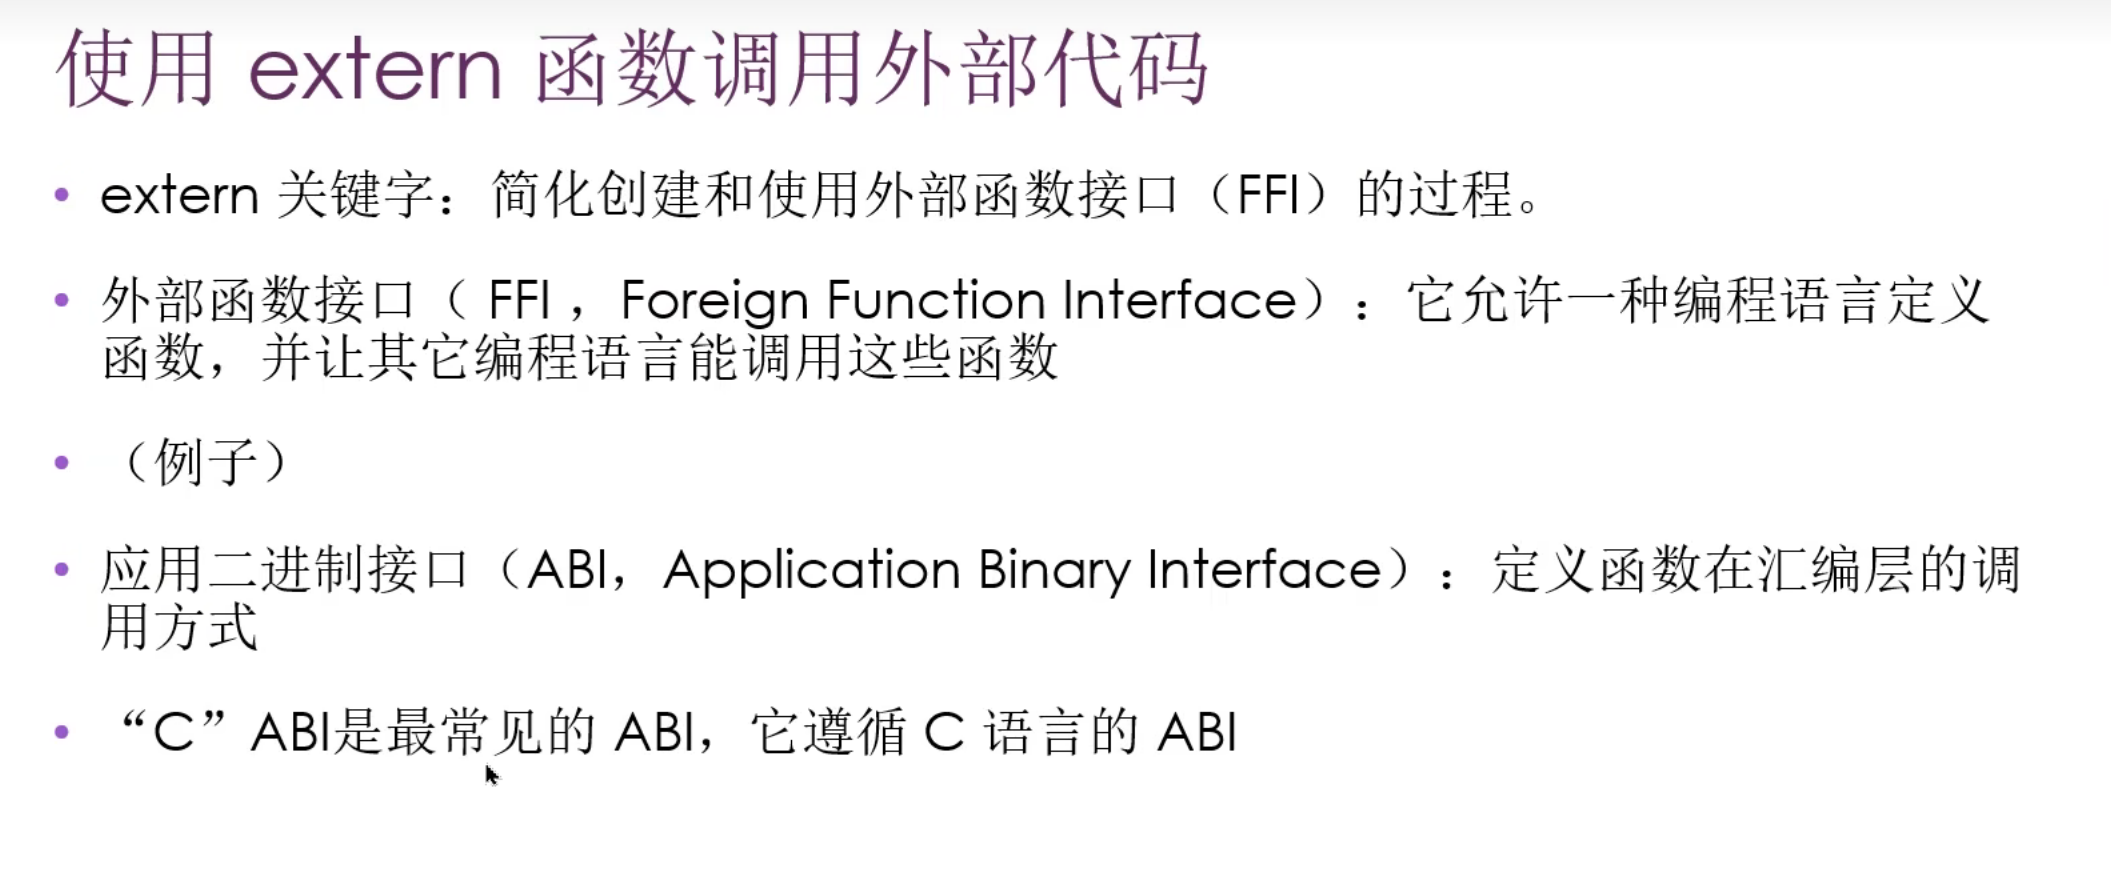
extern
- extren块默认unsafe
1
2
3
extern "C" {

}
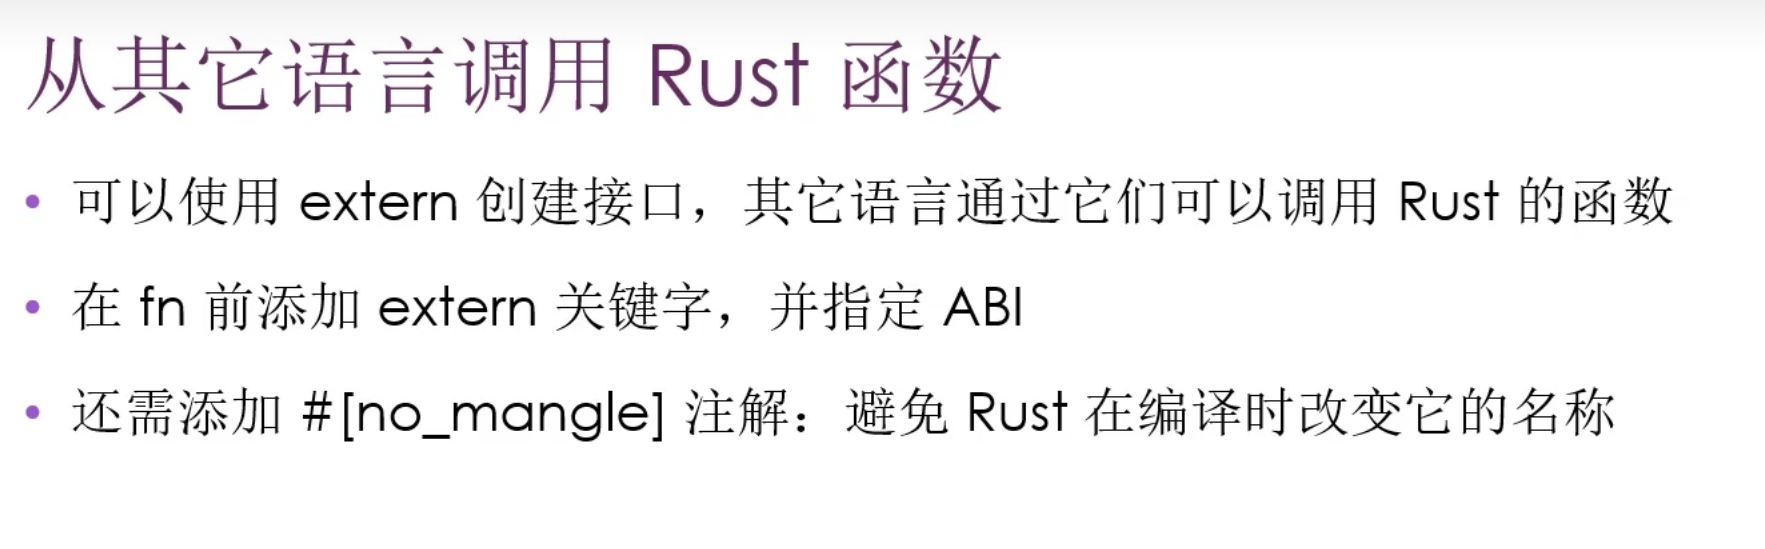
- 这个下面其他语言调用rust则不需要unsafe
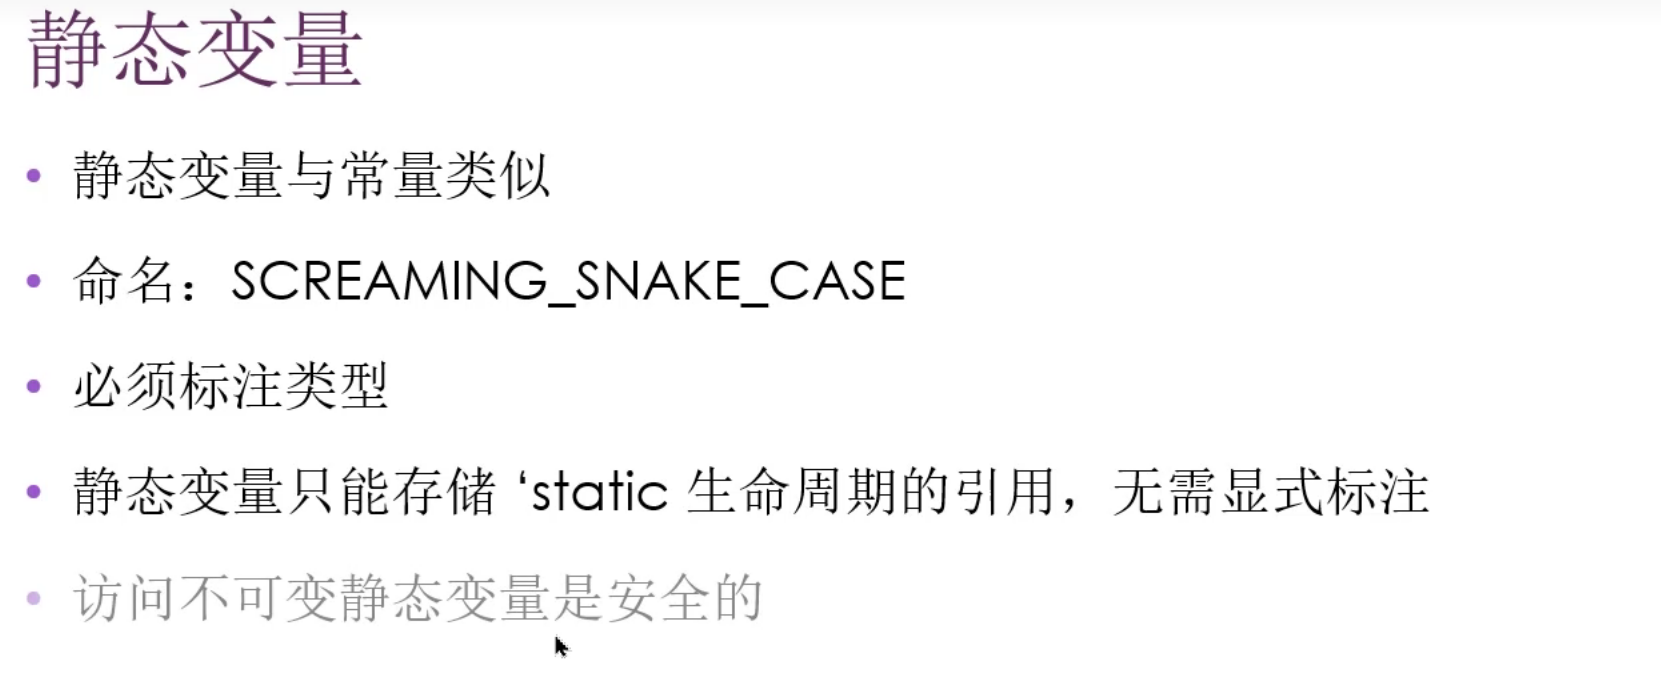
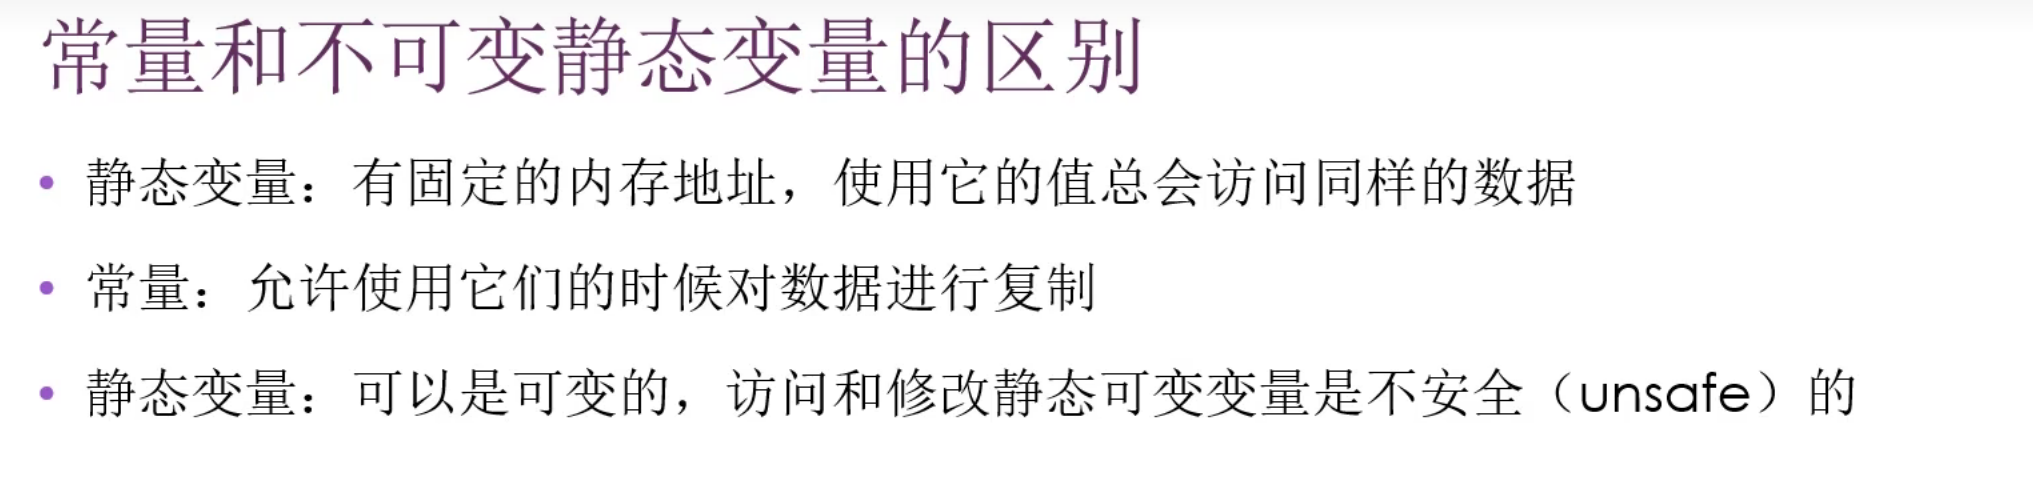
全局变量
- static 标注声明
'static
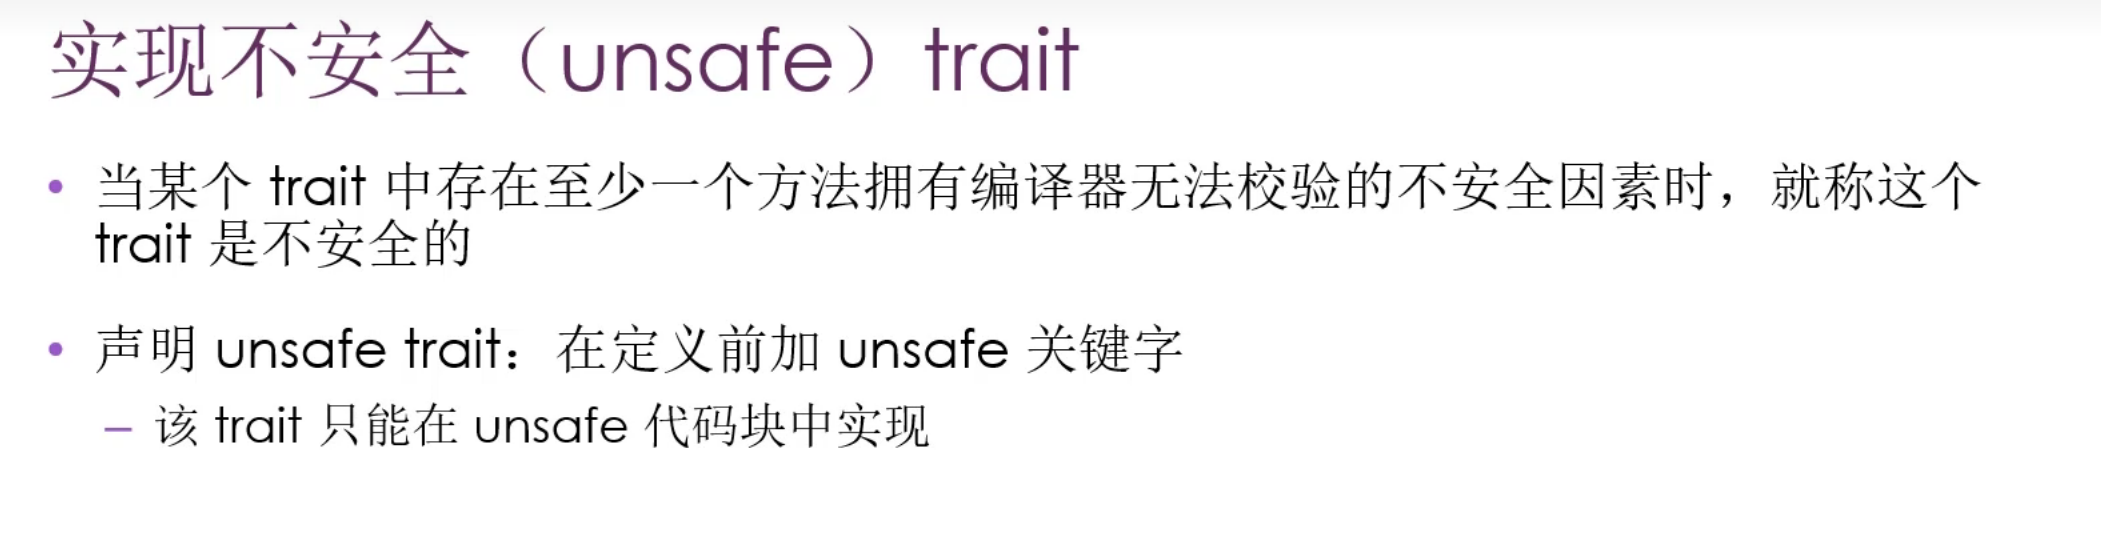
unsafe trait
高级Trait
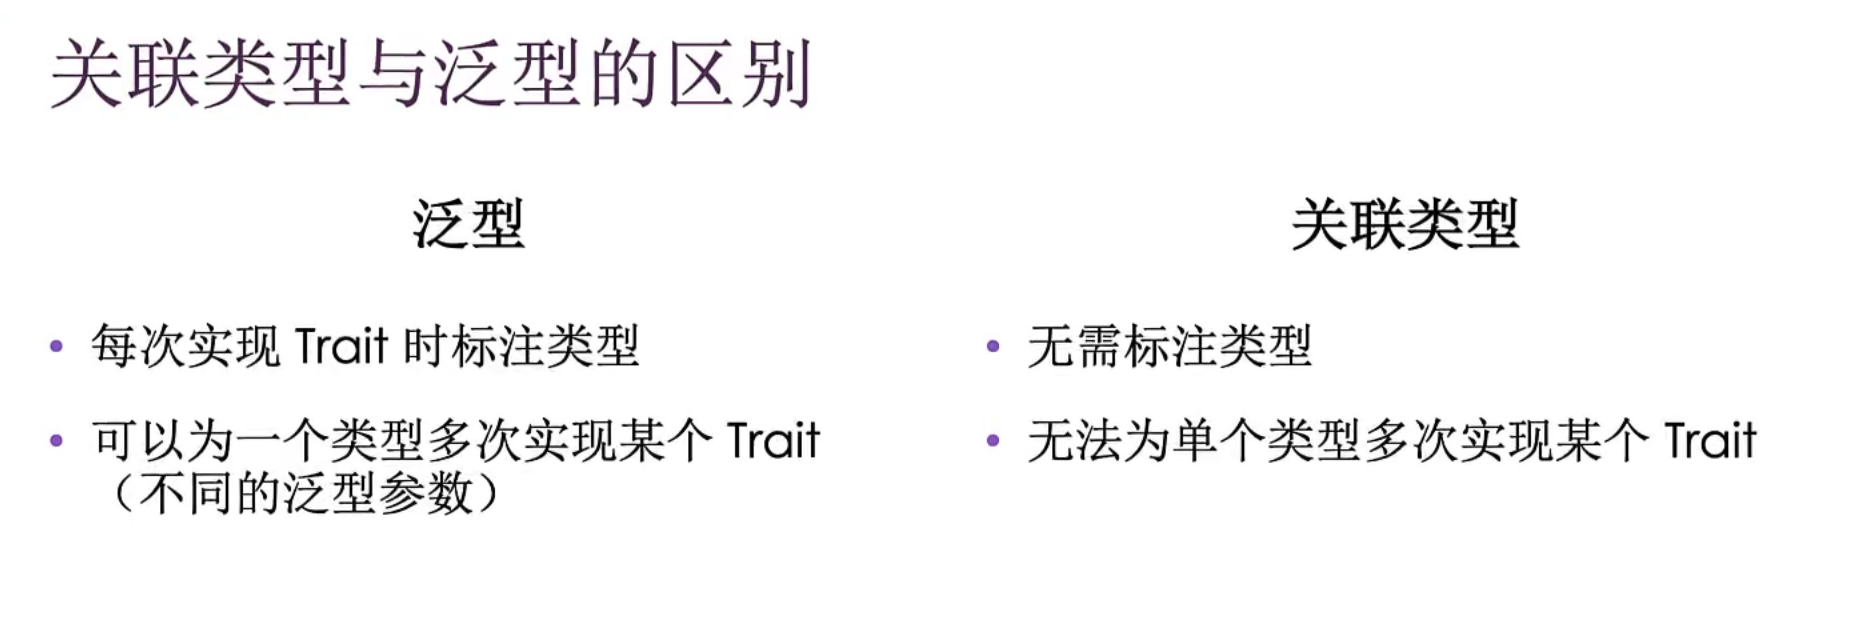
关联类型associated type
默认泛型参数类型
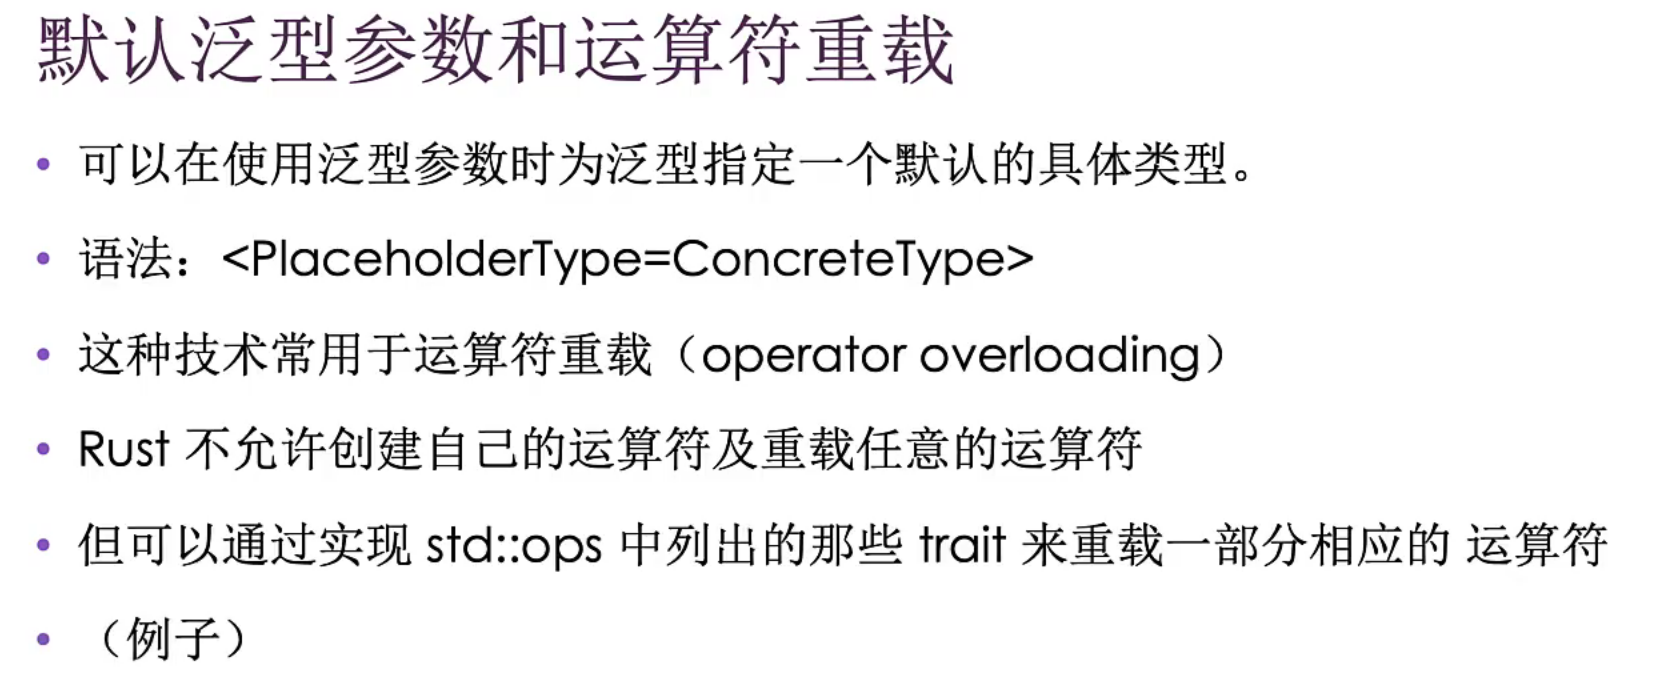
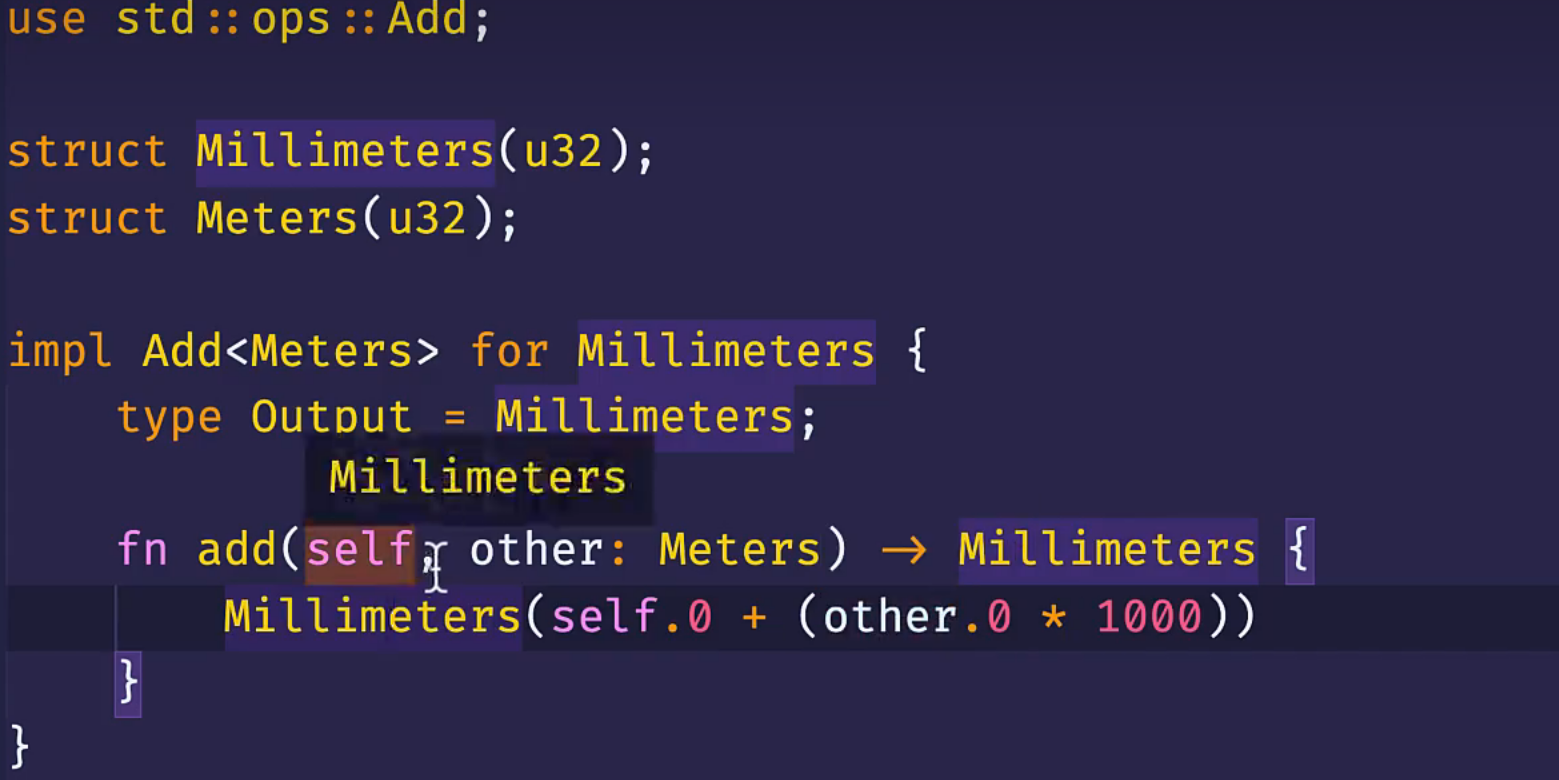
- rust中方法重载的解决办法
student.say()调用的是student的say方法Person::say(&student)sudent实现了Person的trait,如果想调用Person的say,就使用其他语言中多继承的解决办法
- 完全限定语法
1
2
3
4
5
Dog::baby_name();

Animal::baby_name(); //报错,根本不能这样搞,分不清animal是dog还是cat
<Dog as Animal>::baby_name();
supertrait
1
2
3
trait OutlinePoint: fmt::Display{

}
高级类型
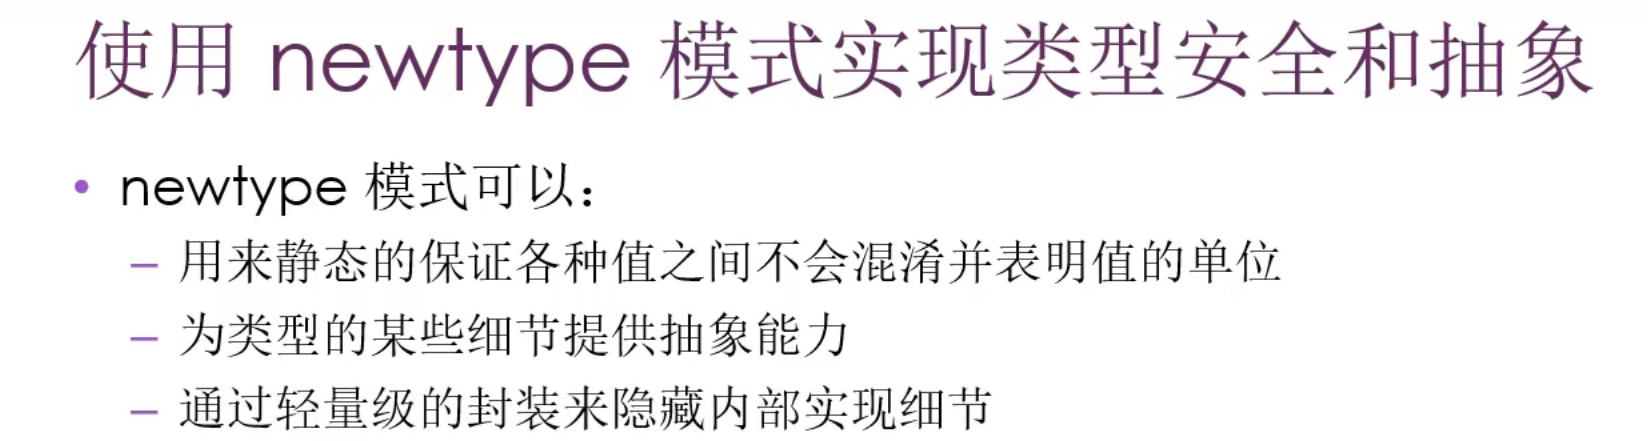
newtype模式在外部类型上实现外部trait
- 其实就是代理,你不允许我这么做,我就给你包装一层,在新的一层上做
new type
1
2
3
4
type kilometers = i32;
//如果你觉得用处不大不妨看看这个

type Thunk = Box<dyn Fn()+Send+'static'>;
never
- rust有
!这种类型 !表示没有类型,所以有些情况会被强制转换为其他类型返回
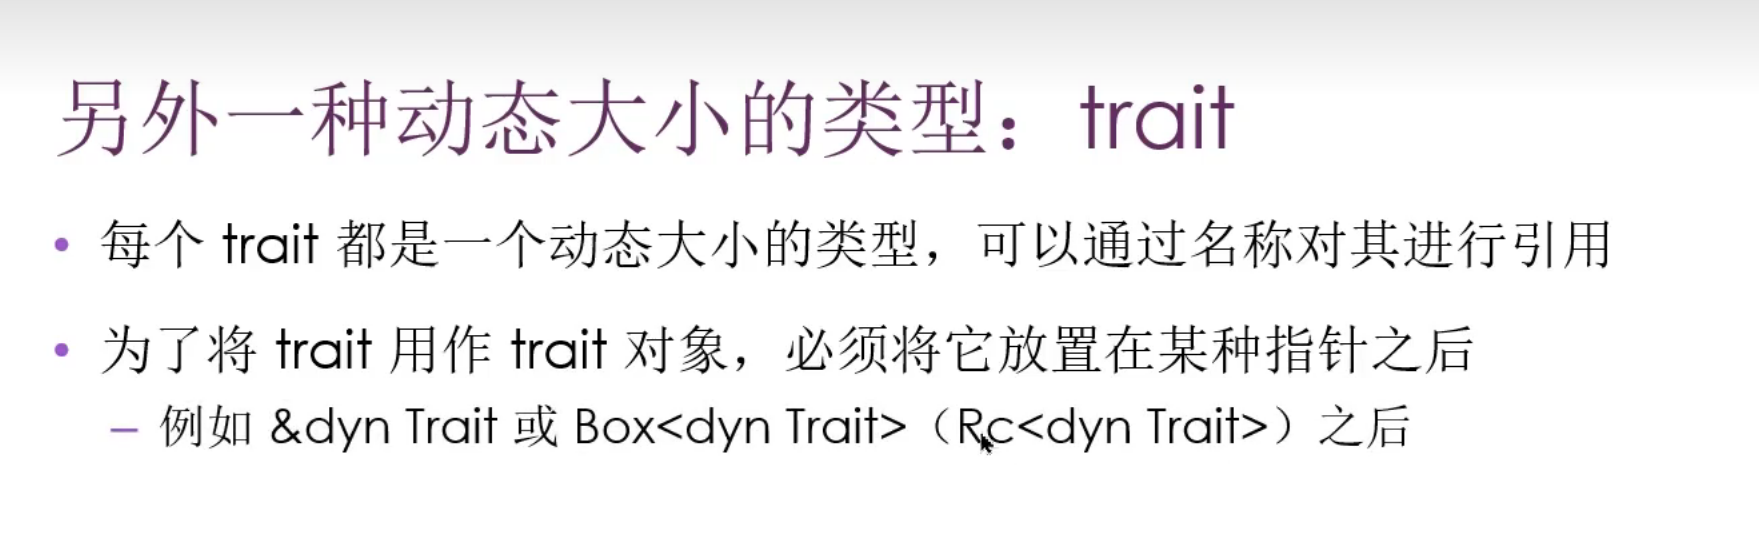
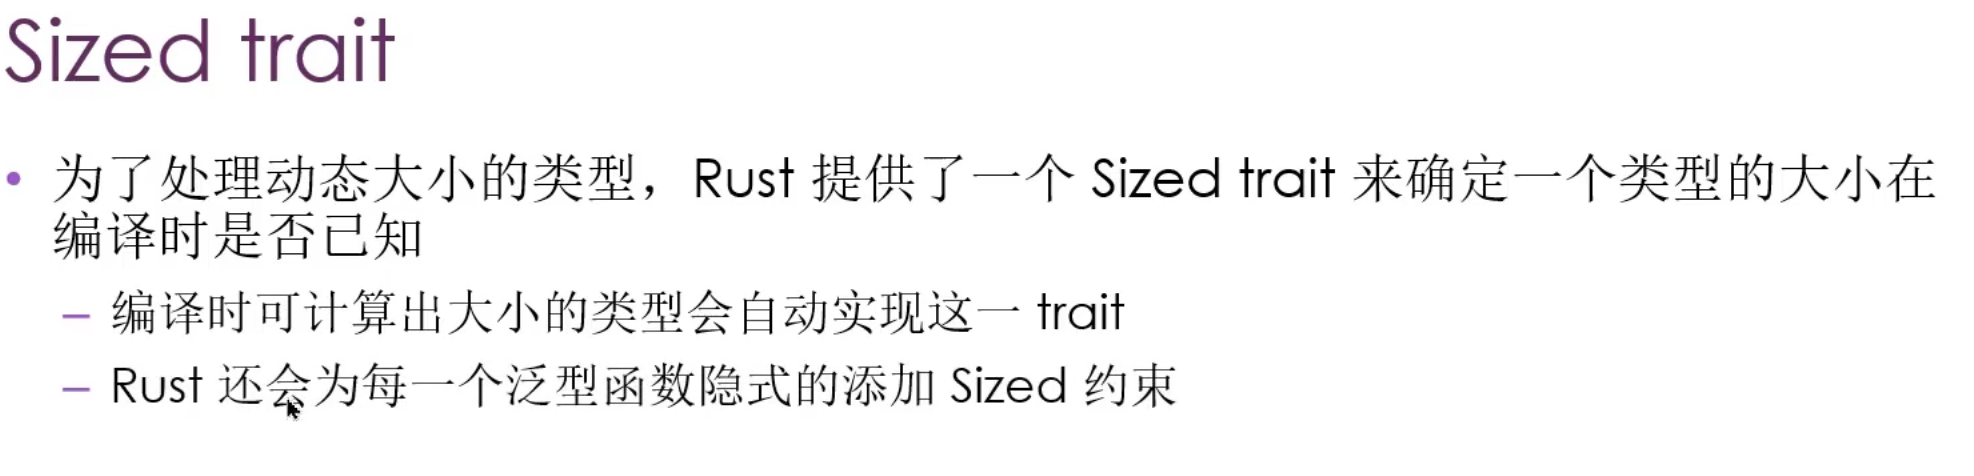
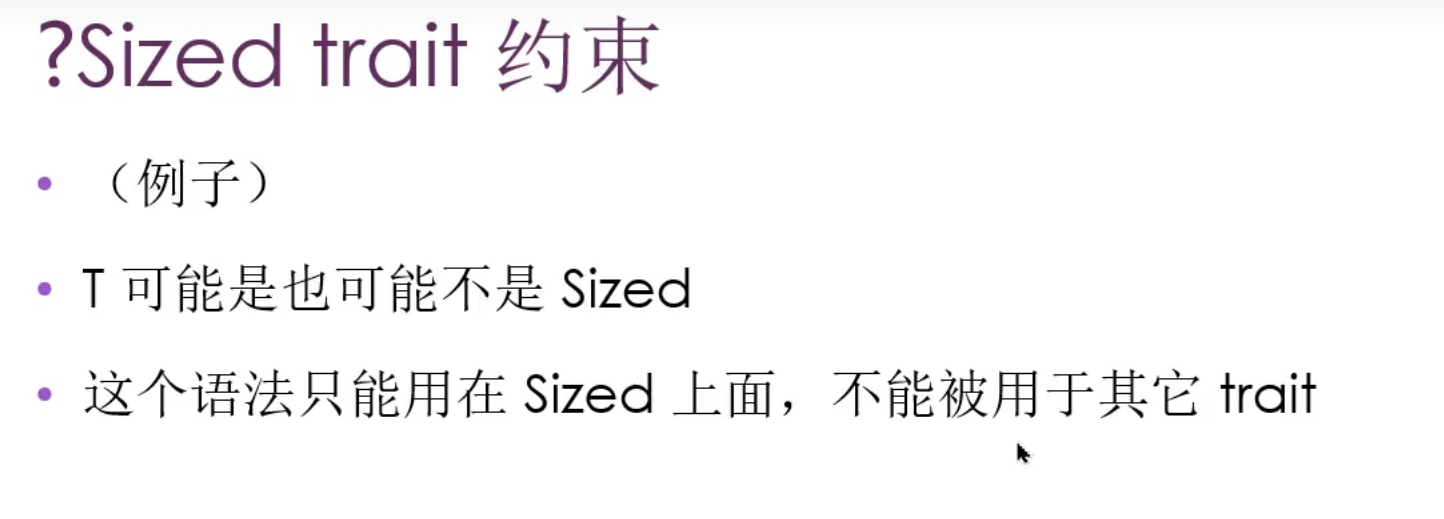
动态大小和Sized Trait
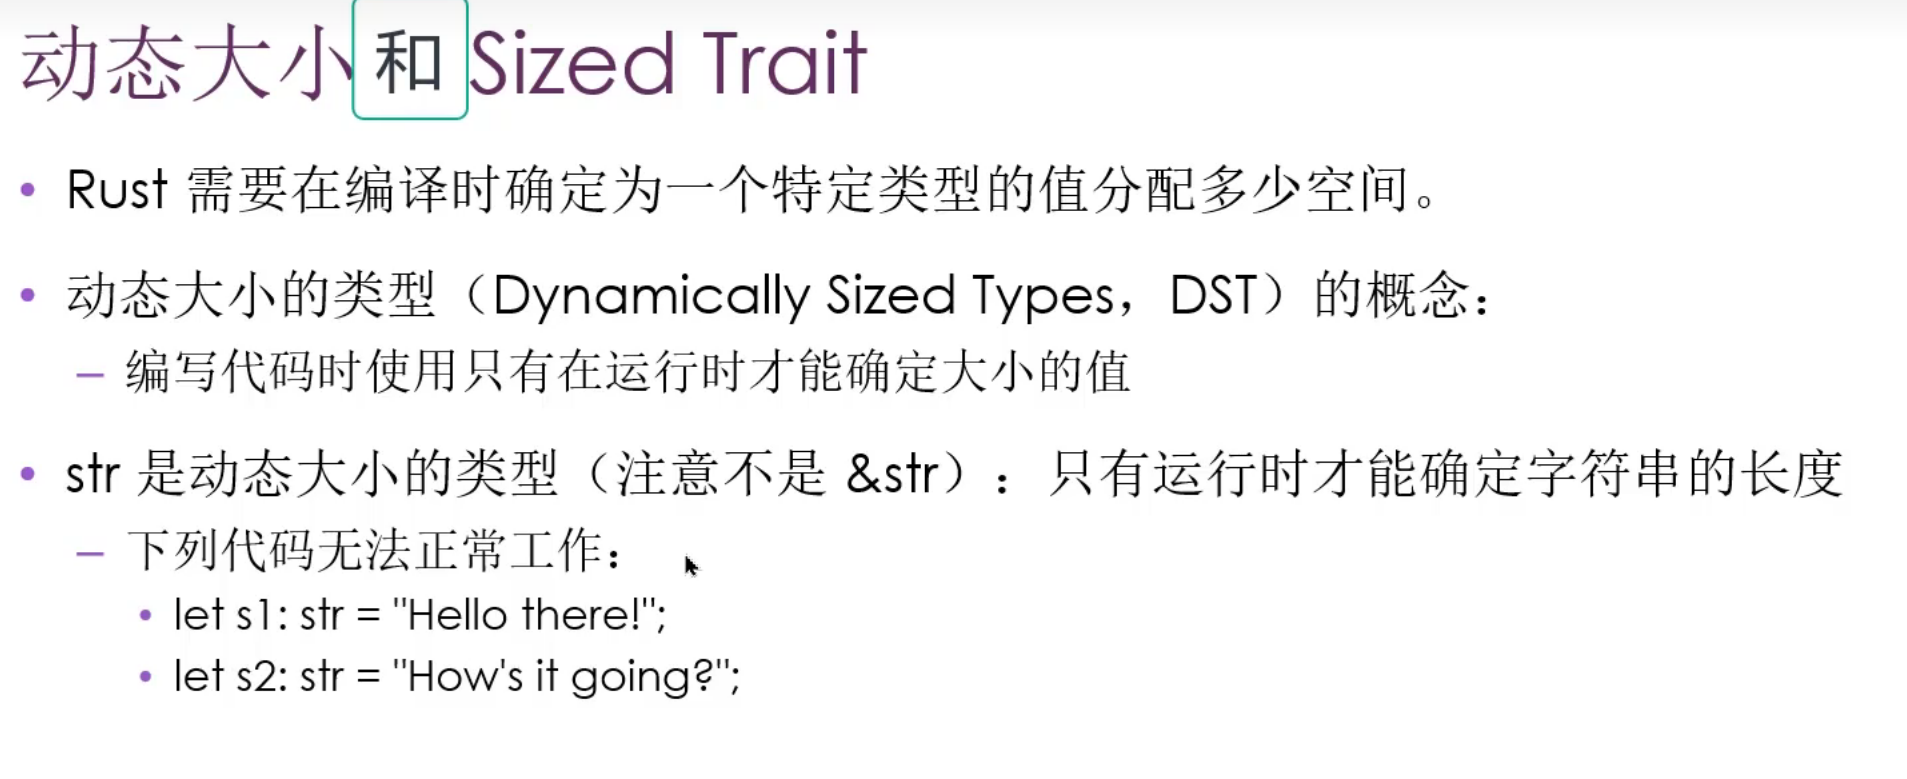
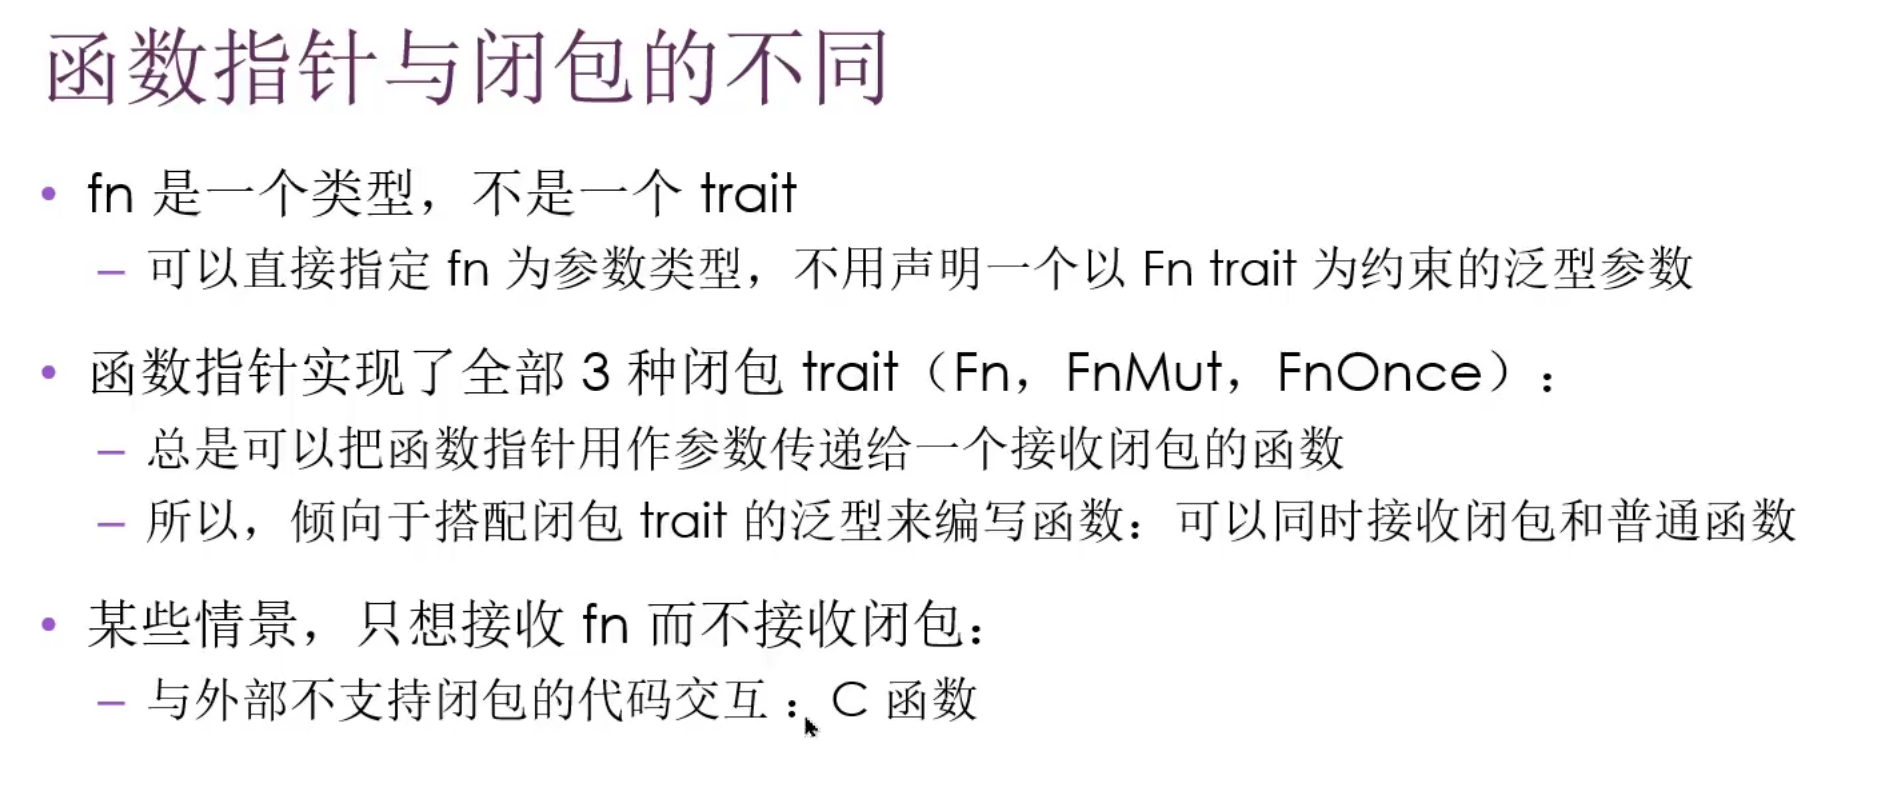
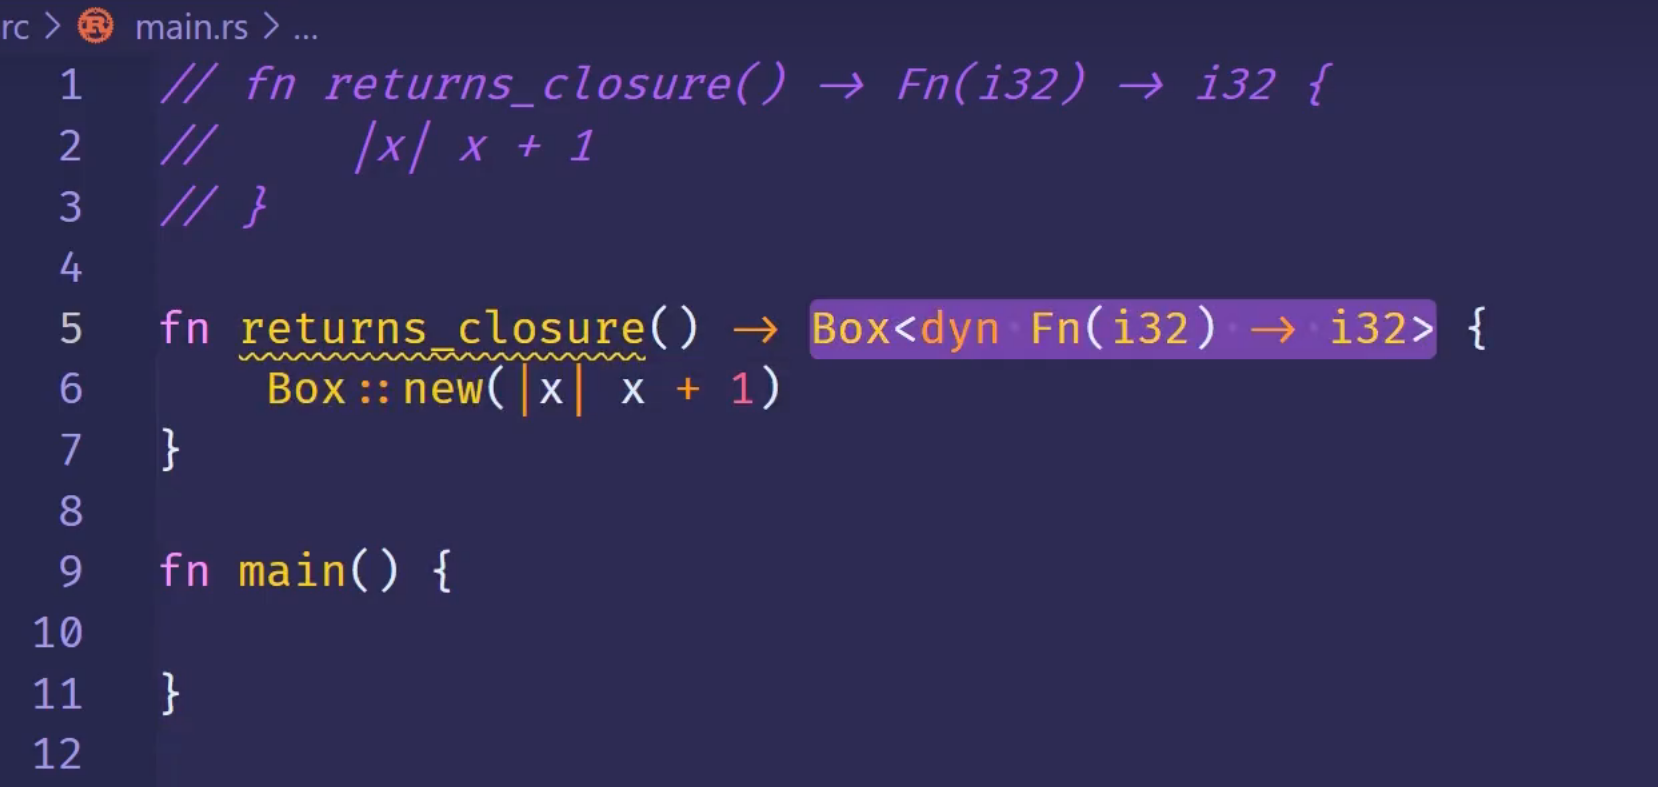
高级函数指针与闭包
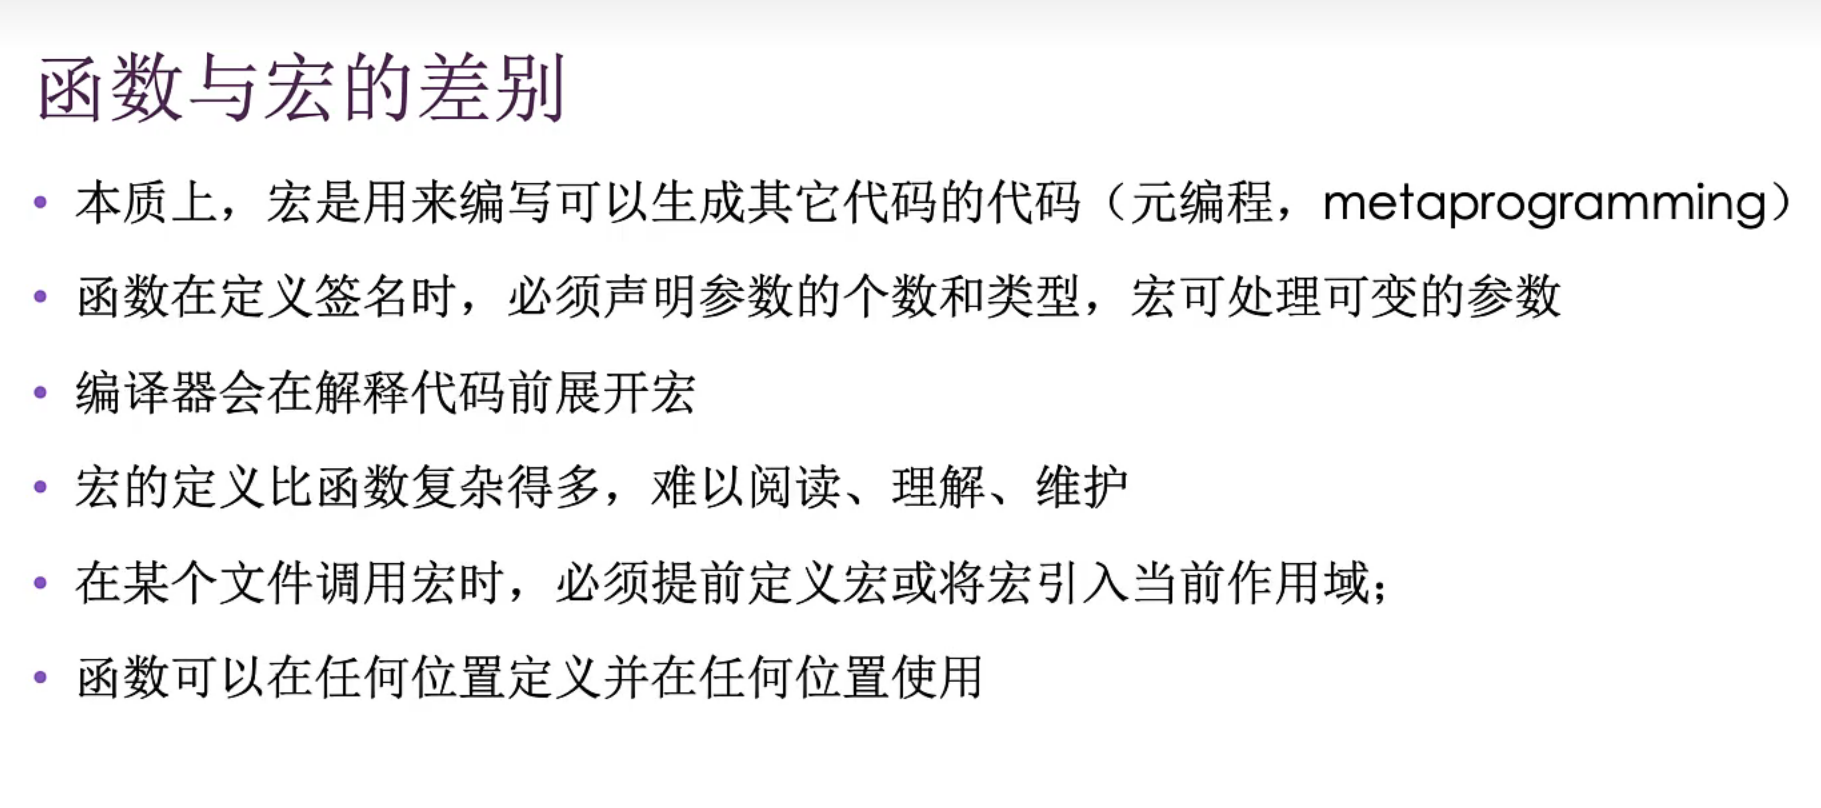
宏macro
过程宏
- 自定义derive宏
- 我已经不行了
- 这里真没学会
